Emergency ID

Throughout the year I do a lot of runs and bicycle rides solo as logistically that is often easiest. So far I have not had a major accident or injury, but recently a voice has been popping in my head asking “What if?” just like those old HP commercials from the early 1990s.
The voices don’t stop at those two words, however. The go on and on, including, “What if I got hit by a car and became unconscious? What if for some unimaginable reason, I crashed, was unable to talk, and had to be taken into the hospital? Would anyone be able to determine who I was and who to contact? How would they obtain my medical insurance information?”
Ah, the symptoms of growing older. I wouldn’t say I’ve been consumed with worry, but do have an increasing awareness that unforeseen things happen and if one is completely unprepared for them, bad goes to worse quickly.
In the past I’ve made half-hearted efforts to carry some sort of identification (if even just a business card) along with hastily scribbled notes regarding emergency contacts along with information about my health insurance plan. Yet, sometimes I forget to do this before bike rides, and many times for runs—especially in the summer when I am wearing much less clothing—I lack pockets to carry this stuff. A better solution was needed.
Perusing products available on the web, I came across Road ID‘s wristbands and necklaces in addition to Smart ID‘s shoe tags. They all serve the same purpose, but my main objection to them is cost. Road ID costs $20-25 per item, and while Smart ID is much more affordable, it is basically just a piece of paper you hand-write information on that snaps to your shoe. Pretty tacky if you ask me.
Compounding the cost issue is what if some of your information changes? Do you buy yet more ID products?
Furthermore, wristbands and necklaces are hardly fail-proof because they require one to remember to put them on. I suppose you could be really “safe” by wearing them at all times including while showering and walking around inside the house, but that seems a little inconvenient to me.
My solution, then, was pretty simple: create my own tags using a computer, and then attaching them to various objects such as the seat bag on my bicycle, cycling shoes, running shoes, etc. (I even taped one to the back of my drivers license.) This was the basic procedure:
- Create a 4″x6″ image file using your favorite image editor (I used the GIMP—open source’s equivalent of Photoshop—but even something more basic like Microsoft Photo Editor would have worked).
- In this file, type in the following in, say, 11-pt font:
Name Location (City, State, Country) An emergency contact number (I put down my neighbors) The URL of a web page where you have more emergency information - Copy and paste the above information as many times as will fit in the image. (I had room to paste the above info about 12 times to make 12 tags!)
- Print out the info on some hard-stock paper (e.g., photo paper). I lack a photo printer, so I transfered the file to a Flash card, brought it into Walgreens, and they printed my image as a 4″x6″ photo and charged me $0.32 (including tax) for it.
- “Laminate” the photo with packaging tape (optional).
- Cut up the photo into new tags, leaving enough room to punch a hole in each tag.
- Attach the tags to desired objects using safety pins. Voila, you’re done!
Well, almost. You still need to create a web page (that was referenced on the tags) containing whatever emergency info you want to include on it. On mine I added:
- Personal info (relationship status, addresses, “no known allergies,” “unknown blood type,” etc.)
- Local emergency contacts, including my neighbors and best friends out here.
- Other contact info, including my parents, siblings, and one of my closest friends who does not live in Colorado.
- An scanned copy of my medical insurance card.
- Whom to contact for life insurance info, etc.
- Other information pertaining to “in case of death,” including the fact that I’m registered to be an organ donor, final wishes, etc.
The info I chose to put on each emergency ID tag provides rescuers a quick means to determine my name and hometown, along with an instantly available phone number of someone to contact. The last line—the URL—provides more info if needed. Most likely, the rescuers won’t have computer and Internet access at the scene of the emergency, but they could always call someone who did, or they could wait to access the web page in, say, a hospital.
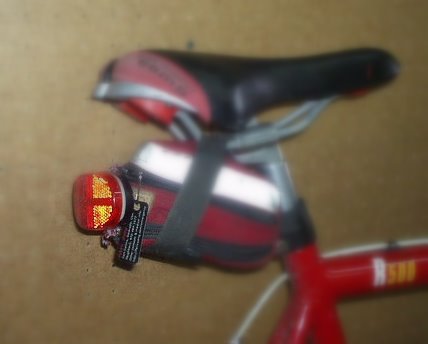
The final product is shown on my bike bag in the image at the top of the page. Despite costing about three cents to make ($0.32 divided by 12), I think it looks pretty darn good.
Of course, on your tags you can put down whatever information you want and make them look like however you desire. That is the beauty of designing your own ID tags! You can use your imagination but the main point of this page was to get people to think about carrying some sort of emergency ID, especially while training.
One comment:
Cool idea! I think I'll try it.