Tent Pole Shockcord Repair

The last time I went camping, I noticed my now-classic Sierra Designs Clip Flashlight CD—which is otherwise in great shape after all these years—had shockcording about as limp as a wet noodle. I suppose, though, that is not to be expected when I had first used the tent while Bill Clinton was still President of the United States. Shockcords elongate and lose their elasticity over time, and when that happens for a tent, it can be more difficult to assemble the tent poles as the flaccid lengths get in the way of inserting pole segments together.
So I just spent a good amount of time researching shockcording repair kits on Amazon (~$10 with shipping), and how-to-repair videos on YouTube. All that turned out to be entirely unnecessary. When I inspected my poles, I realized there was a much easier fix than replacing the shockcord altogether.
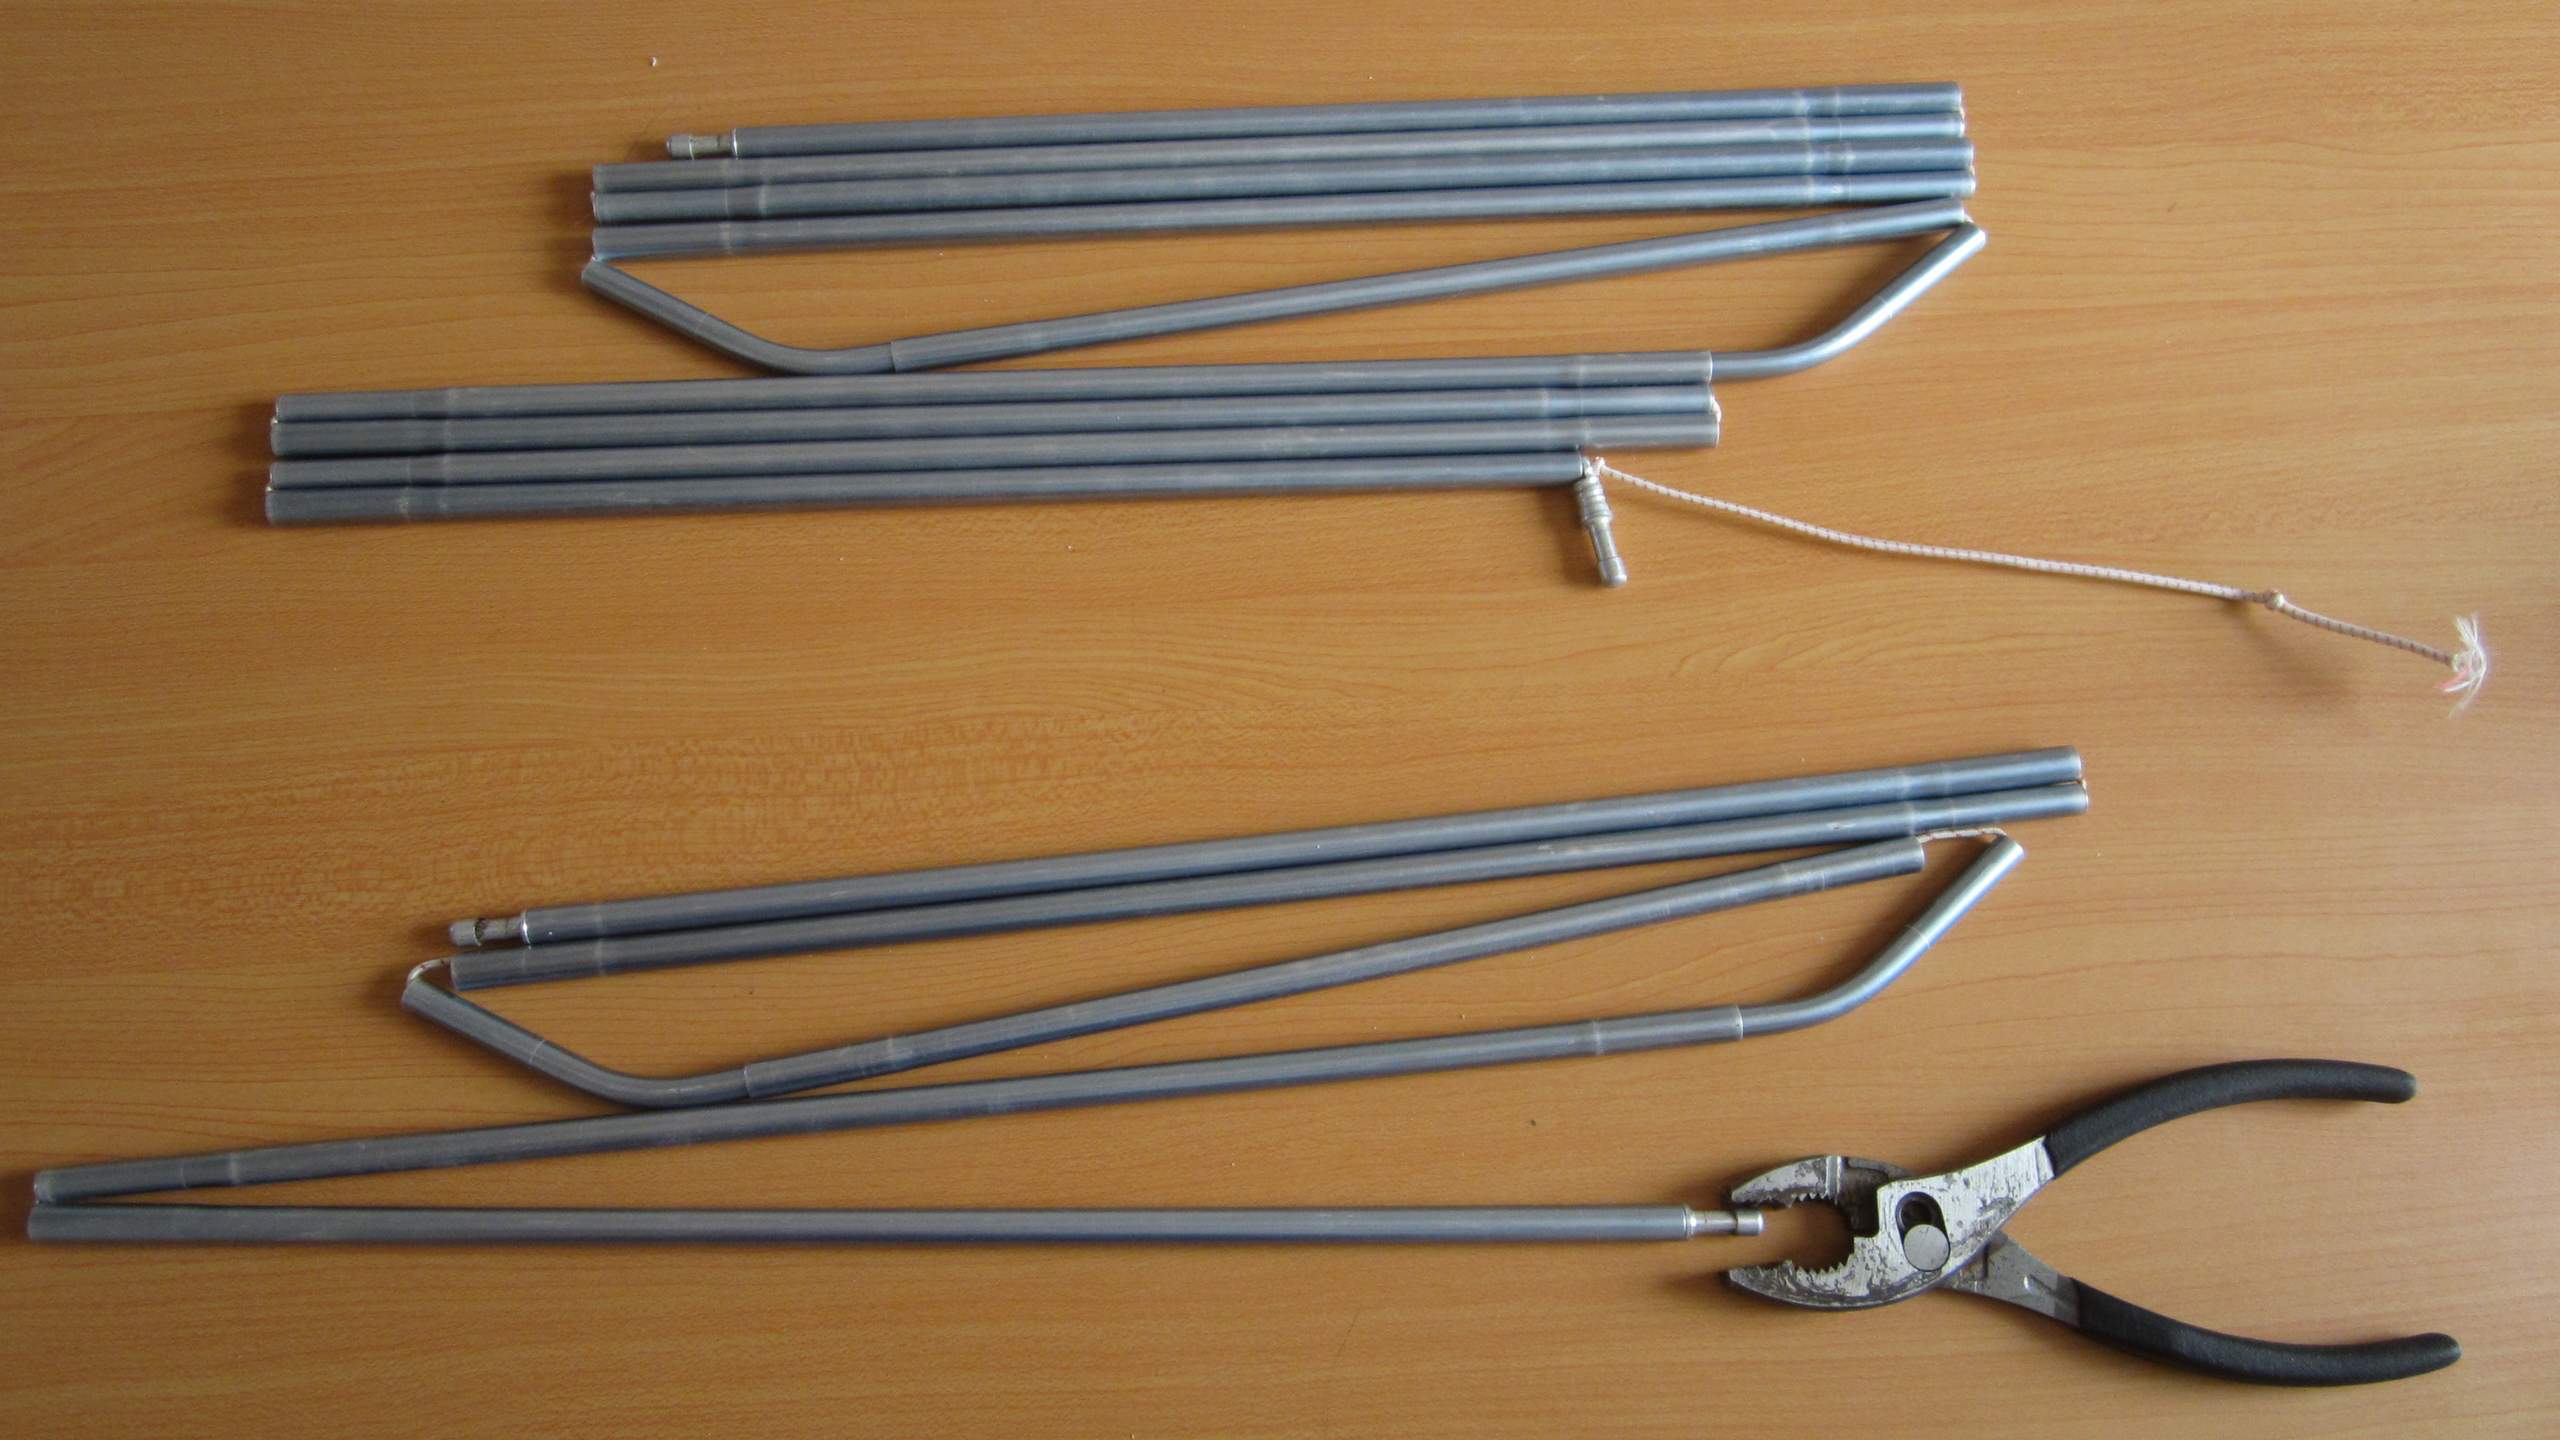
For my tent, I simply pulled the end rivets out of the pole ends with pliers as shown in the image above. That turned out to be connected to the end of the shock cording. I then assembled the pole segments together (all pieces except for the rivet I just pulled out), pulled the shockcord taut, tied a new overhand knot about 6″ from the original knot in the end of the shockcord (upper half of the image above), cut the extra shock cording about an inch from the new knot, and reinserted the rivet.
Basically all I did was make the shockcord shorter!
Easy peasy. It was simpler than holding a piece of cake in one hand while jumping up and down. My tent is probably good for another 13 years.
There are 7 comments.
How did you pull out the end rivets? I have the same tent and I could not get the river out. I used two pliers and pulled as hard as I could.
I was able to pull the ends straight out, but you may find it easier to twist them out.
Just did mine. They twisted out. Thanks for the quick and easy tip!!
Glad it worked for you, Brent!
Felix - thanks for the tip, you saved me a trip to REI!
That's so funny. I just went camping to days ago with my tent (same model) which had been stored in its bag for at least 10 years. I did not check the tent before leaving for my trip, and when I noticed the problem with the cord, I was worried because it was getting cold and dark, and I really needed the tent. I fixed it the same way you described. I was just starting to do my research for a replacement cord, but after reading your article, I think I'll just leave it as it is. Thanks!
Haha, we had the same idea! I seem to need to shorten the cords every few years since they stretch or lose elasticity over time. But otherwise, they are still working!