DIY Fix: Chipped Paint on Apple Magic Keyboard Keys

I’ve been using the white Apple Magic Keyboard with my M1 iPad Pro 12.9 for over three years now. While it has held up pretty well—certainly far better than the keyboards I had for the Microsoft Surface—it hasn’t been entirely flawless.
The silicone plastic is quite durable and doesn’t fray like the Microsoft keyboards did, but over time, it does accumulate stains that Apple’s officially recommended cleaning solutions—70% isopropyl alcohol or Clorox Disinfecting Wipes—won’t remove. Thankfully, a Magic Eraser or toothpaste does the trick.
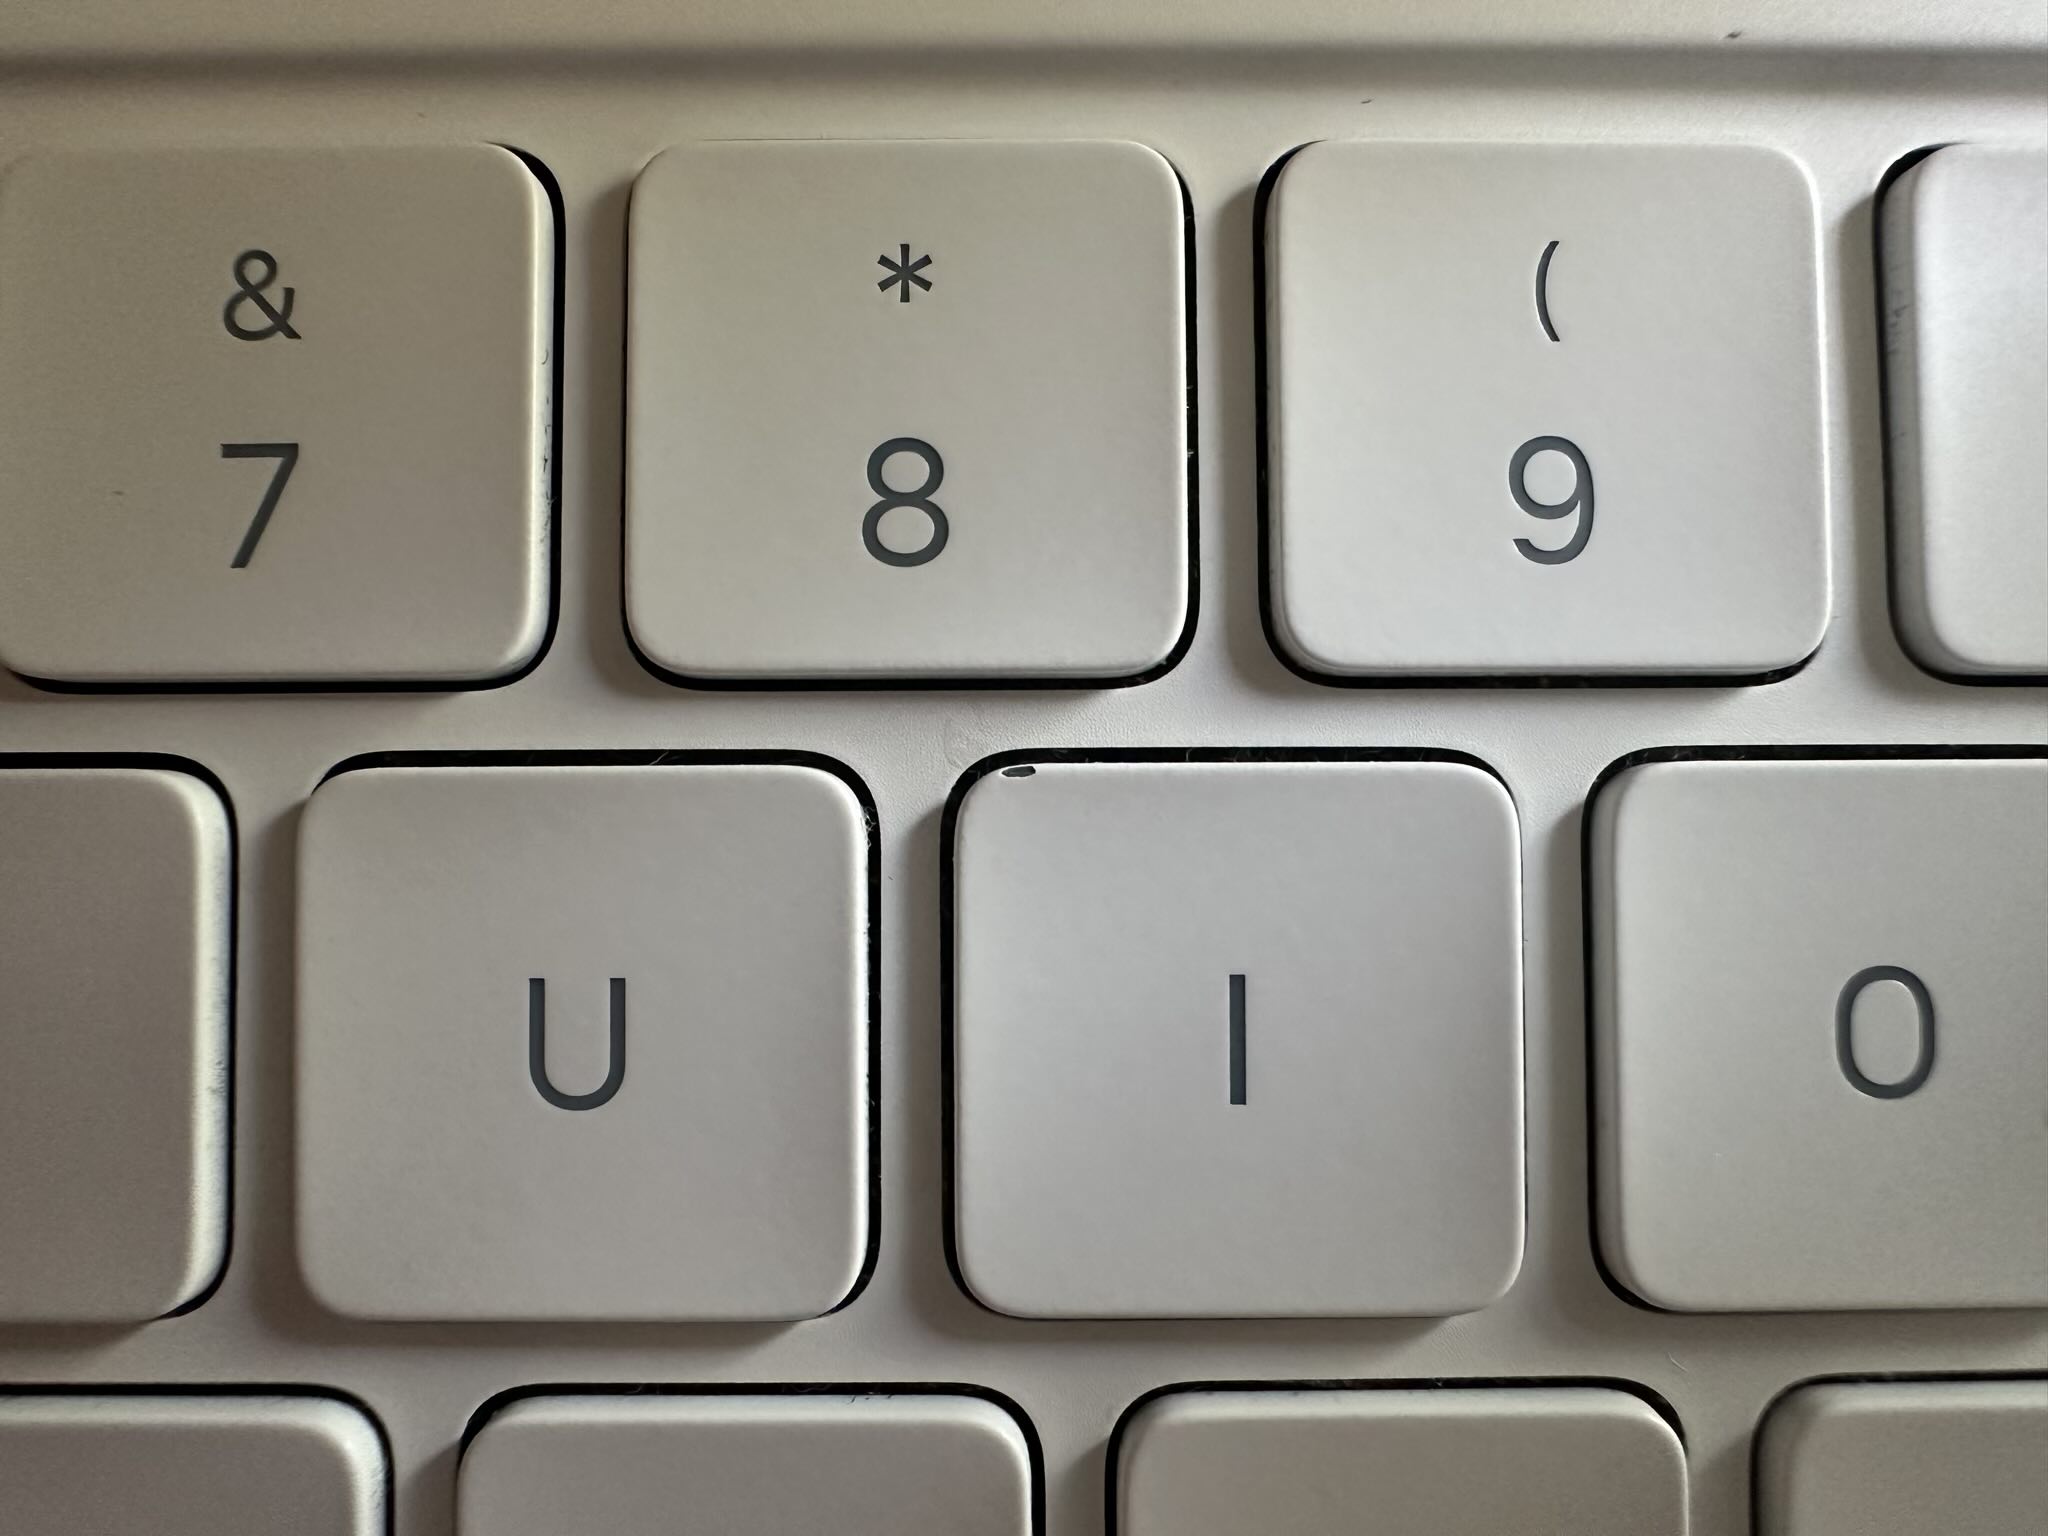
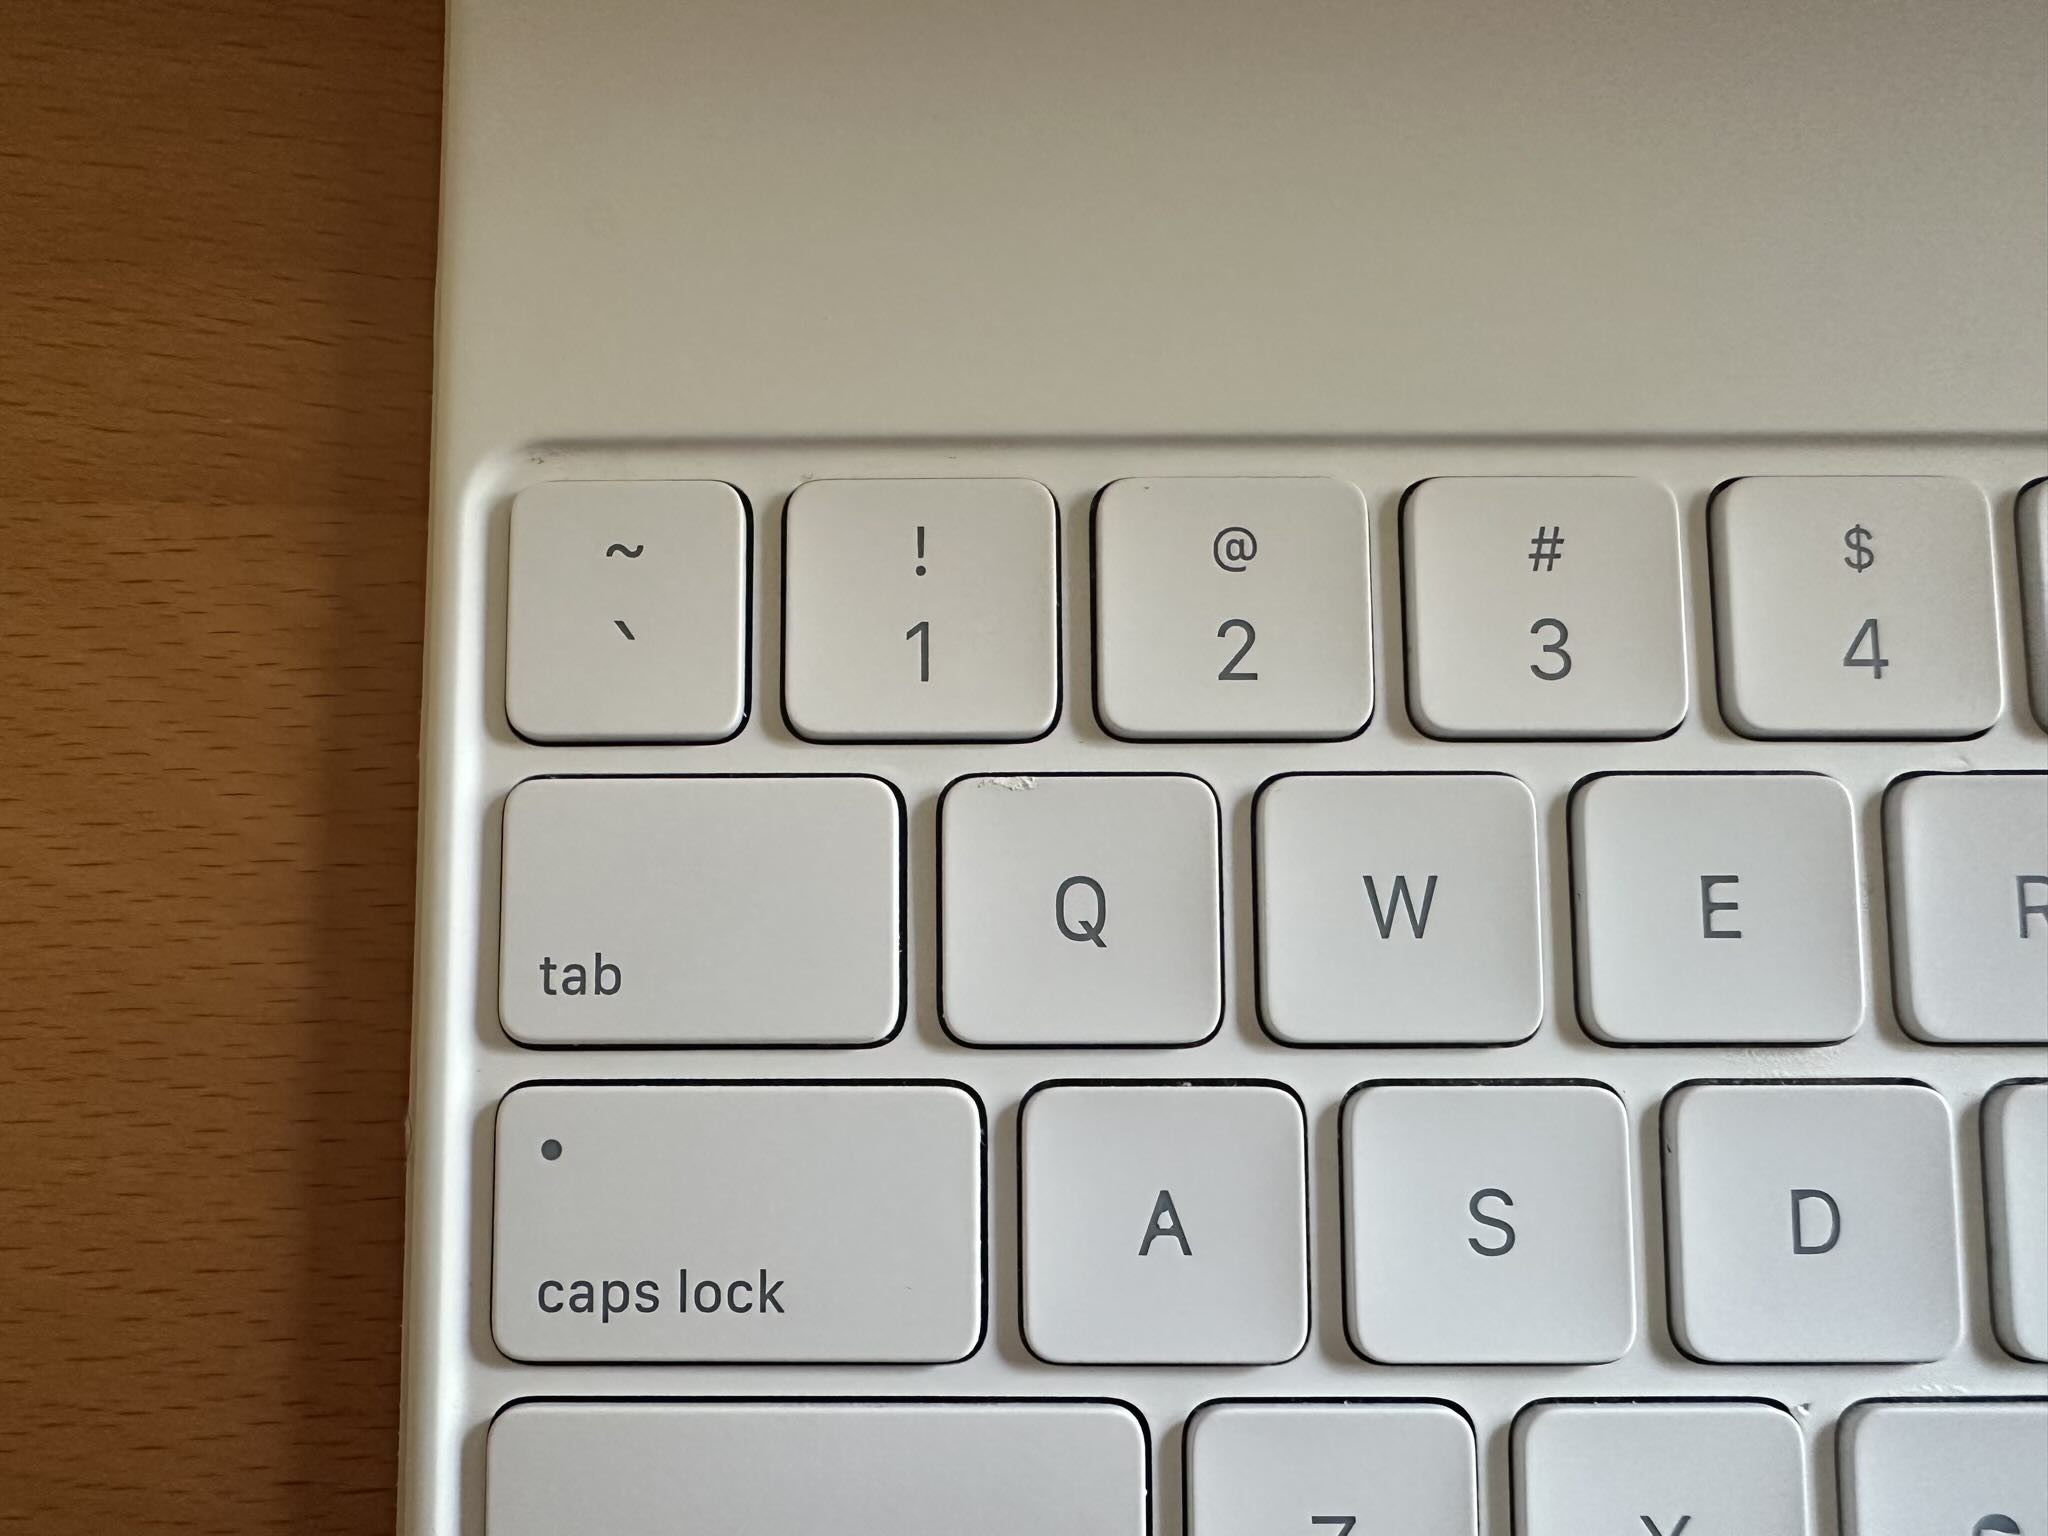
However, another issue I’ve encountered is chipping paint on the key corners. While it may not be a widespread problem, it’s happened to two of my keys—’Q’ and ‘I’—despite not having long fingernails or being particularly abusive with the keyboard.
Initially, I looked into replacing the damaged keycaps, but that seemed neither easy nor practical. Finding individual replacement keycaps is tricky, and installing them isn’t straightforward.
Fortunately, I came up with a simpler and more cost-effective solution: touching up the keys with paint!
Materials & Application
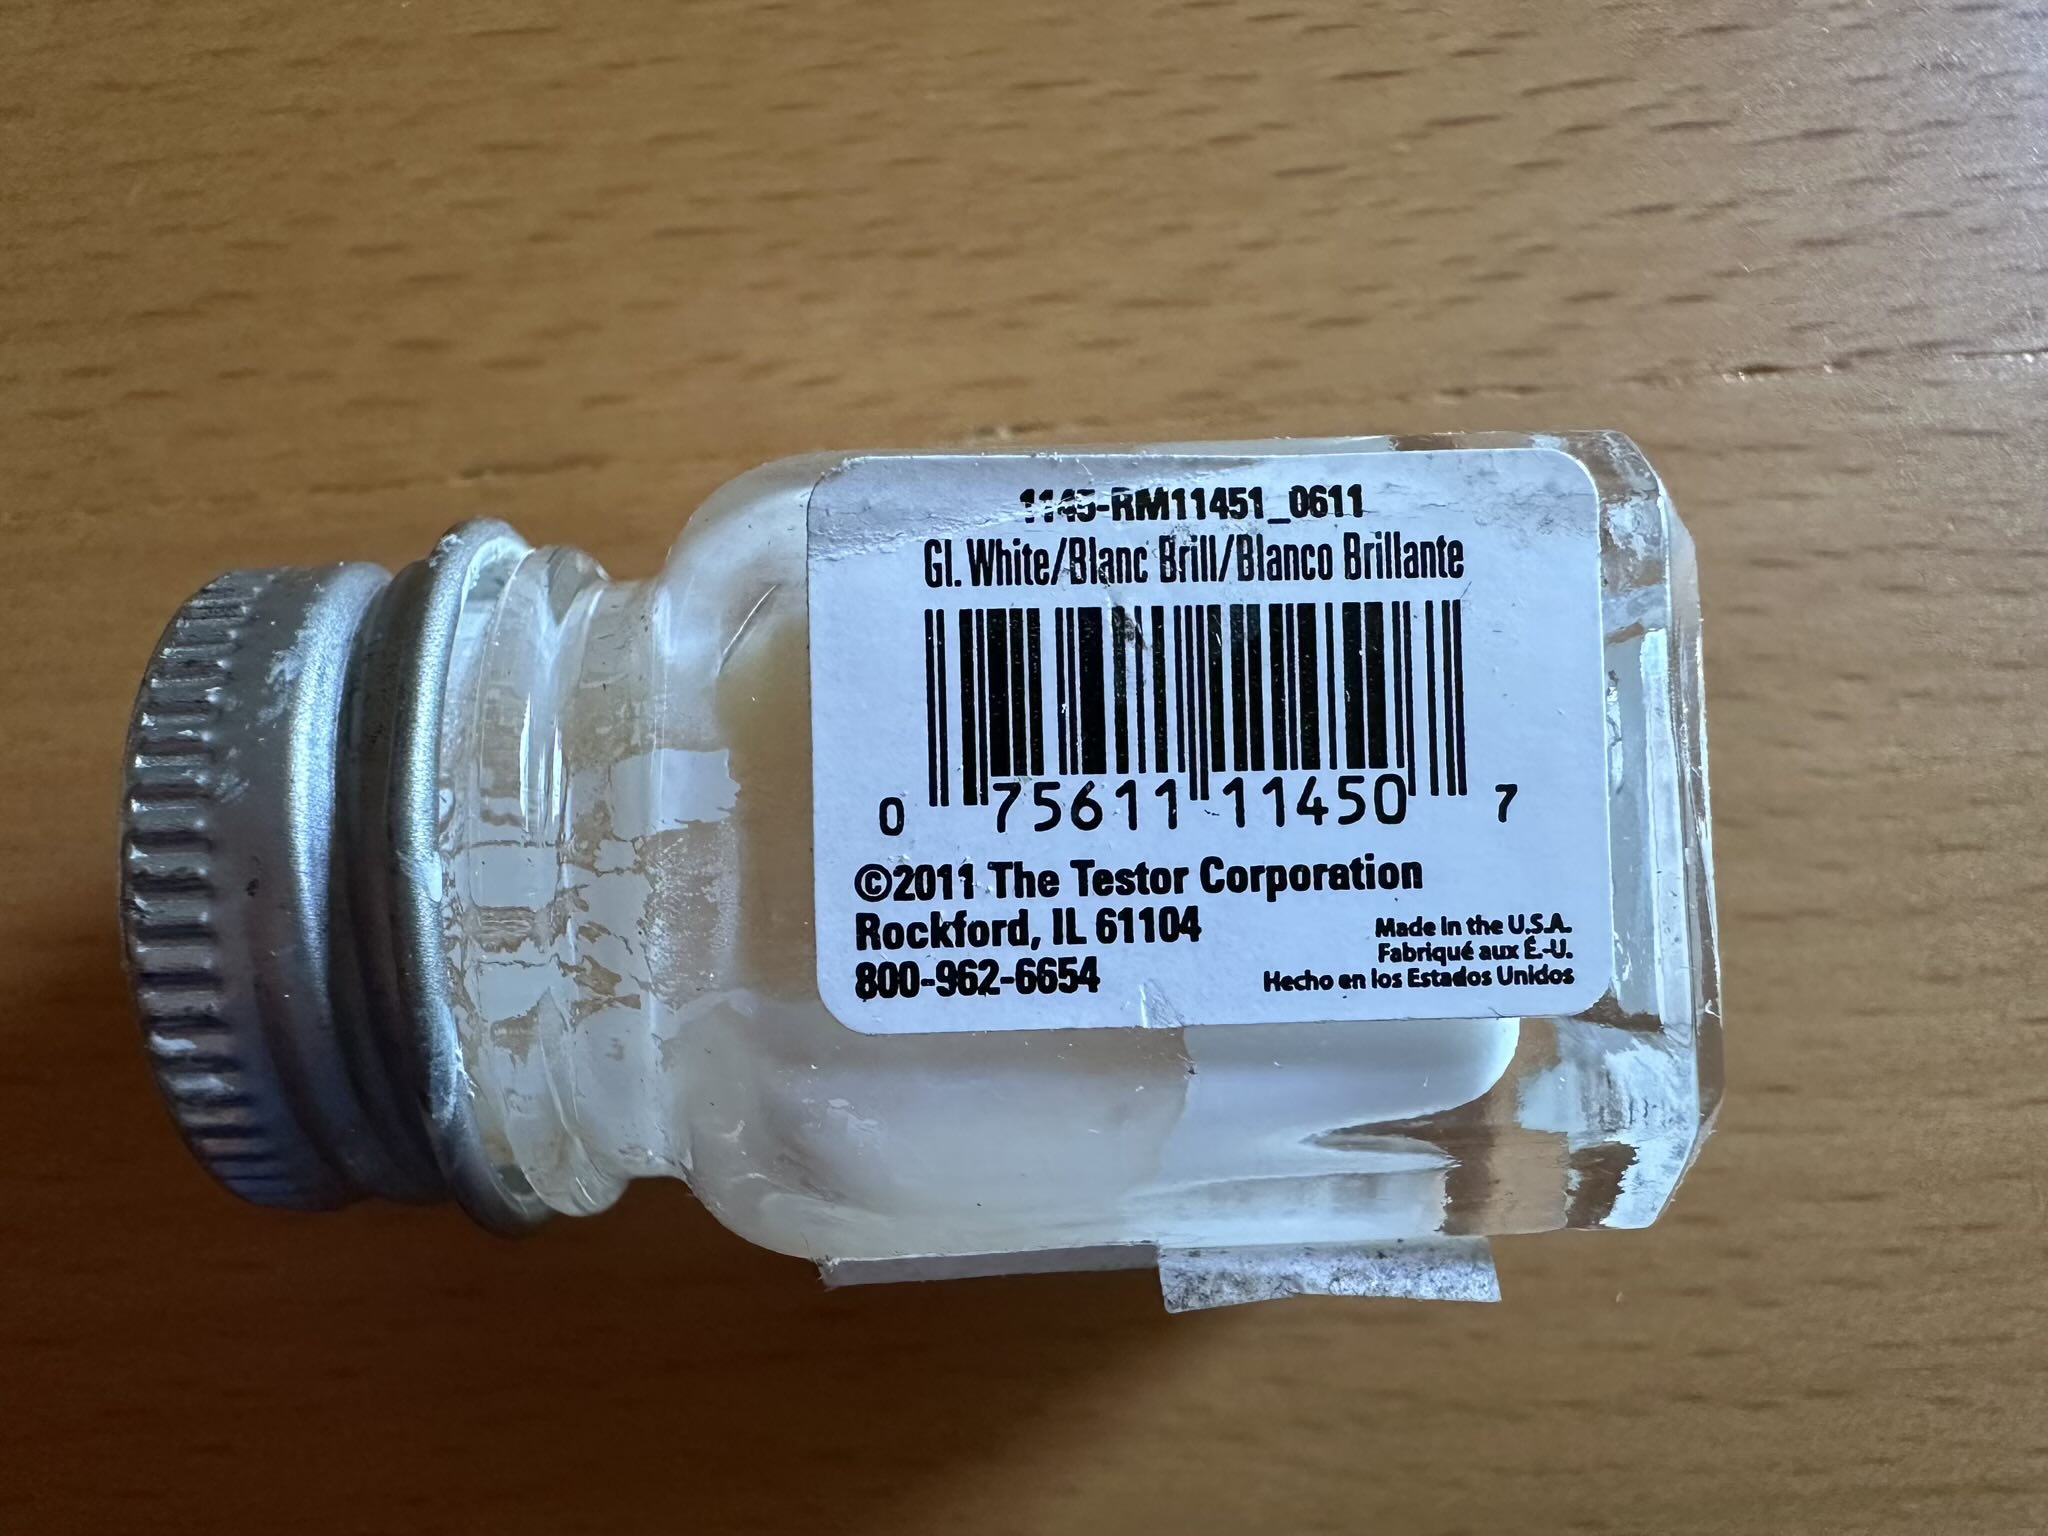
I already had Testors Gloss White model paint (Testors Gl. White #1145-RM11451_0611) in my garage, which I bought at Hobby Lobby for $1.59 + tax over a decade ago. Happily, it was a virtually perfect color match for the Apple Magic Keyboard.
Applying it was simple:
- Using a wooden toothpick, I carefully dabbed the paint onto the chipped areas.
- If you don’t have a toothpick, a safety pin would probably work almost as well.
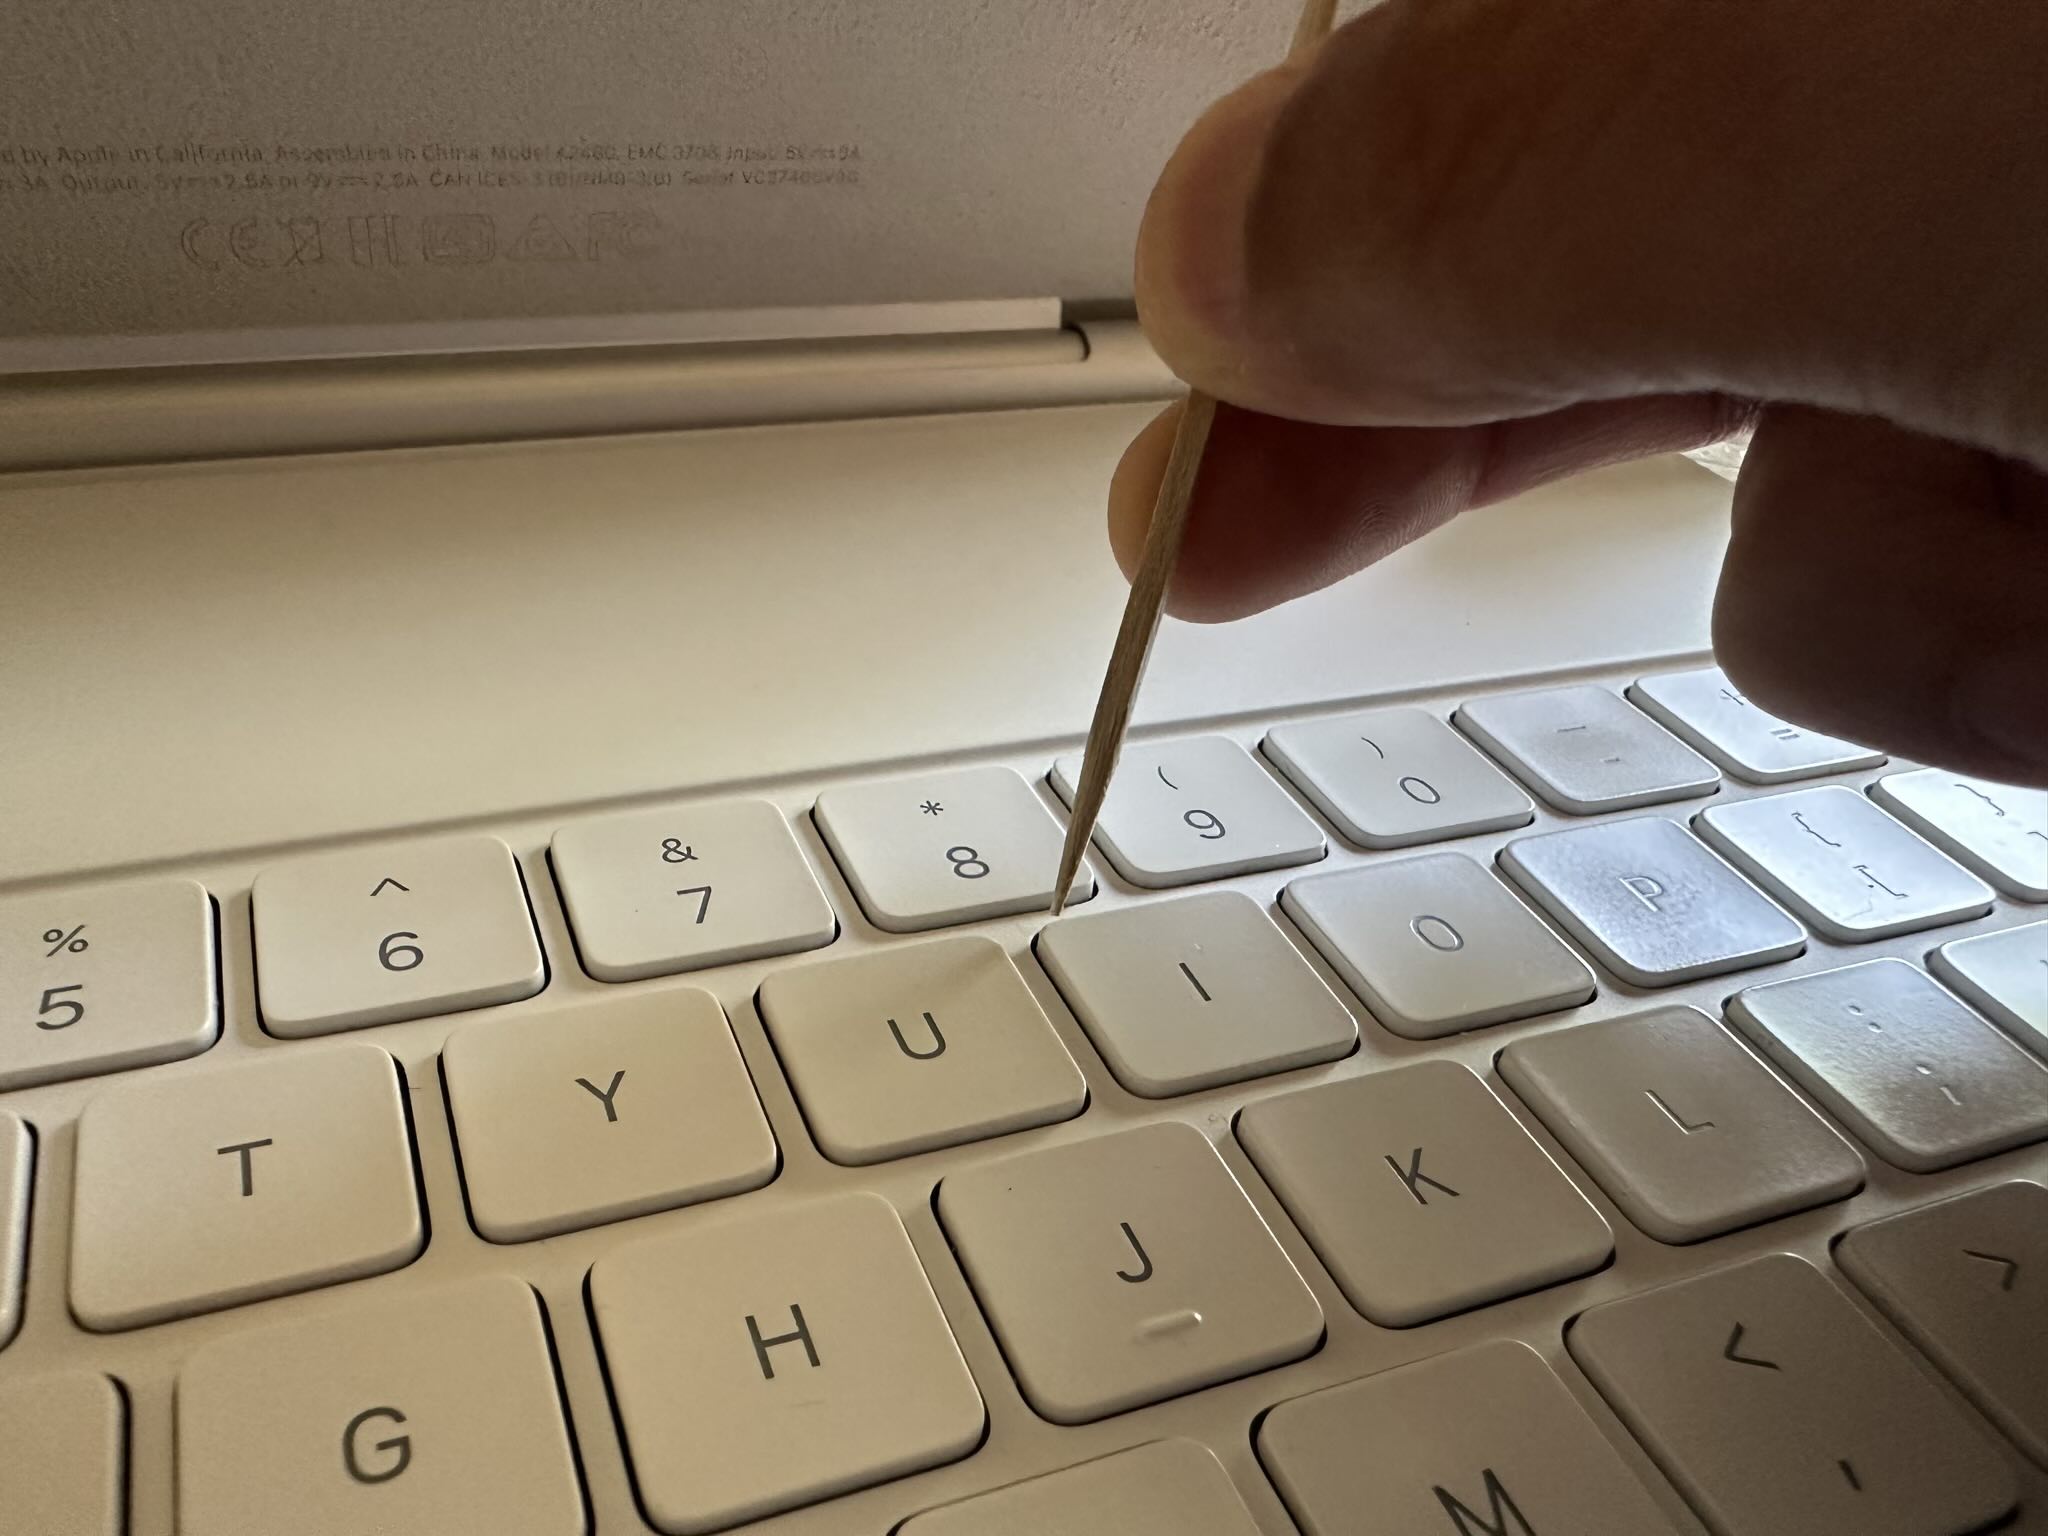
Total time: About 10 seconds per key. The paint also dried quickly and I was already using the keyboard 10 minutes after the repair.
Durability of the Fix
A month after touching up the ‘Q’ key—where roughly three millimeters of paint had chipped off—the repair has held up well.
I don’t have a “before” photo, but here’s how that key looks now. None of the Testors paint has flaked off. The macro photo makes the flaws look exaggerated, but in real life, the key looks far better than the image suggests. The iPhone’s camera simply captures details my eyes don’t notice.
As someone who tends to be meticulous, I’m pleasantly surprised by how well this simple fix has worked—even if it’s not 100% perfect.

Broader Applications
Interestingly, while my online search didn’t uncover other Apple Magic Keyboard users dealing with chipped key paint, MacBook owners have reported similar cosmetic issues.
I believe that his touch-up method could easily restore those keyboards to about 95% of their original look—provided you use the right shade of black paint.
This technique isn’t limited to keyboards. I’ve also used the same paint to touch up the MagSafe ring stand for my iPhone 14 Pro.

Last year, while prepping and beautifying my Cannondale F700 for the world premiere of Ride the Divide Returns—a movie in which the bike made some cameos—I used a similar method to touch up paint chips on the aluminum frame. The only difference was that for the spots where there was bare metal, I dabbed them with grey automotive primer first.
Then I mixed yellow Testors paint with a bit of white Testors paint—the same paint I alluded to above—to closely match the Cannondale’s shade. Can you make out all the spots I touched up on the top tube alone in the photo below? (There were at least a dozen.)
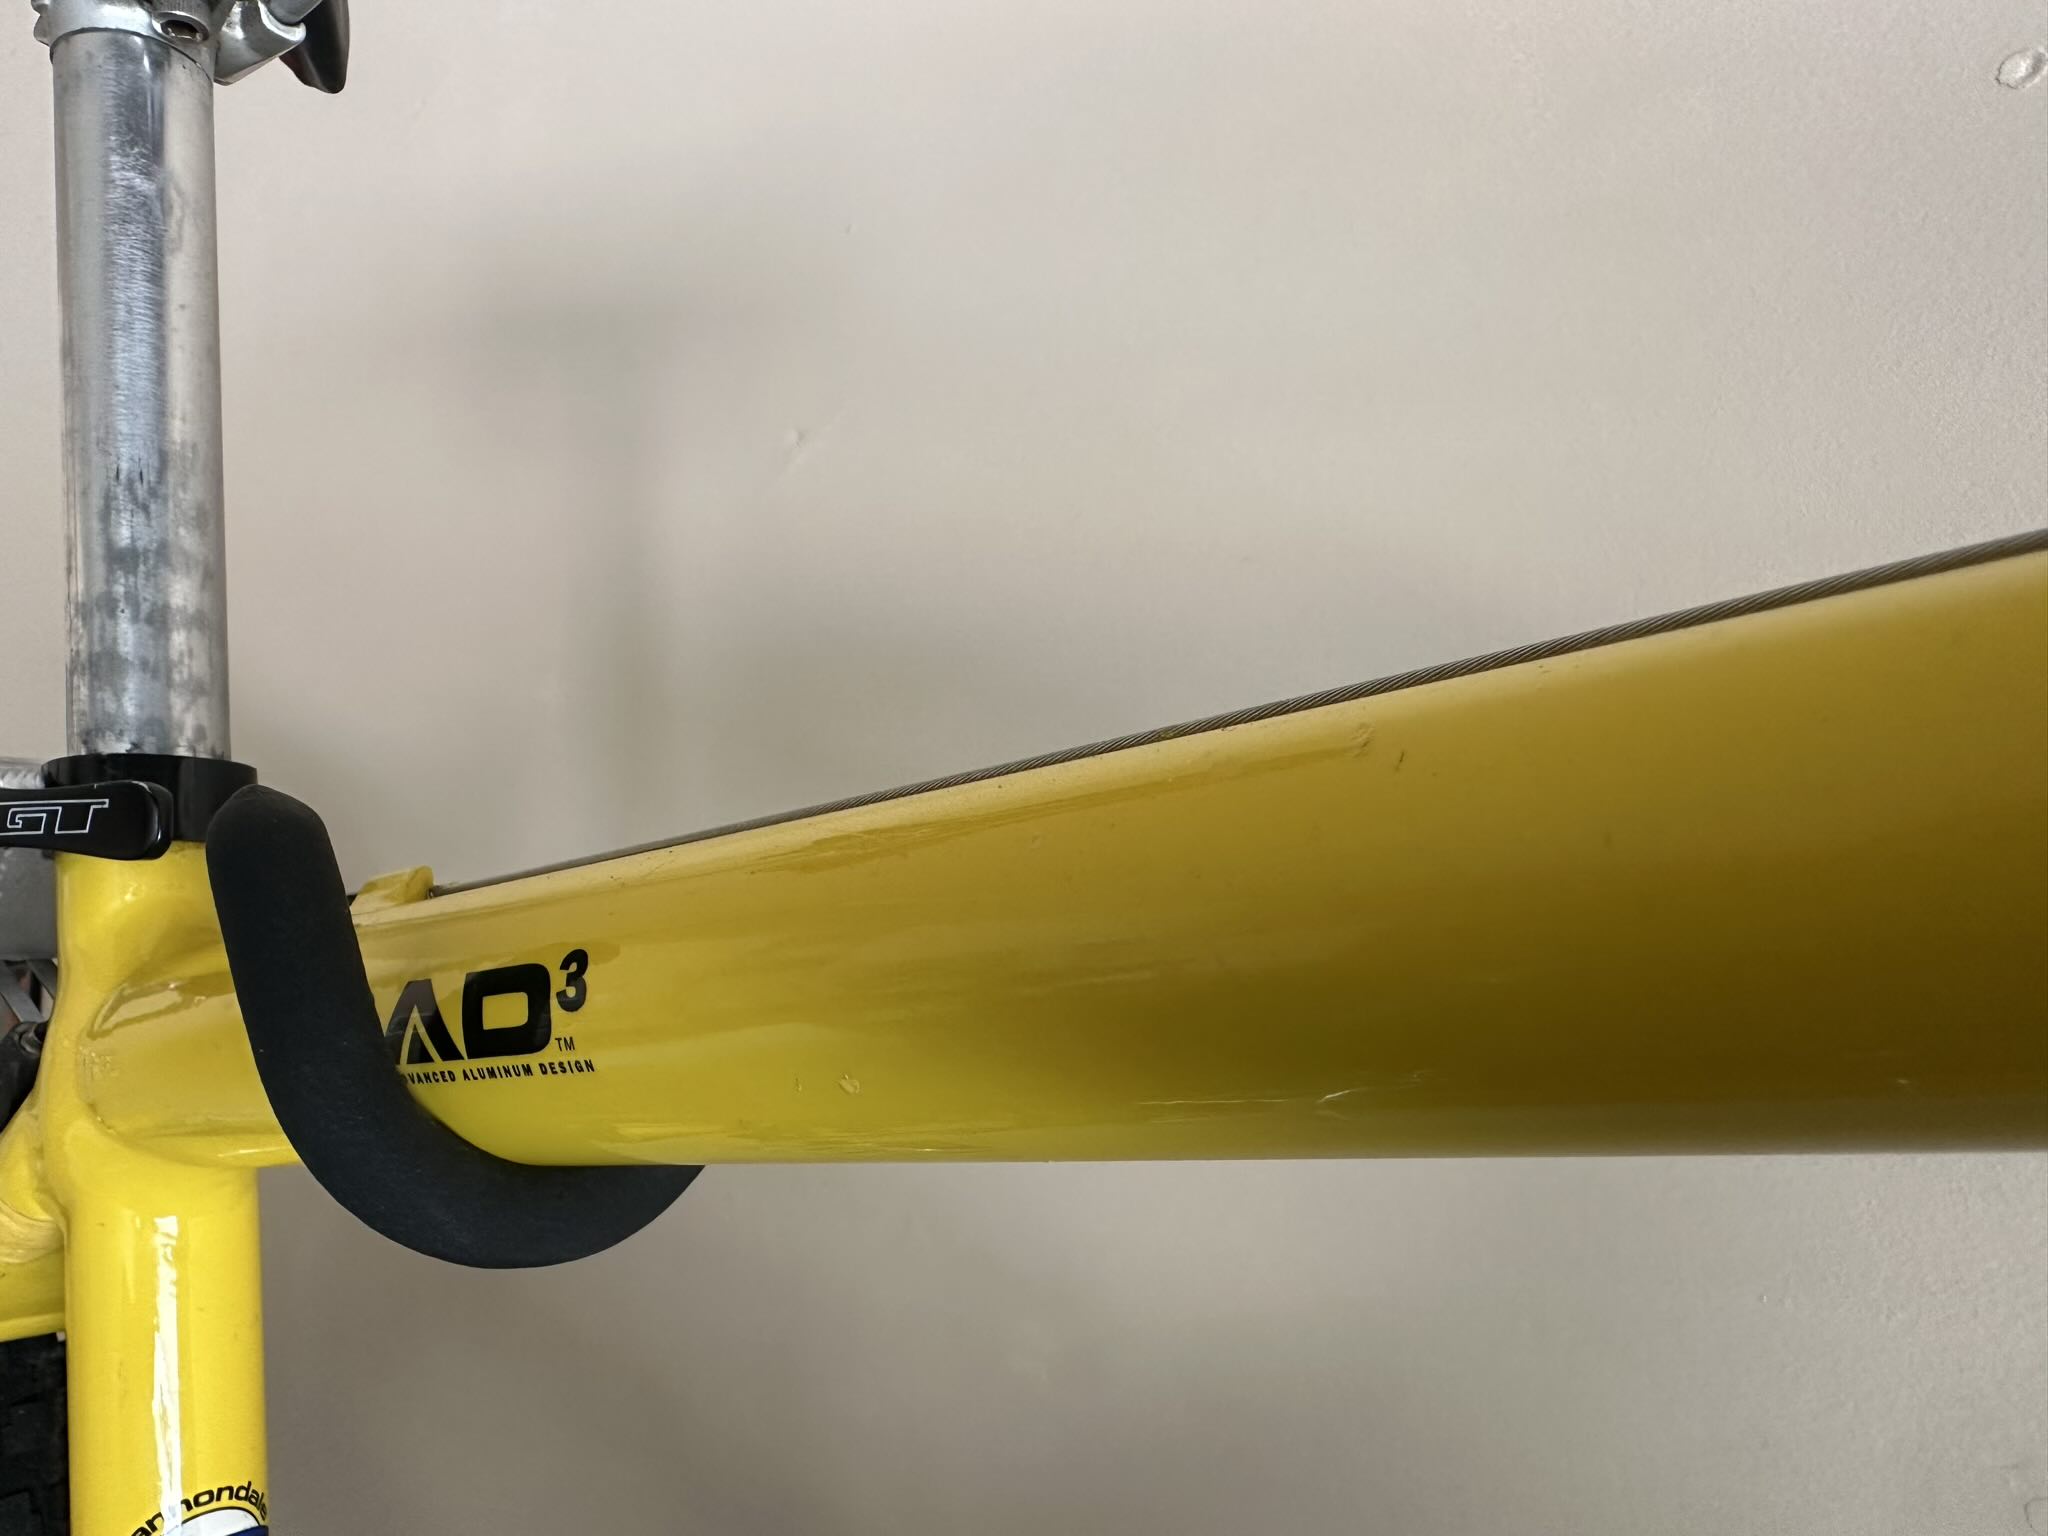
The final result made the frame look like new—at least from three or more feet away!

There are 2 comments.
How about the “greasy” spacebar problem with Apple’s use of ABS plastic in their keys? After just a little bit of typing, I always develop a shiny spot on the right side of the spacebar where I hit with my right thumb. Other keys that I hit have this problem too. And unfortunately, there is no way to restore them short of replacing the existing key caps (it’s not really a grease stain, it’s the wearing of the ABS plastic).
That's interesting about the "greasy" spacebar problem! Is that happening on your MacBook’s or iPad's keyboard?
It's not happening on my iPad's white Magic Keyboard, but I had an Apple keyboard in the mid-2000s that had that issue.
My first thought was that if it were really grease, then you could try cleaning the keys with a degreaser like Simple Green. Or, failing that entirely, try to make the whole space bar uniformly "greasy" by either rubbing it with olive oil (to add grease), or with a Magic Eraser (to remove grease but also to finely smooth the ABS plastic).
Another idea is to apply keyboard stickers. All sorts of colors are available to make a keyboard look snazzy or unique.
My final idea is to use a silicone keyboard cover. I used one of these with my former HP Spectre x360 convertible. Not only did it protect the keys, but it kept food and dust particles from entering the crevices of the keyboard. Its main "downside" was that if the keyboard was upside down---like when I would flip the keyboard all the way back to use the computer as a tablet---it would fall off.
Whether one of these solutions works for you or you come up with another one, I hope you post it on your blog!