How I Reattached the Rear Glass on My Audi TT Roadster’s Convertible Top

Eighteen years after my Audi TT Roadster Quattro rolled off the assembly line, the rear glass of its convertible top decided it was time to part ways with the fabric. Completely separated, it was a daunting task to reattach it but with some research, patience, and the right tools, I managed to get it done.
Here’s a guide on how I reattached the rear glass of my convertible top myself.
Materials and Tools Needed
- Sealey 6-piece Suction Clamp Set RE006
- 3M Windo-Weld 08609 Note: Amazon shipped mine without a nozzle, so I refunded it and bought it at AutoZone instead.
- 3M Single Step Primer 08682
- Caulk gun. I already had one from Home Depot.
- Scotch General Purpose Masking Tape
- Hyde Tools Heavy-Duty Glass Scraper 13050
- Powder-free nitrile gloves
- Small paint brush, about a half-inch wide.
Procedure
Step 1: Preparation
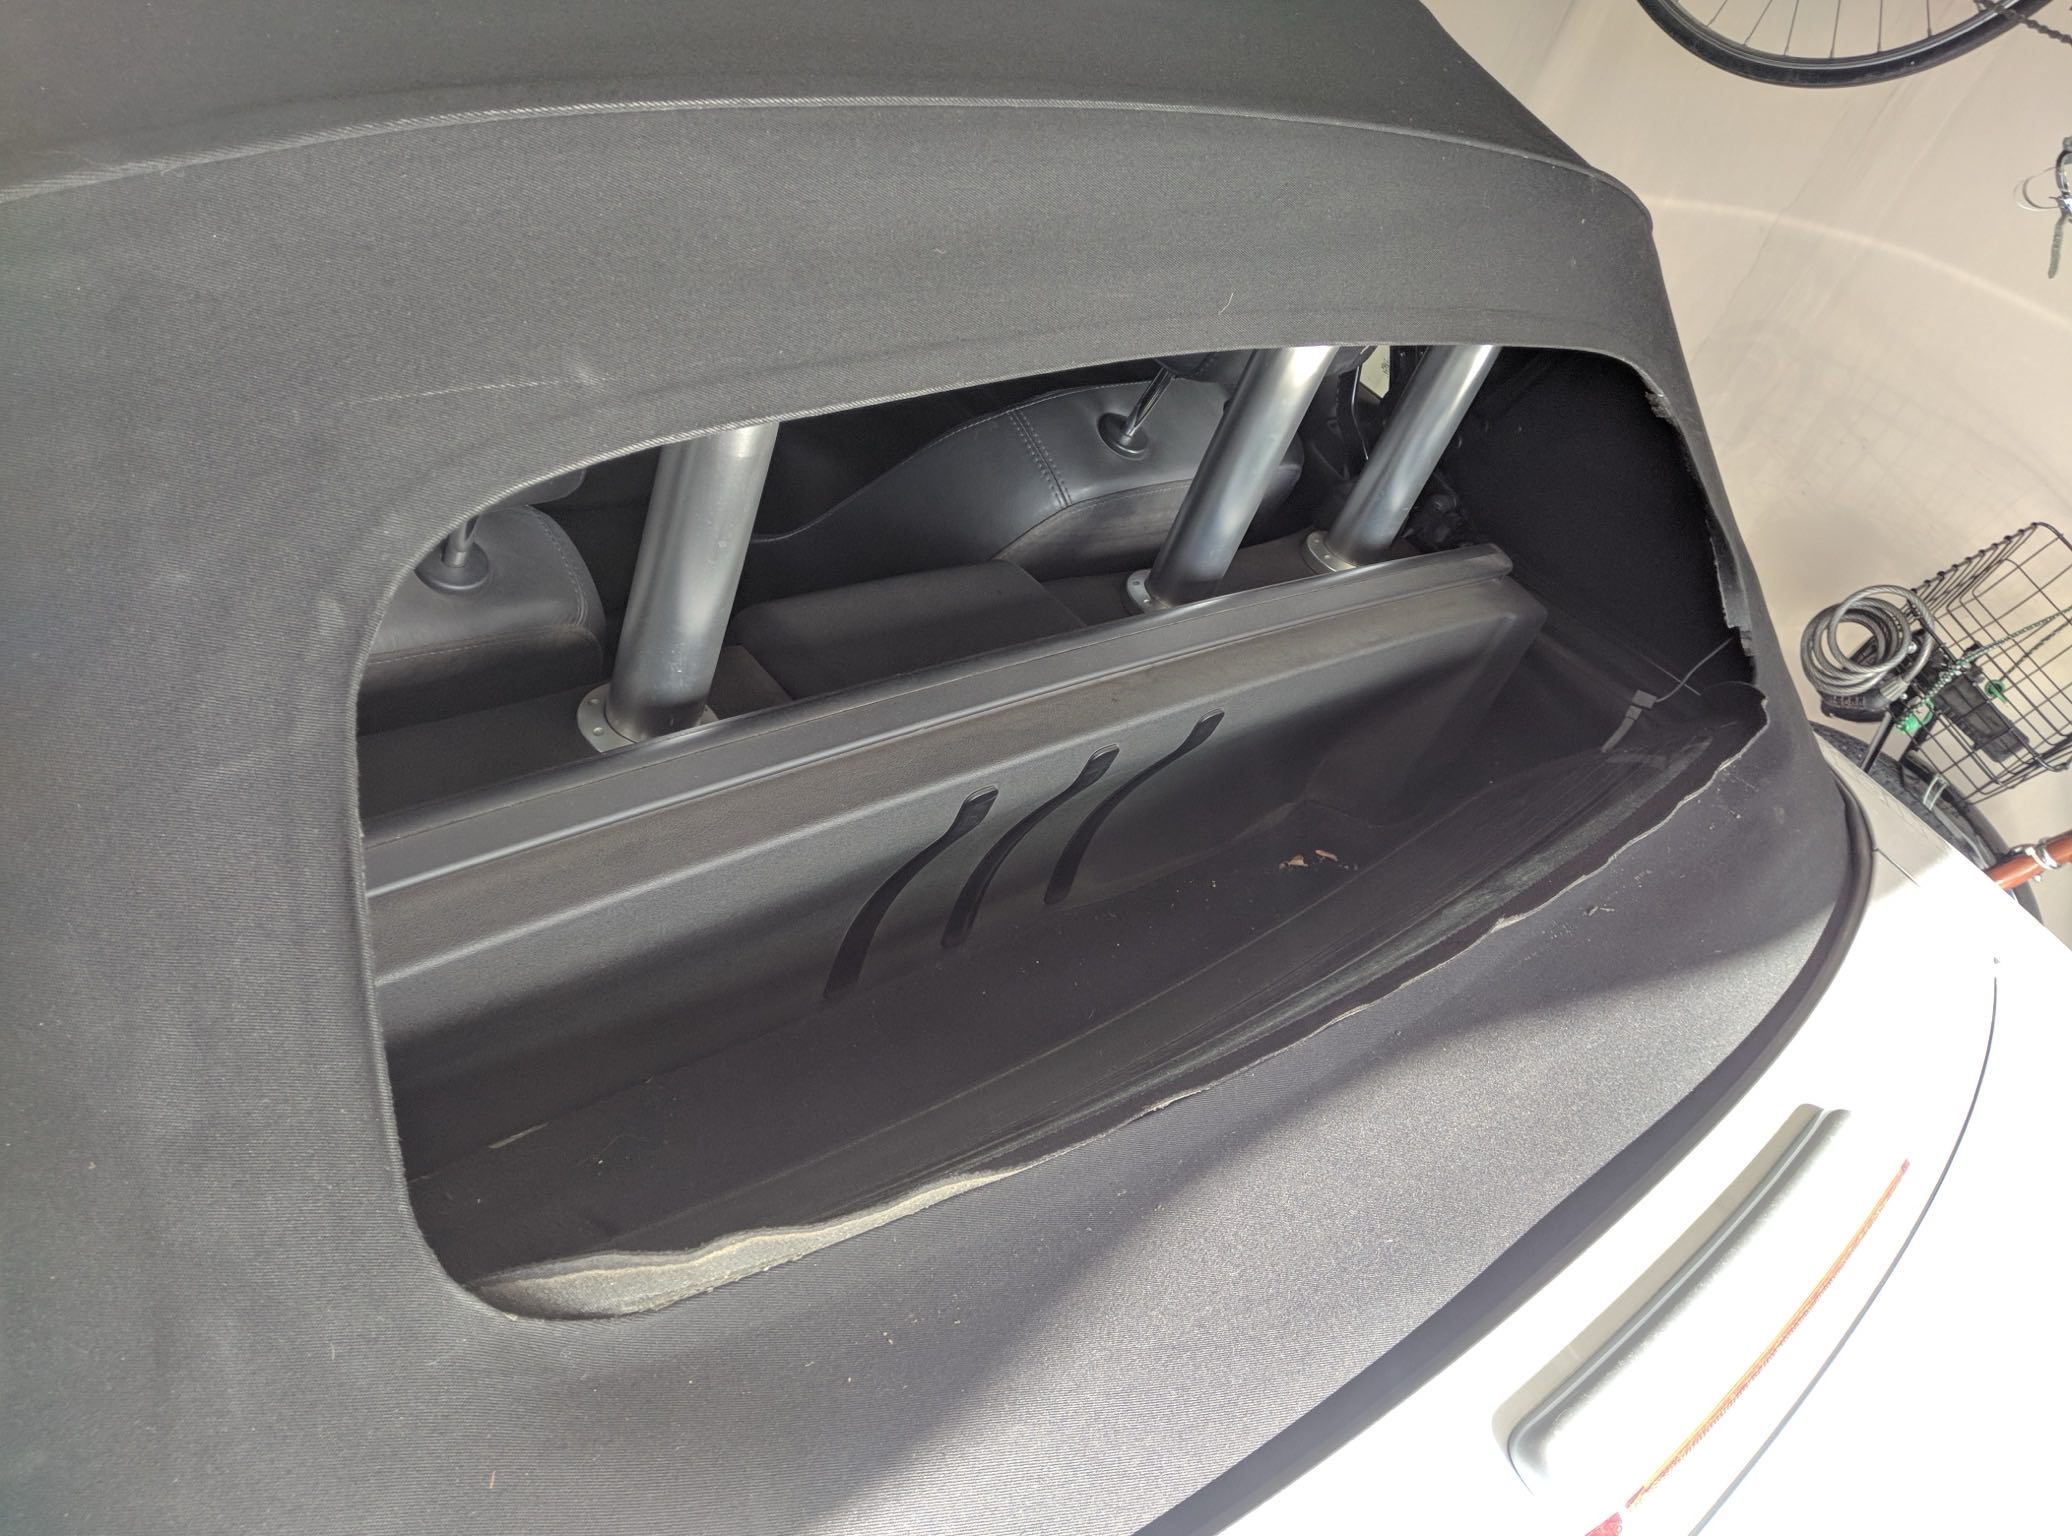
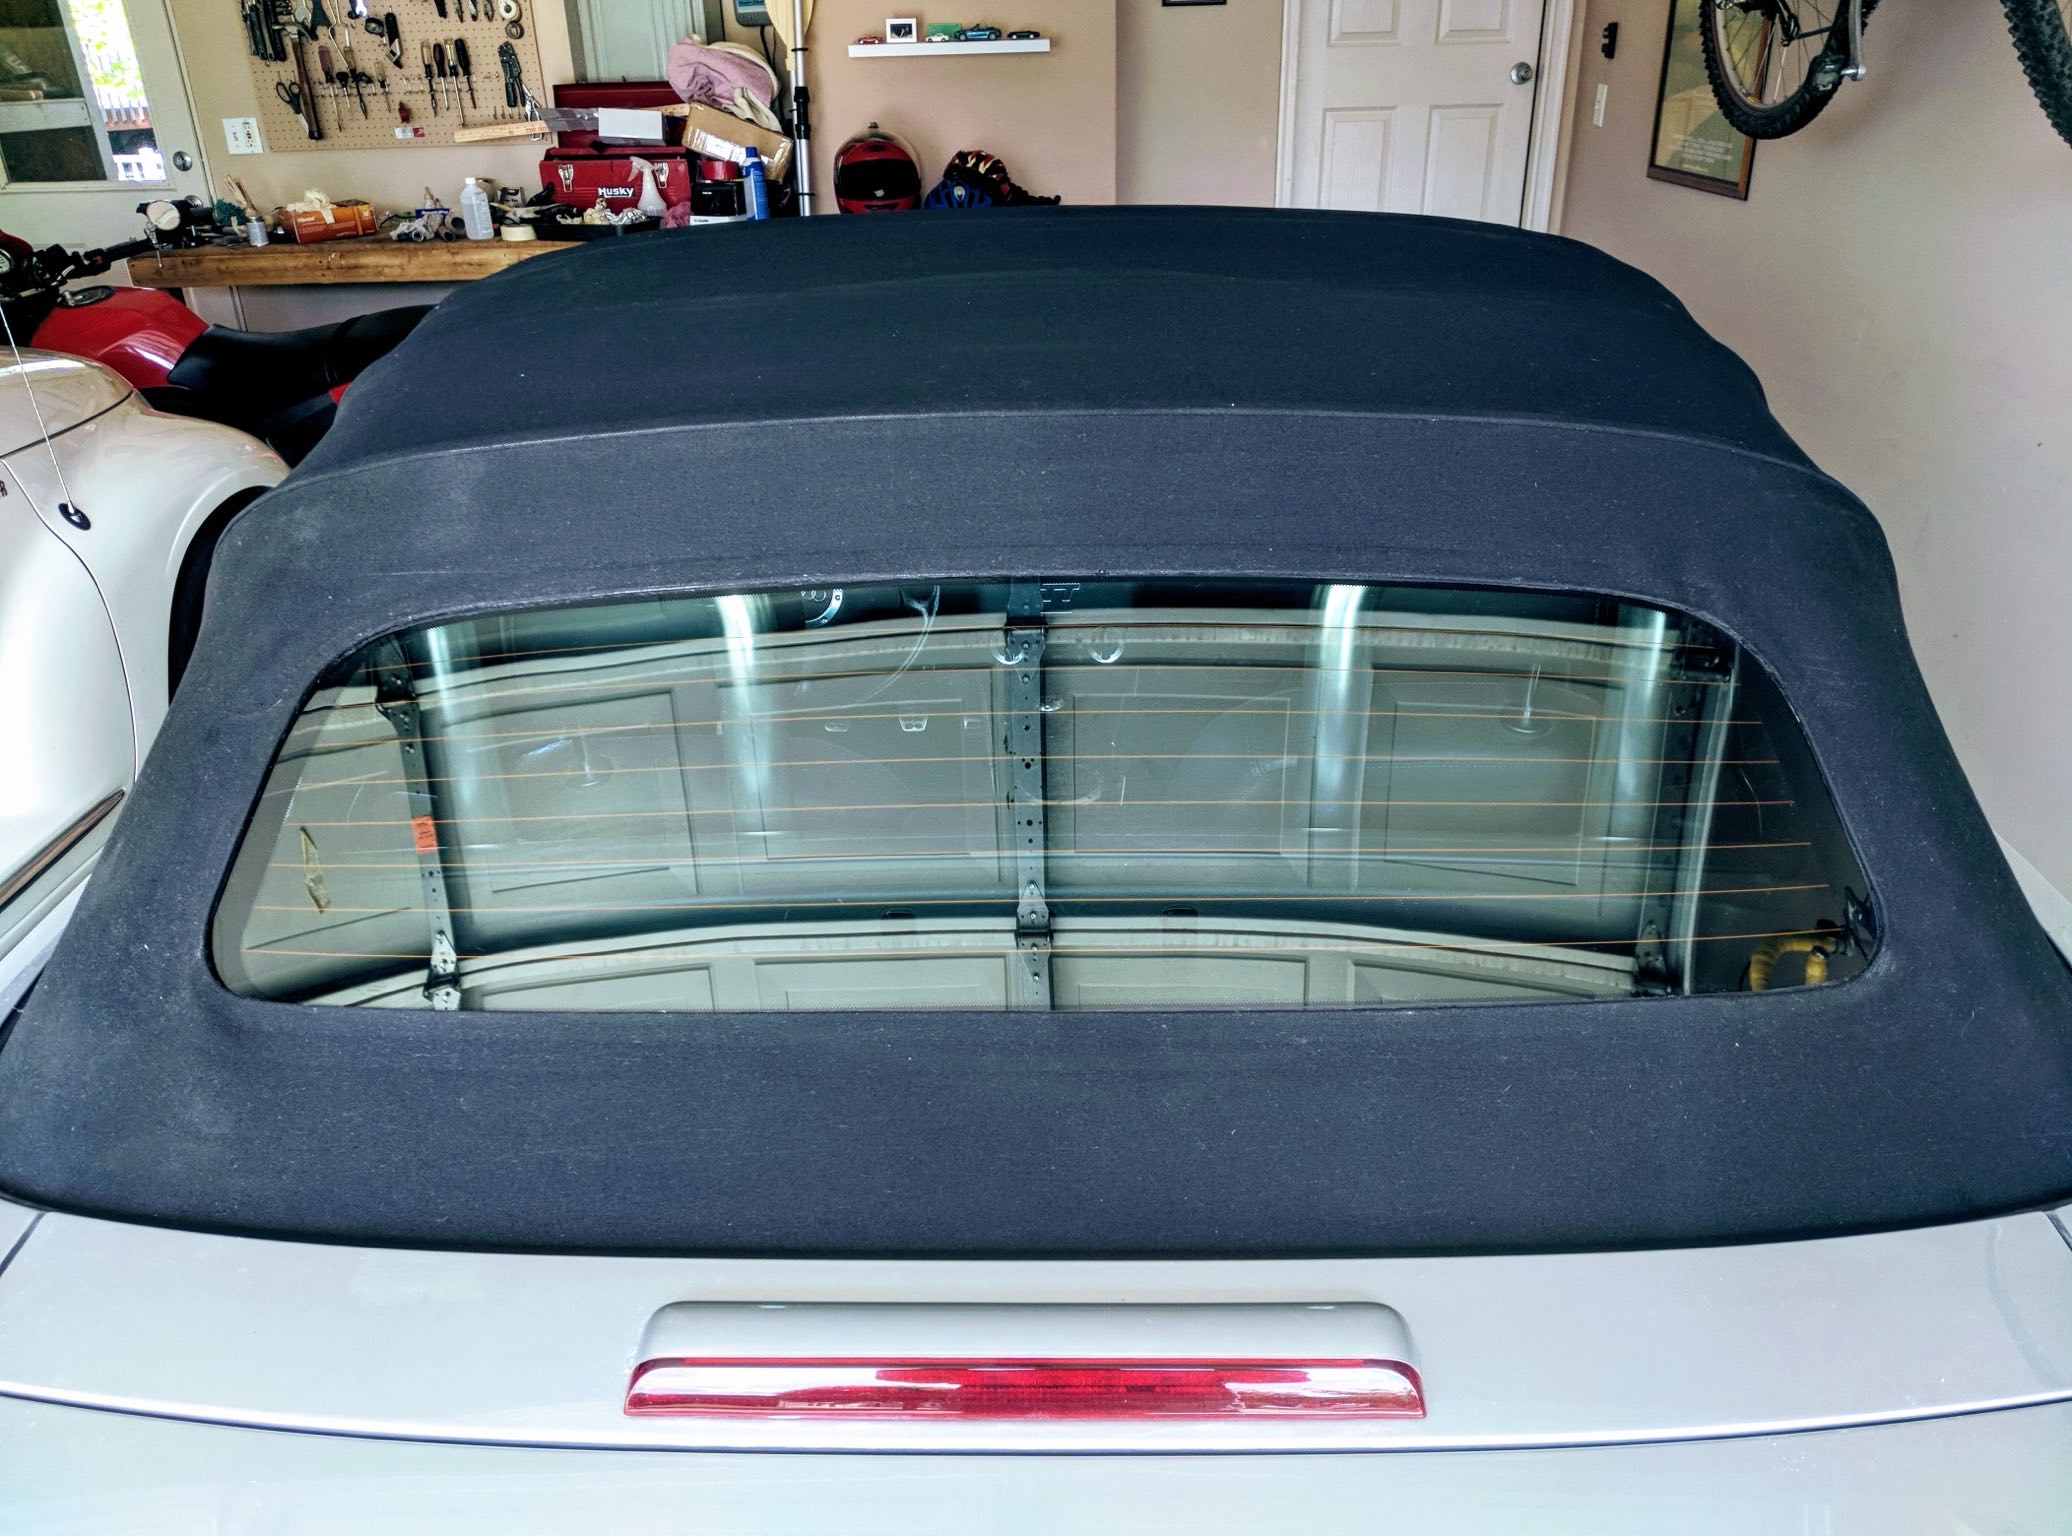
Disconnect the heating element (rear defroster) wire from the passenger-side middle edge of the glass. Remove the glass assembly (glass + cloth “bezel”) completely from the top.
Then, using the Hyde Tools Heavy-Duty Glass Scraper, I carefully removed as much of the old adhesive from the rear glass as possible. The more thorough you are with this step, the better your results will be, but I found that the fabric bezel didn’t require as meticulous of a cleaning.
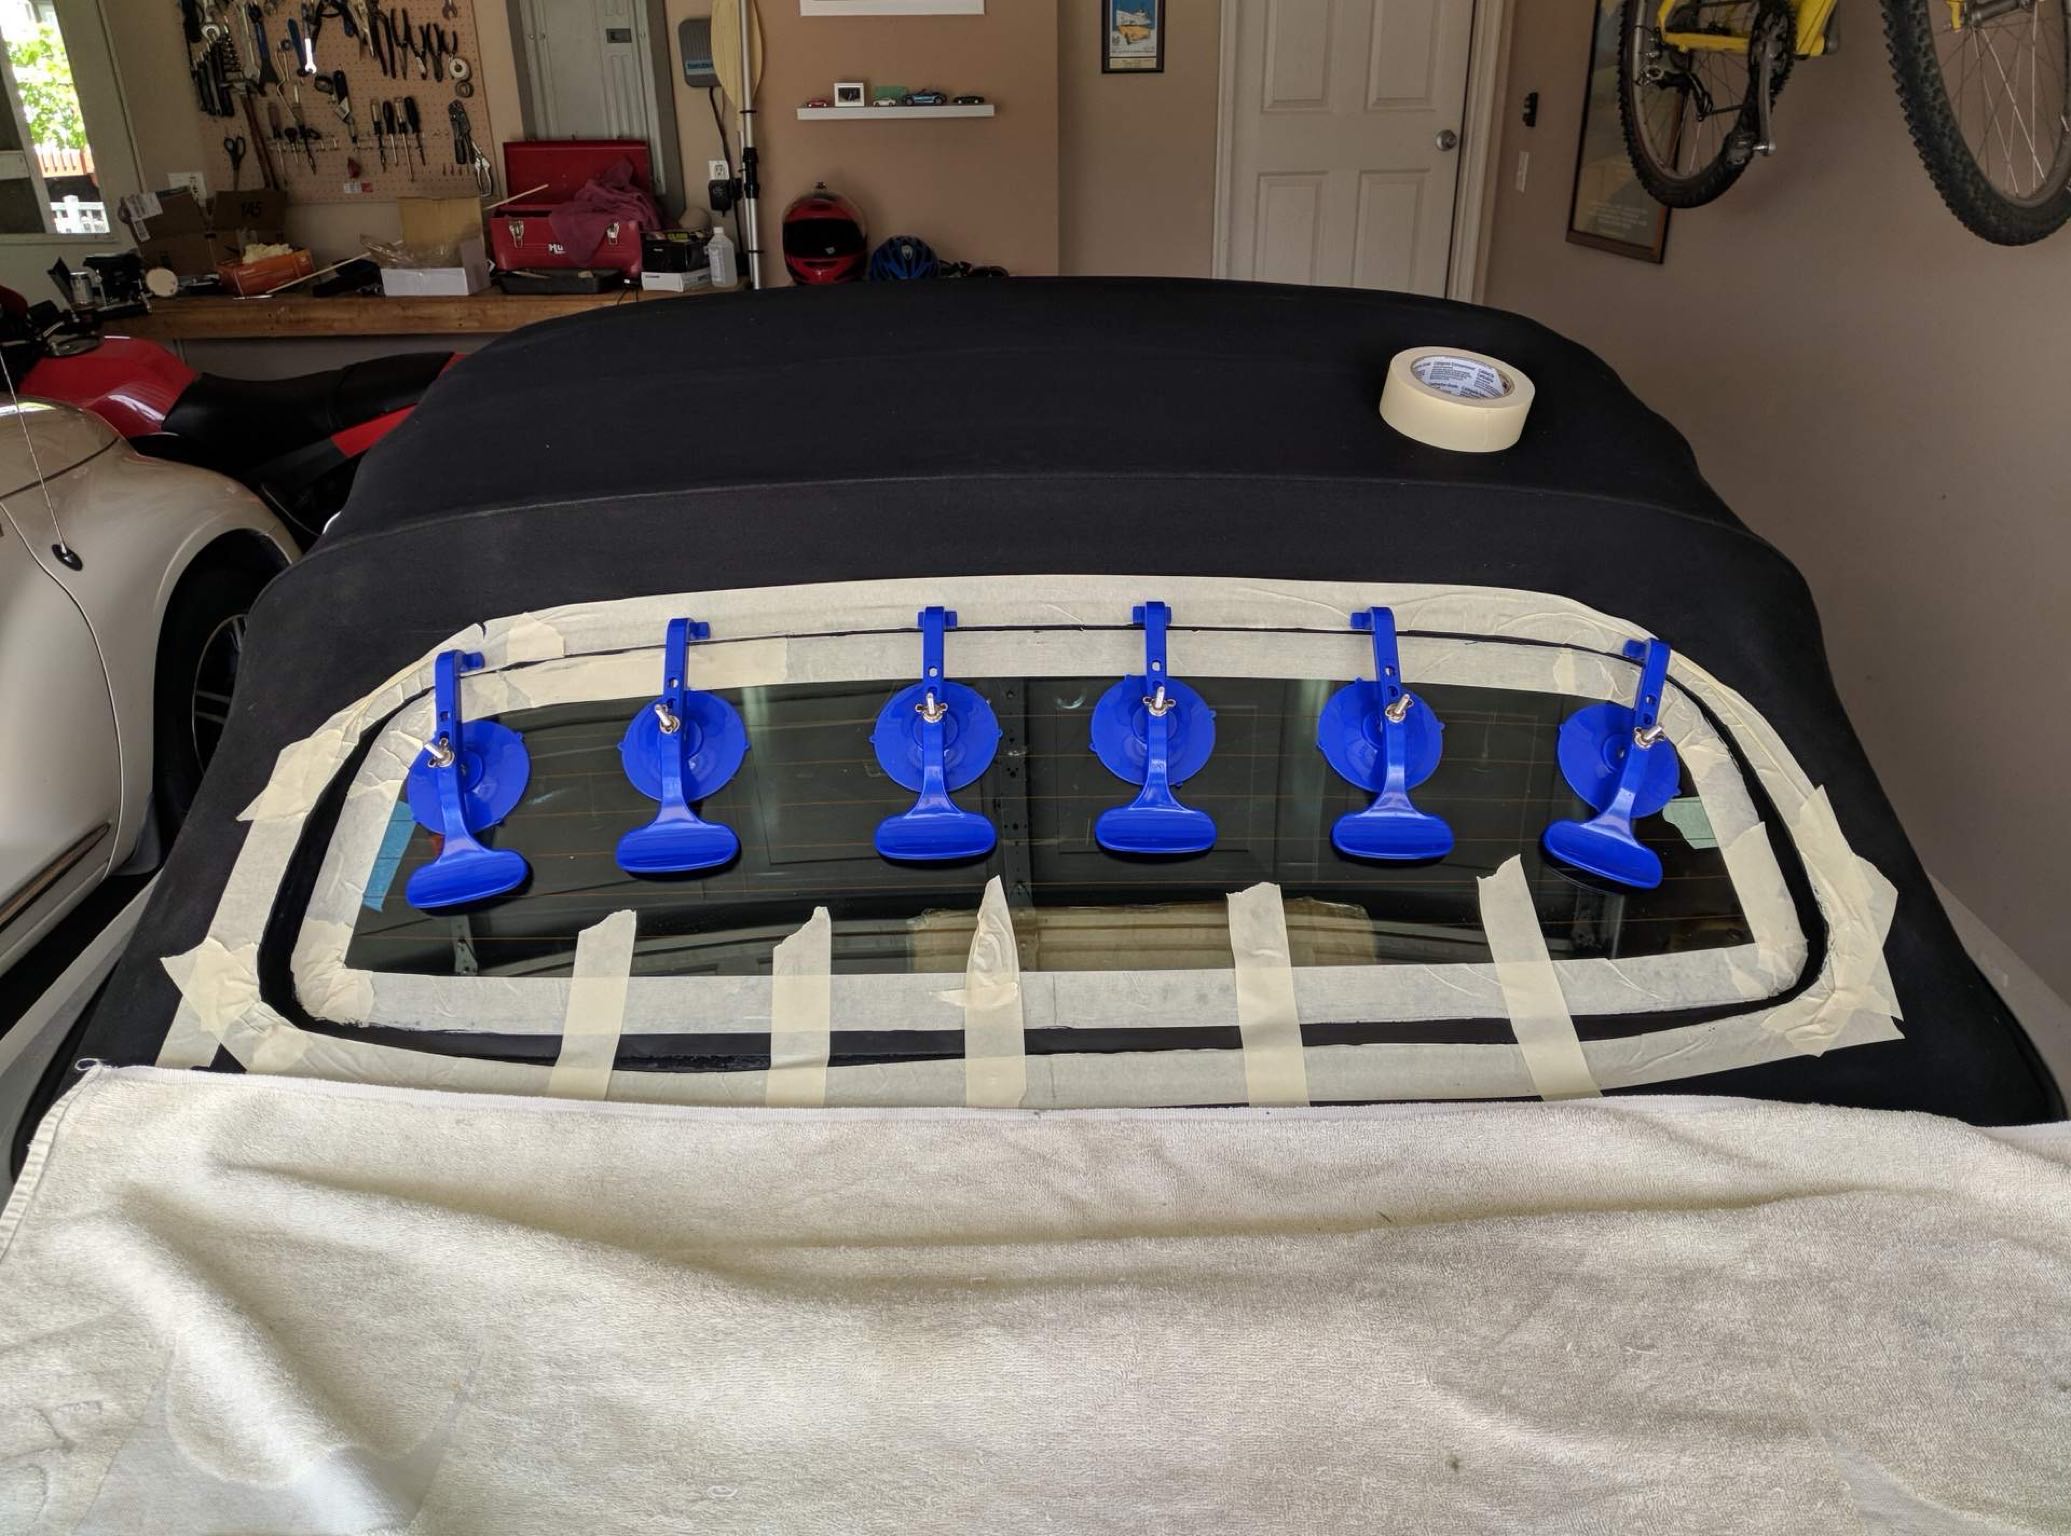
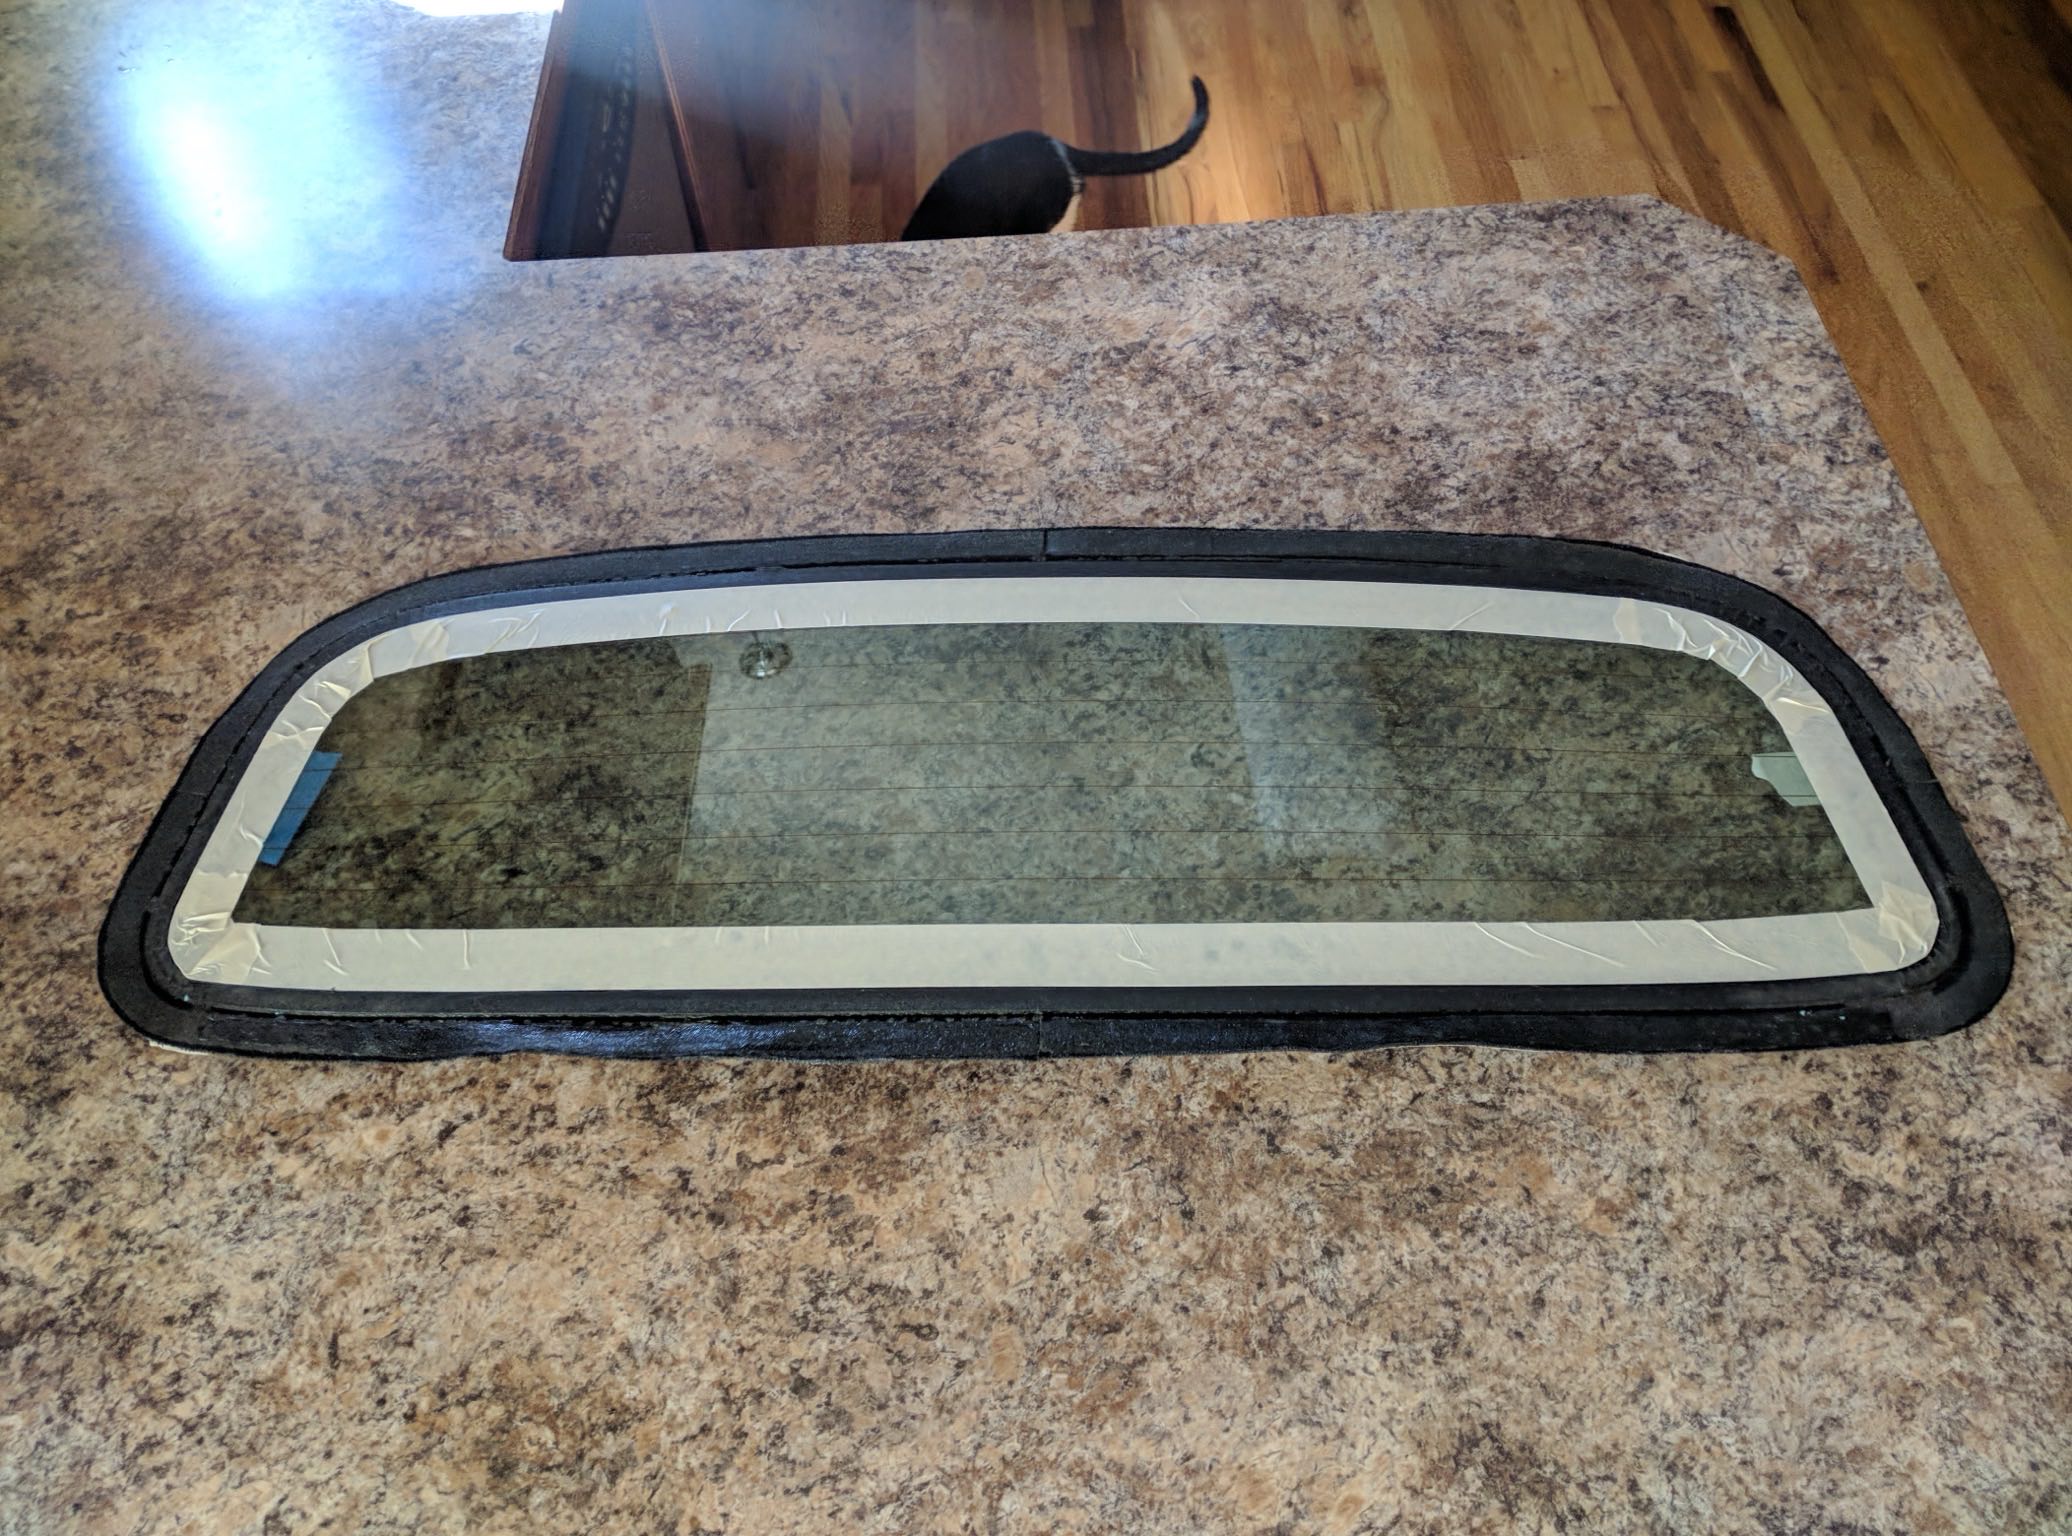
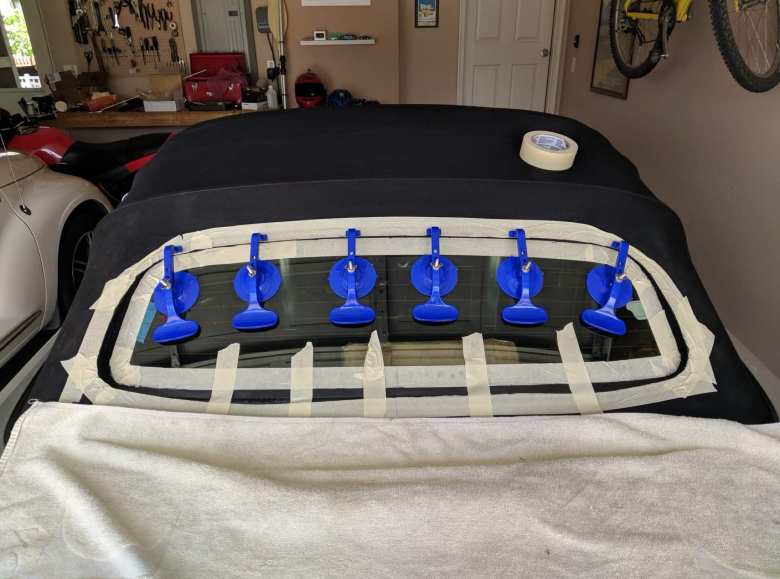
With the convertible top secured in its up position, mask off the inside of the top adjacent to where the urethane will be applied, along with the outside of the top. Also mask off the the glass adjacent to the periphery that you will be bonding to the cloth top, as shown below.
Step 2: Safety Precautions
Before you start working with the 3M Single Step Primer and 3M Window Weld, I can’t stress enough how essential it is to wear nitrile gloves. (Latex gloves would also work, but they tear more easily.) You’ll need several pairs as you’ll be changing them frequently throughout the process. Both the primer and the Windo-Weld are black and can easily get onto everything if you’re not cautious.
I also recommend wearing clothes you wouldn’t mind discarding afterward, as these products can ruin fabric quickly. Both the 3M primer and Windo-Weld are virtually impossible to remove from clothes.
Step 3: Applying the Primer
Using a small, 1/2”-wide paintbrush, I applied the 3M Single Step Primer to the areas of the glass that would be bonded to the fabric. This primer is extremely thin, almost like water, so be careful when applying it. It flicks and spills easily, so make sure you’ve taped off any areas you don’t want the primer to touch and use drop cloths for added protection.
Step 4: Reattaching the Glass
Reattaching the glass would definitely easier with two people. Ideally, one person should be inside the car, holding the window in place, while the other is outside positioning and tightening the suction clamps.
Unfortunately, I was working alone, so I had to approach it step by step.
- Top edge first: I started with the top edge. To support the glass from below while the adhesive cured, I placed a box on the opposite side. After applying the 3M Window Weld urethane adhesive to the glass top edge using the caulk gun, I secured it in place to the top using all six suction clamps. Per the 3M website, I had 10-20 minutes before the Windo-Weld gets tacky. I left the clamps undisturbed for a full 24 hours to allow the urethane adhesive to cure.
I bonded one side of the glass to the top at a time, starting with the top. - Sides: I moved on to the sides, repeating the process. Again, I let the adhesive cure for 24 hours.
- Bottom edge last: Finally, I worked on the bottom edge of the glass, using the same method. By taking it one section at a time, I ensured a secure bond all around.
Step 5: Trimming Excess Adhesive
One thing I learned the hard way was that it’s best to trim any excess adhesive with a razor blade (I used an X-Acto knife, but you could use the Hyde Tools Glass Scraper) within a few hours of application. If you wait too long, the adhesive becomes much harder to manage and clean up.
After 24 hours, I carefully removed the suction clamps and masking tape. I was thrilled to find that the rear glass was holding firmly in place.
Step 6: Reattach the heating element wire
Reattach the wire for the rear defroster to the glass. Unfortunately, in my case, the terminal for the wire had become separated from the glass edge, so I had to resolder that.
Final Thoughts
The 3M Window Weld and Single Step Primer worked exceptionally well together, and despite being a first-timer with auto/body work, the result was professional-grade.
If you’re facing the same issue with your Audi TT Roadster, I highly recommend these products. Just take your time, follow the steps carefully, and you’ll have your rear window securely reattached without having to pay a dealership thousands to replace the top.
Update June 2024
Five years later, the glass is still completely secure with no separation anywhere at all. So I did a good job and 3M makes quality products!