Review: Dynaplug Racer Tire Plugs For Tubeless Road Bicycle Tires
Considering that the bane of a cyclist’s existence has traditionally been flat tires, it’s been truly a wonder that not every cyclist that rides more than 10 miles a week has switched over to tubeless tires with sealant. I made the change in 2014 and have yet to need to repair a puncture in a tubeless tire on the road since then in well over 10,000 miles. I even successfully raced across the width of the entire U.S. on a single pair of Hutchinson Intensive tubeless road tires without a single flat.
A good tubeless tire setup rides well, has equal or lower resistance, and has no weight penalty compared to a conventional tire setup even with sealant. Not going through disposable tubes also saves money and potentially has environmental benefits as well.
Tubeless tires have even been used at the Tour de France recently. Basically, they have no downside to go with the upside of no flats.
Well, almost. They are harder to install. You will definitely need to use tire levers and you might need to use compressed air upon initial inflation if you are unlucky. (Subsequent inflations require only a tire pump.) But those are one-time things, something that is done in the comfort of your garage or a bike shop. Not on the road.
The second downside is if you get a puncture that is too large to be sealed by sealant on the road, traditionally you’d have to insert a tube to keep on riding home on an inflated tire. Either that or try to patch the tire from the inside. I look at that scenario as mostly hypothetical because in my experience, even holes caused by a large nail can be sealed by sealant without losing enough air to make the tire pressure dip below 40 PSI on a road bike. Forty PSI is enough to get you home, where you can repair the tire in comfort. But hey, it could happen.
That scenario has compelled me to always have a spare tube and a CO2 cartridge (for inflation) in the saddle bags of each of my road bikes even though I have never needed to use them since switching to tubeless. (I have given away one to another rider repairing a flat on the side of the road, however!) But maybe I will stop carrying a tube now. The reason?
Because the new Dynaplug Racer tubeless tire repair kit would take care of that. And much more easily too.
What does this repair kit include? It contains tire plugs that are inserted into a puncture from the outside of the tire—so no wheel removal is necessary—along with a tool to insert them.
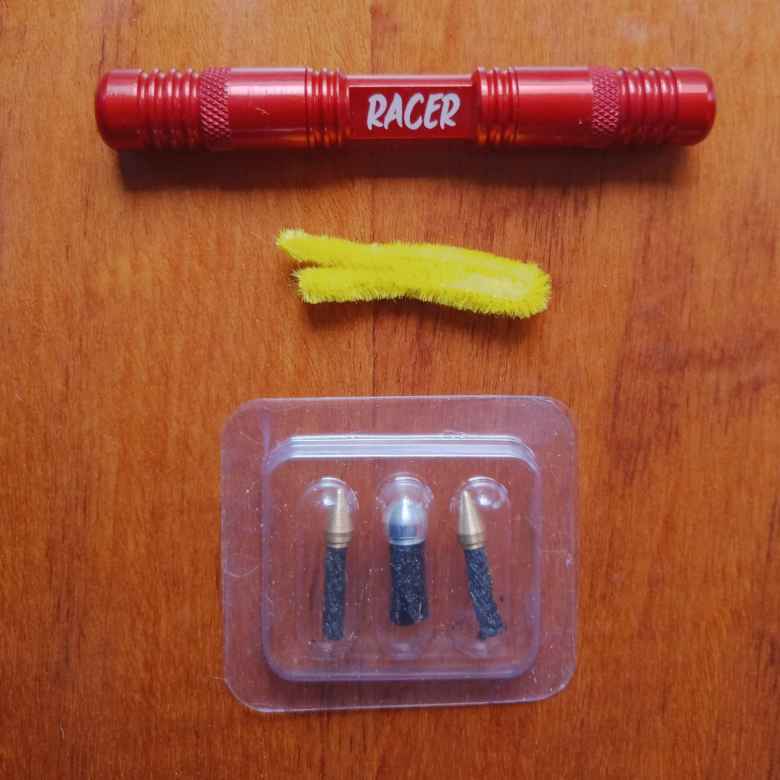
It differs from other tire plug kits that use “Side of Bacon” tire plugs that resemble the tire plugs used for car tires. Those are harder to insert and, according to Amazon reviewers, sometimes blow out and are not totally reliable.
In contrast, the Dynaplug kit is ingeniously designed. The tire plugs insert into the tool—a couple even come pre-loaded, and it is totally a cinch to put in another one. The plugs come with a metal end, making insertion into the tire puncture very easy too.
Yellow pipe cleaner is included in case there is some residue left inside the tool that you want to clean out. I haven’t had to use it yet.
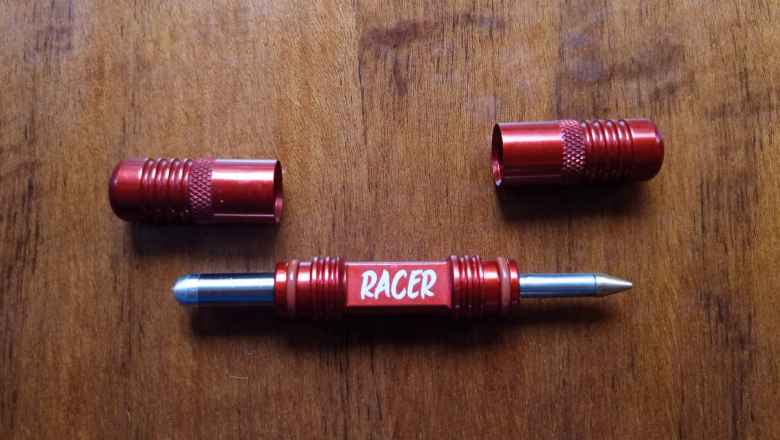
You can imagine how the tire plugs work by looking at the tool above. Simply locate the location of the puncture—easy if you have sealant in the tire, as sealant will be coming out—and press in the plug until the tool bottoms out on the tire tread. Remove the tool straight out and—voilà—the plug has permanently sealed the tire.
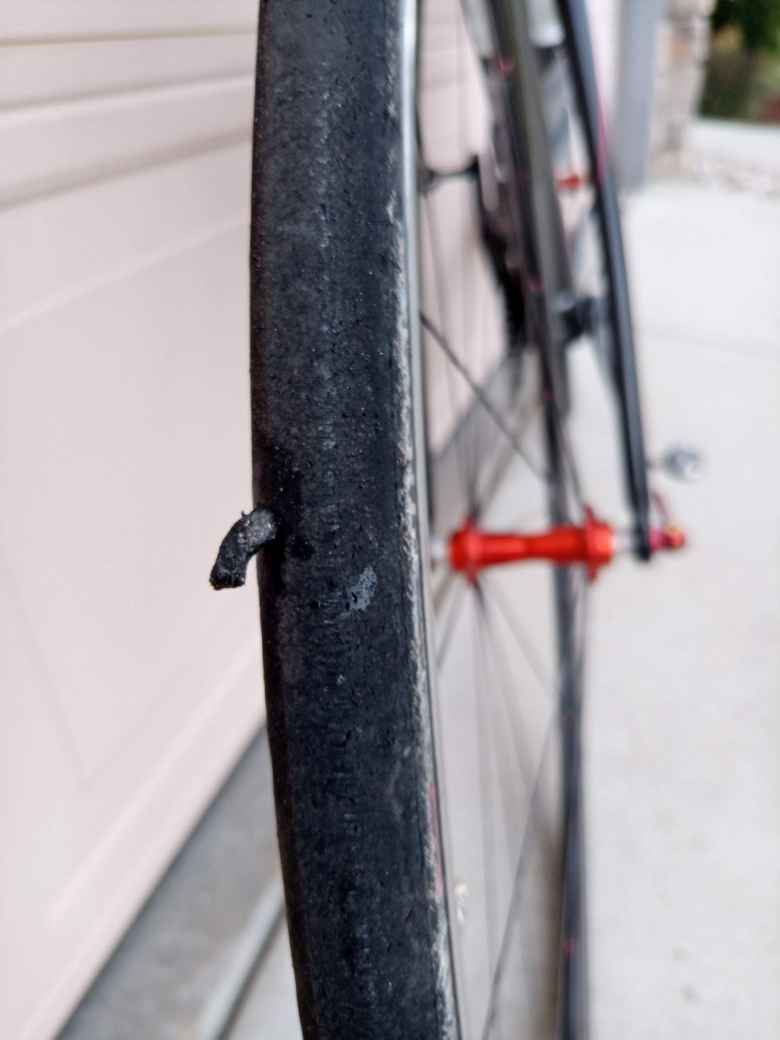
According to Dynaplug, you don’t even have to (maybe even should not) cut off the excess part of the plug. They say you won’t feel it and in my experience that is true.
The photo above is of a recent repair I did for a puncture that was too large for Stan’s No Flats sealant to permanently seal above 80 PSI. Inserting the plug took about five seconds. Compare that to my previous method of patching a tire, which took nearly 30 minutes the last time I did that.
If you’d like to better visualize the repair procedure, watch this excellent video by Jim Langley, former long-time editor for Bicycling magazine.
The main drawback of the Dynaplug Racer is its expense: about $48 on Amazon. But considering it is made out of 6061 aluminum in the USA; designed by an American company based in Chico, California; and certainly looks and feels like a premium quality product, I think it is reasonably priced. It also costs less than a brand new tire, and the time savings you reap the first time you use it make it worth it.
Stashing Away the Dynaplug Racer For a Ride
Another great thing about the Dynaplug Racer kit is that it is super small and lightweight. The tool is made out of aluminum, is entirely hollow, and is only 14 grams—about the same weight as a few coins.
In fact, it is small enough that you could easily stash it in one of the handlebar ends:
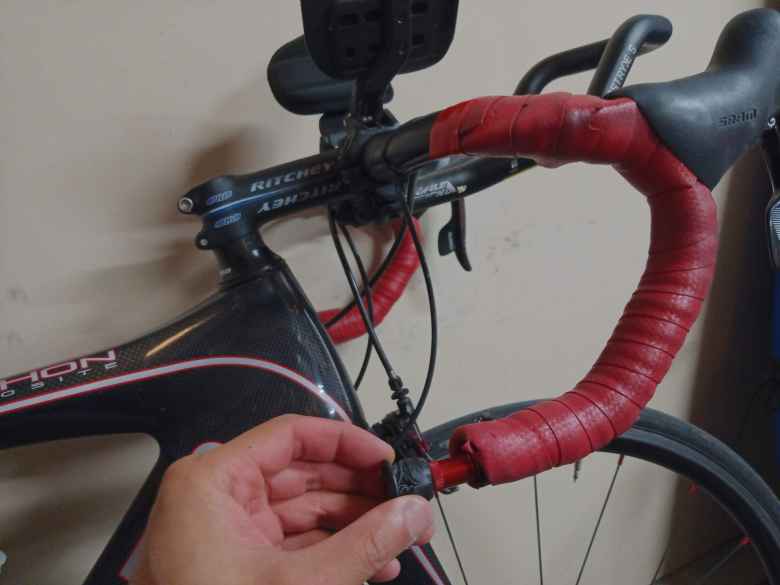
I keep it in there and it does not rattle around.
You could put it inside a three-inch section of a discarded bicycle tube too if too if you are worried about it rattling. After all, you won’t be needed those bicycle tubes for anything else anymore!
For emergency tire inflation, you could also stash a threaded CO2 cartridge and inflation valve in the other handlebar end like the one below. You would need to use a 12g CO2 cartridge for it to fit, however, and not the 16g cartridge pictured.
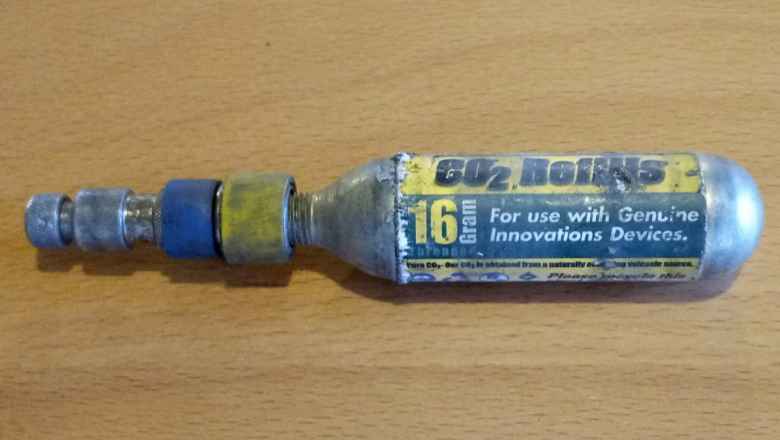
By keeping the Dynaplug Racer tire repair tool and CO2 cartridge in the handlebar ends, you would not need to carry a saddle bag anymore—especially the tire plugs obviate the need for bringing spare tubes, tire irons, and patches. This enables a cleaner-looking and lighter bike setup. Not having a saddlebag also frees up space to put a neatly tucked away rear flashing taillight under the saddle using the saddle rails—something I haven’t done yet but intend to.
I also have put a Presta-to-Schraeder valve adapter on the valve stem of one of the tires in place of a valve cap, and a $10 bill in the same side of the handlebars that the tire plugs are in. Such an adapter is handy in case you needed to put more air in the tires when passing by a gas station on a ride, for example, and weighs next to nothing. The $10 bill ensures you have money in case you need to use a gas station air machine, or to purchase emergency food and liquids during a ride.
