OneNote for iPad: How to Set Proofing Language and Banish Squiggly Lines from Spell-Check

If you use Microsoft OneNote on your iPad, you likely appreciate its power as a versatile note-taking solution, available across various platforms such as iOS, iPadOS, MacOS, Android, web, and Windows.
However, if you, like me, take notes and/or use your iPad in multiple languages, you may find that your pages of notes are marred by unsightly squiggly lines indicating spelling mistakes. This occurs when OneNote for iPad automatically proofreads for a language that’s different than that of your notes, which can be a nuisance.
So, how can you get rid of these unsightly red, squiggly lines?
I wrote this post after much trial-and-error, because Microsoft does not provide satisfactory or comprehensive answers on its support pages. I’ll explain how to eliminate those bothersome squiggly lines denoting spelling errors.
There are two primary ways: turning off spell-check altogether, and correcting the proofing language for your notes.
Easiest Solution: Turn Off Spell-Check in OneNote for iPad Altogether
You can easily disable the spell-check feature in OneNote for iPad, but you do not do that in system settings or OneNote settings. Instead, follow these steps:
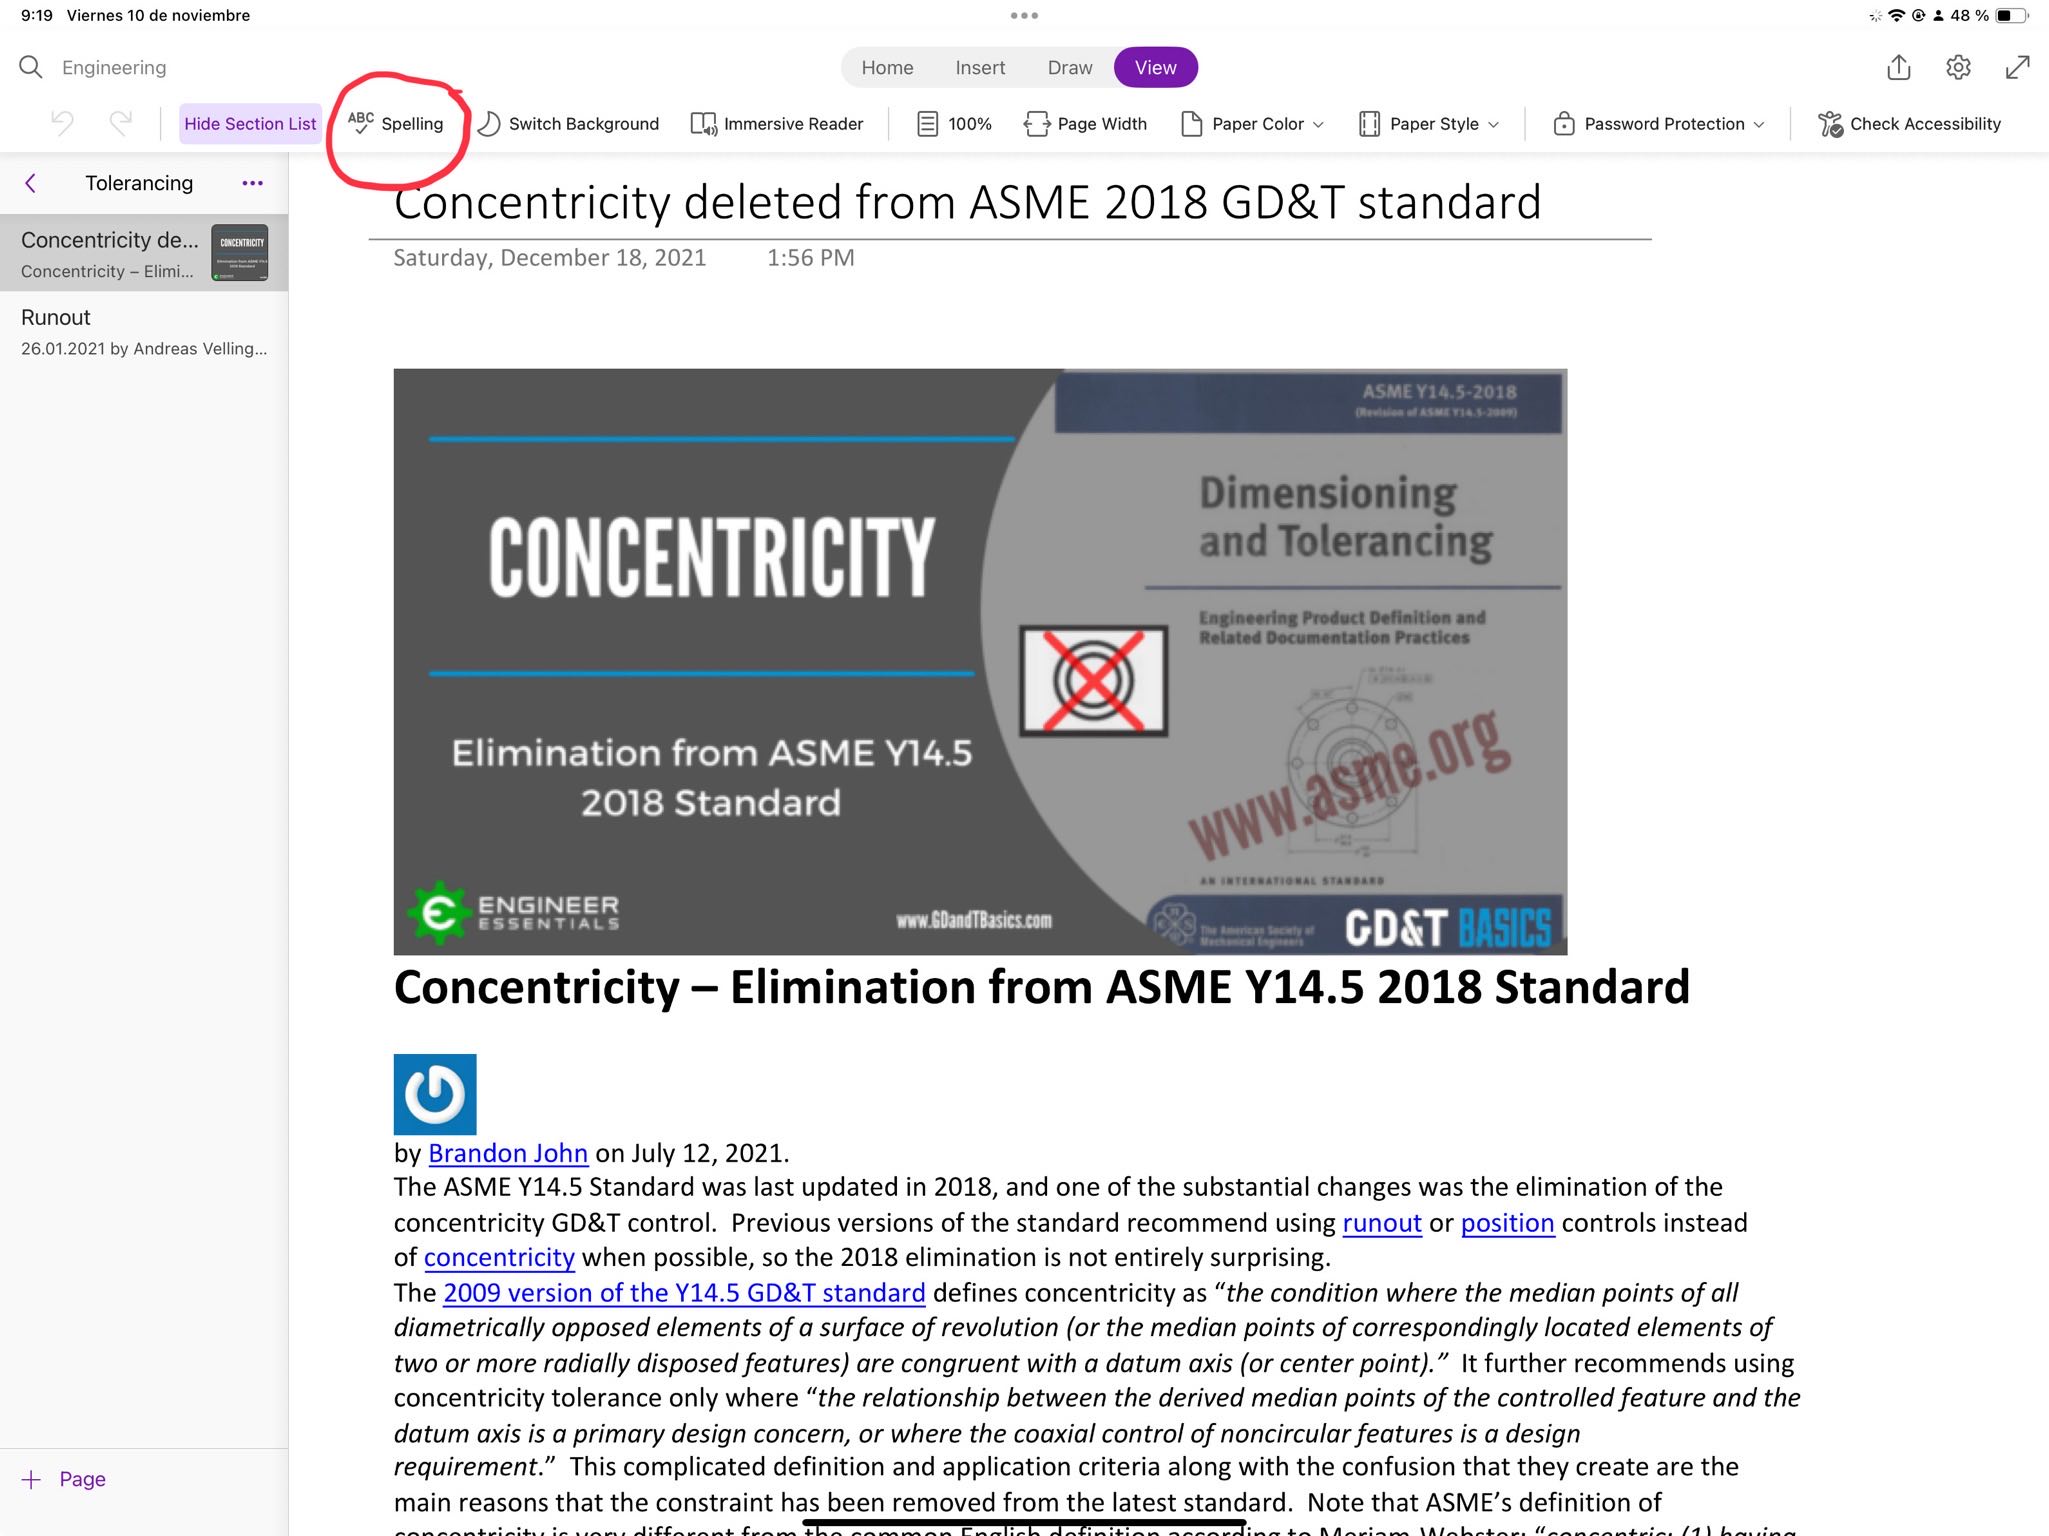
- Open OneNote for iPad.
- Click on “View.”
- Toggle off “ABC✓ Spelling.”
For the majority of users, this is the best—and certainly the easiest—solution. Most notes in OneNote are for personal use and are not published (unlike, say, a Word document), so a few spelling errors aren’t a significant concern compared to the annoyance of squiggly lines.
However, if you are particular about accurate spell-checking, continue reading for alternative methods.
Correct the Proofing Language in OneNote for iPad
Unfortunately, there is no direct way to change the proofing language for your notes in OneNote for iPad through a menu option. But there are workarounds:
Workaround #1: Correct the proofing language in desktop OneNote for Mac or PC
The desktop version of OneNote offers the functionality to change the proofing language. To do this, open your notes in the desktop version and select the text, text block (e.g., paragraph, list, or heading), or text box container you want to change. Then click Review → Language → Set Proofing Language.
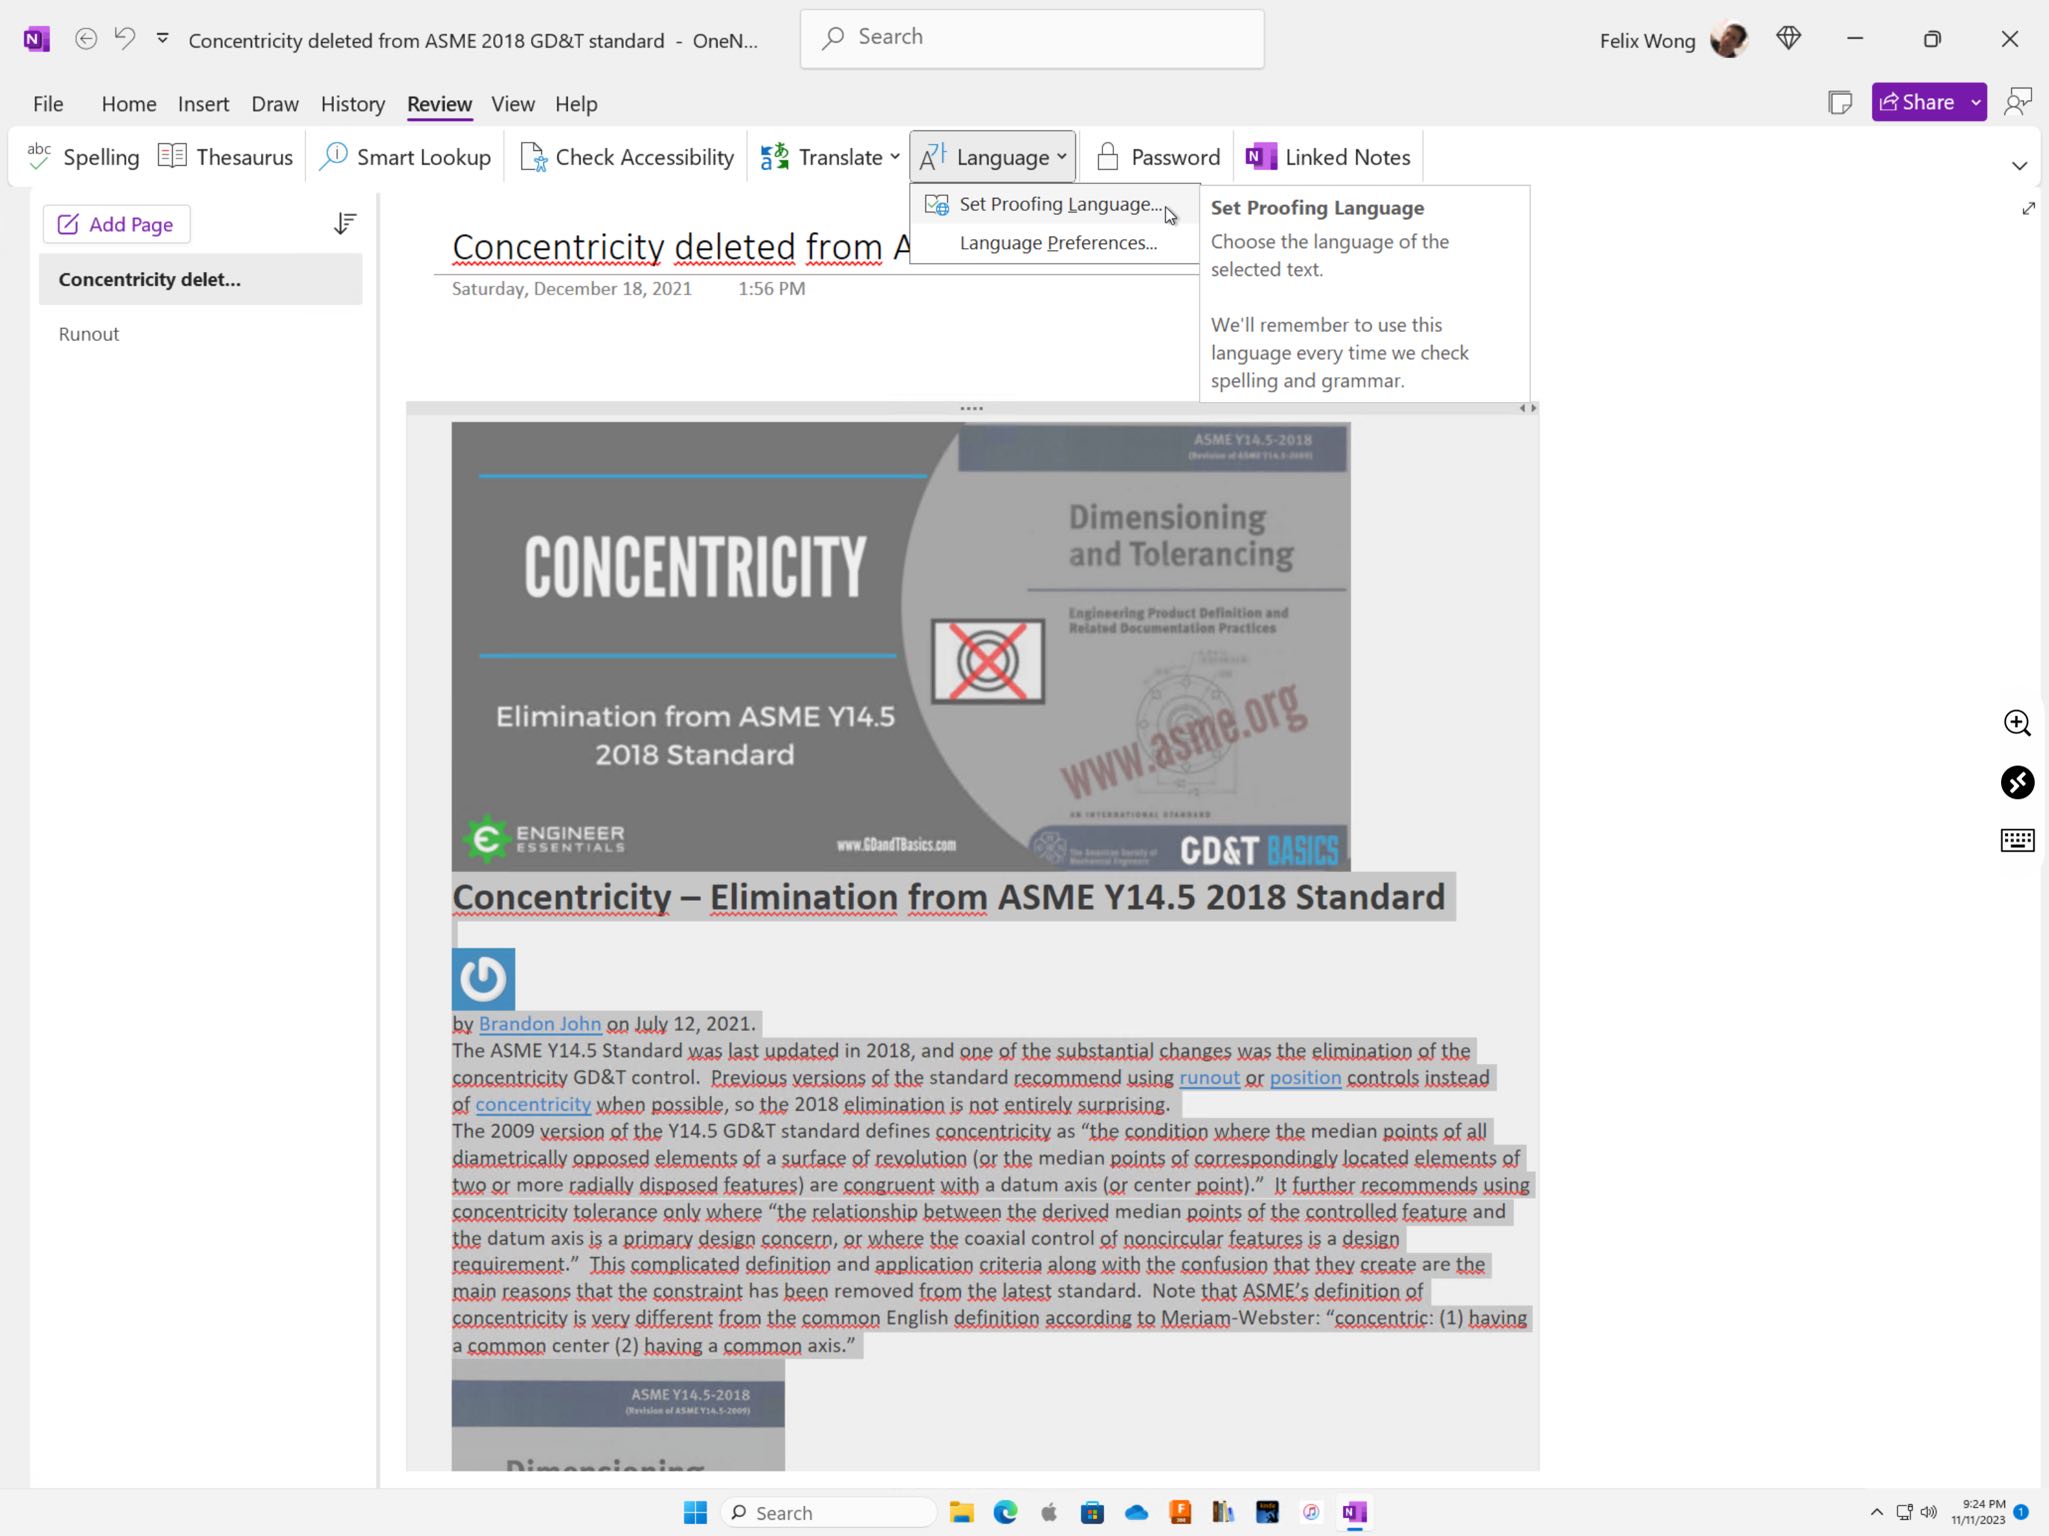
Tip: Functionality to change the proofing language for an entire notebook or page does not exist. However, in the desktop version of OneNote, you can select all text containers on a page by pressing Control-A for “select all” and then set the proofing language.
This solution assumes you have access to the desktop version of OneNote, which may not be feasible or convenient for some users. For instance, I’m #soloiPad and don’t have a physical PC or a Mac. Therefore, to use the desktop version of OneNote and take screenshots for this article, I had to utilize a Windows virtual machine on Azure, which is beyond the scope of this article.
If you do not have the OneNote desktop application, see Workarounds #2 or #3 instead.
Workaround #2: Correct the proofing language using the web version of OneNote
In the web version of OneNote (onenote.com), you can select text, “right-click” (click the touchpad with two fingers), and choose Set Proofing Language.
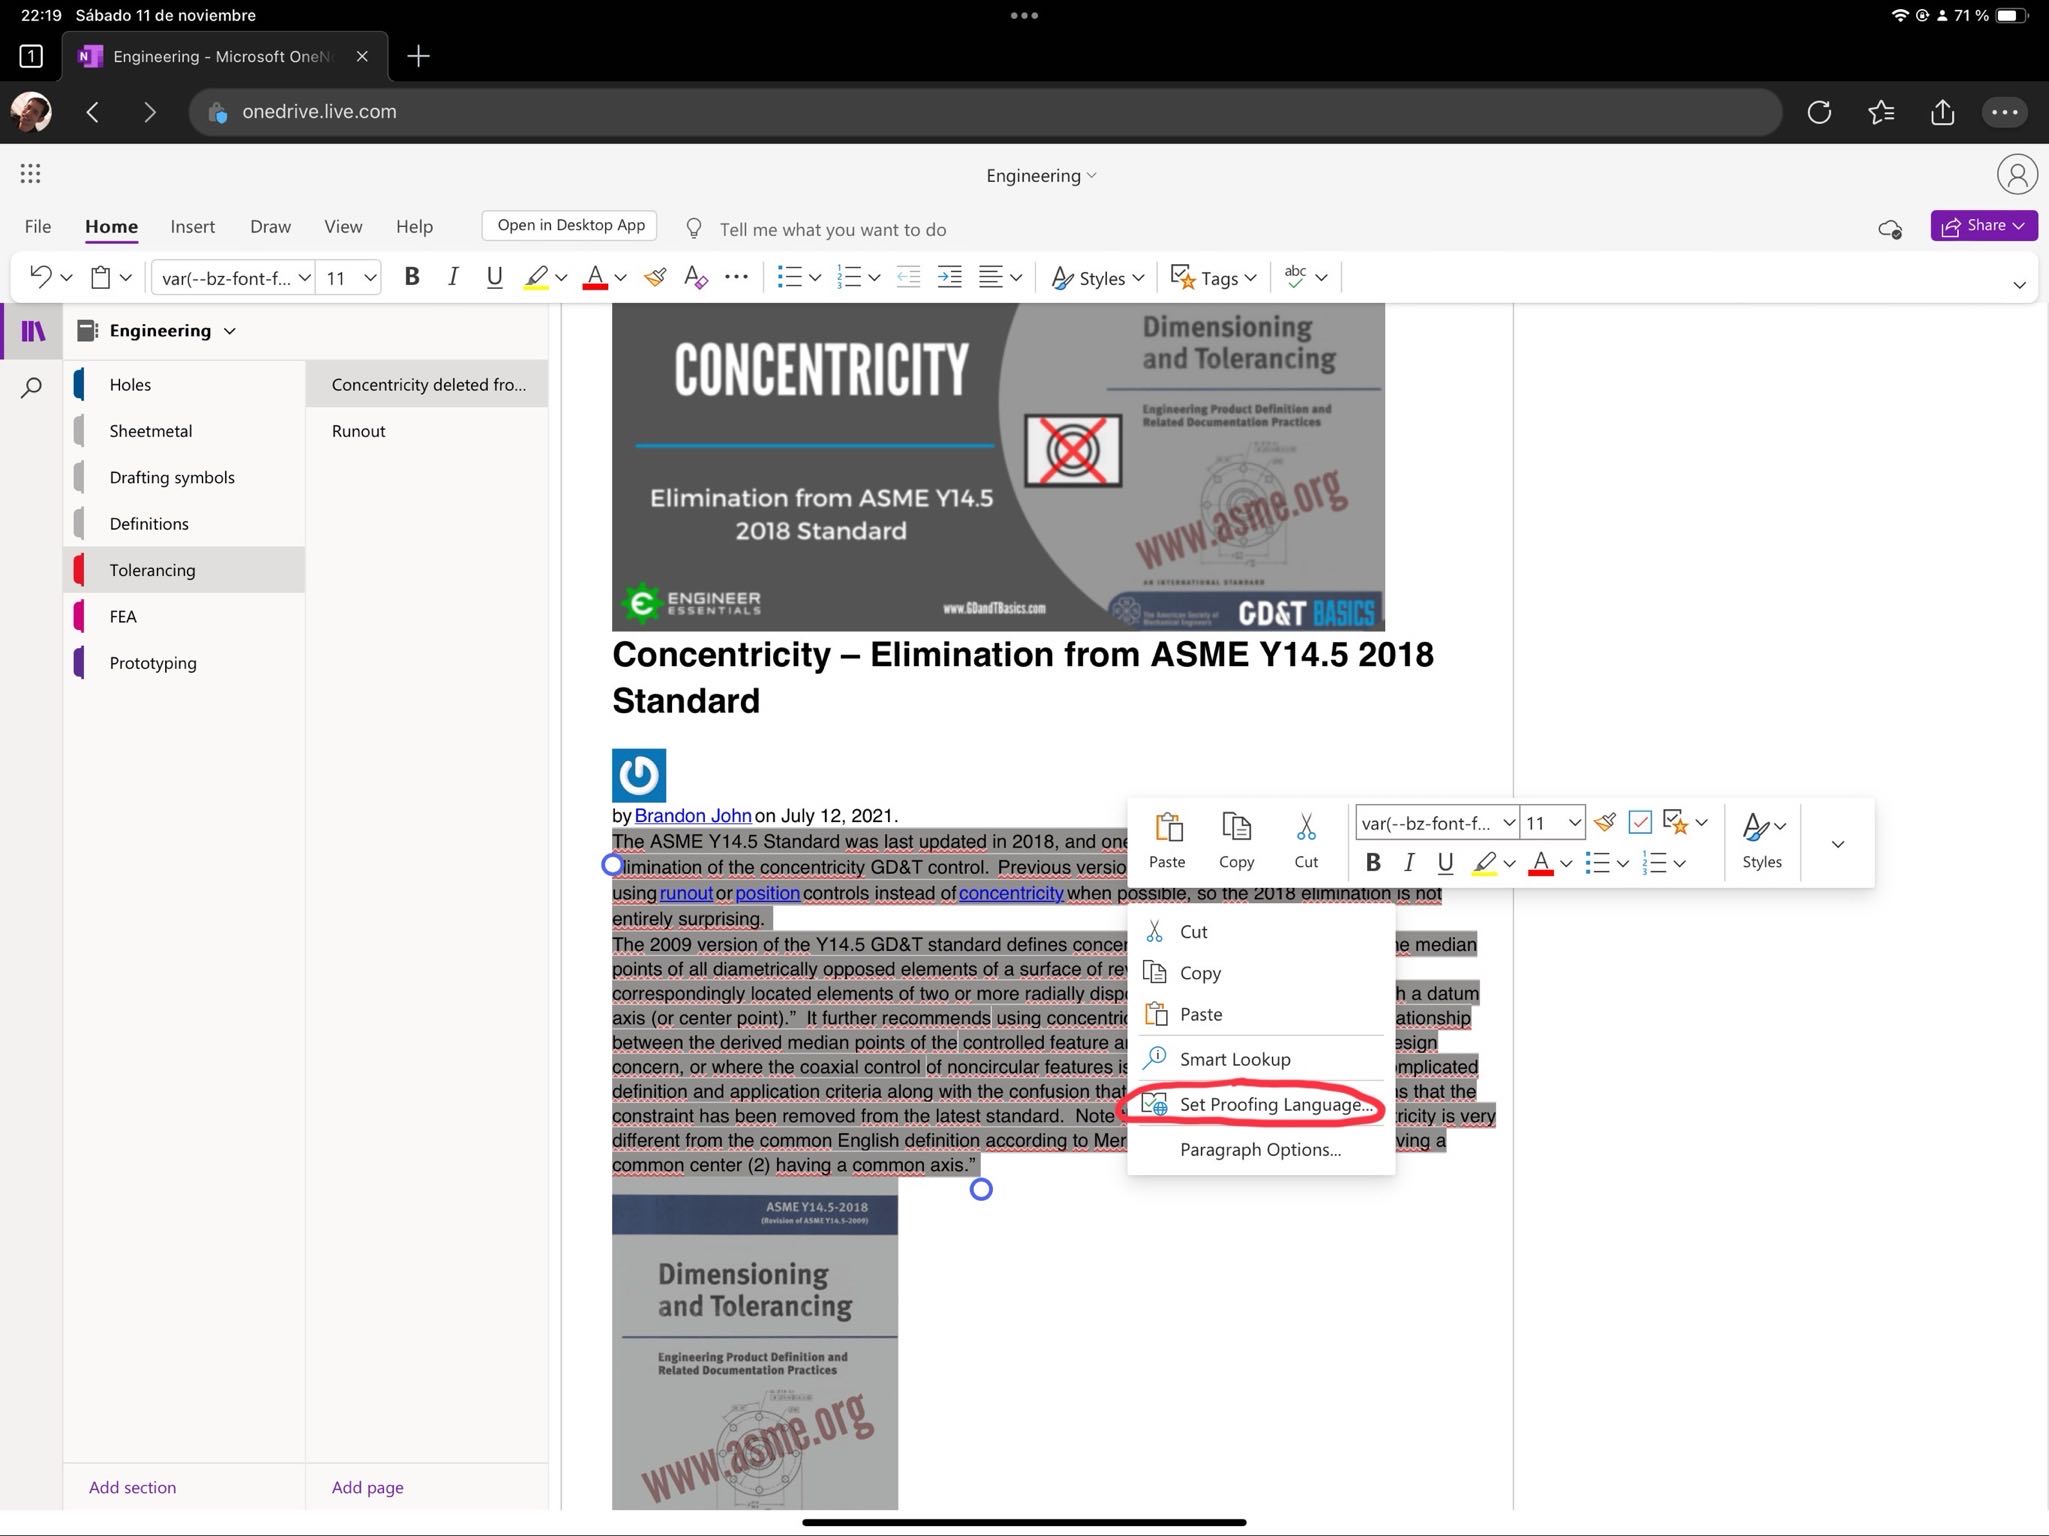
However, in the web version of OneNote, you are limited in the amount of text you can select to change the proofing language. For example, you can only change individual words or sentences and not entire text box containers.
I’ve also found that sometimes “right-clicking” can be unreliable or challenging in the web version of OneNote.
The desktop version of OneNote offers a less frustrating solution, provided you have access to it.
Workaround #3: In OneNote for iPad, cut and re-paste text as plain text
Warning: This workaround also eliminates formatting and images.
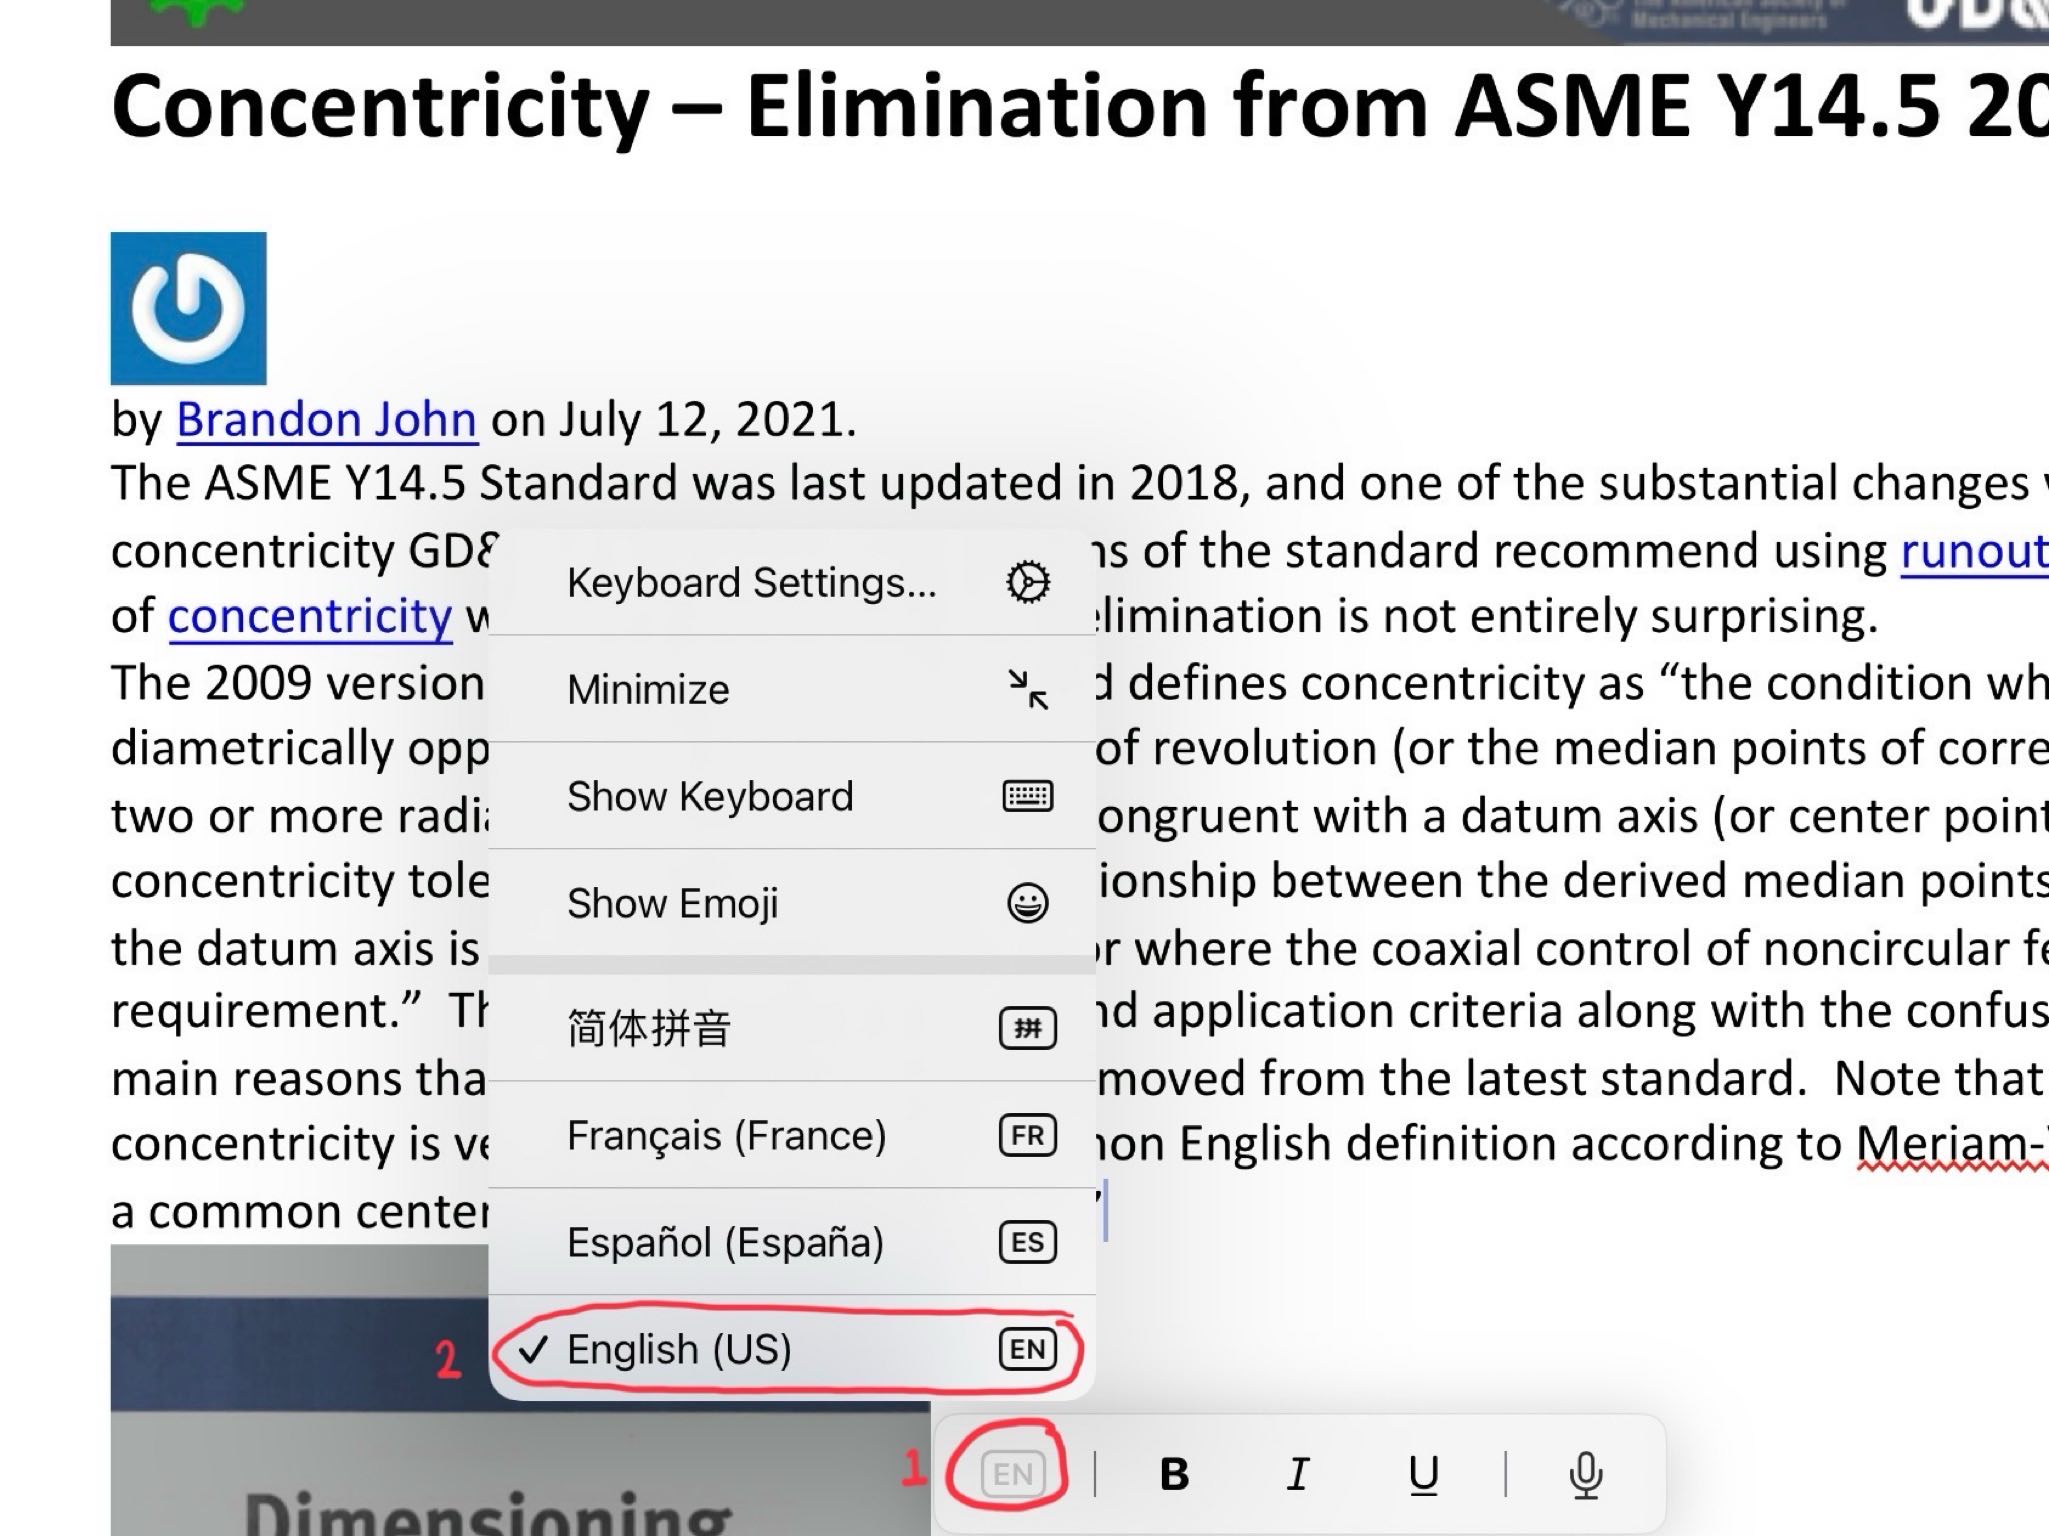
The only way to change the proofing language of text in OneNote for iPad is by cutting and re-pasting the text as plain, unformatted text with the virtual keyboard set to the correct language.
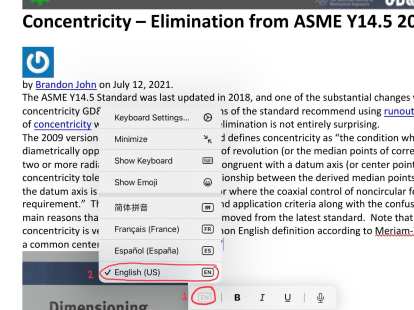
See the screenshot below by what I mean by the “virtual keyboard.”
Then, after that is set to the correct language, you can copy and re-paste text from OneNote for iPad as plain text. The pasted text will be set to the correct proofing language. Here are a few ways to do this:
- Select text, then “right-click” (or tap with a finger on the screen), then select Share. Then select Copy. The text is copied but not the formatting. Then re-paste it (Control-V) into OneNote.
The downside of this method is that you can only select at most a single text block (e.g., heading, paragraph, or a list item). The Share option will not appear if you select, say, a whole text box.
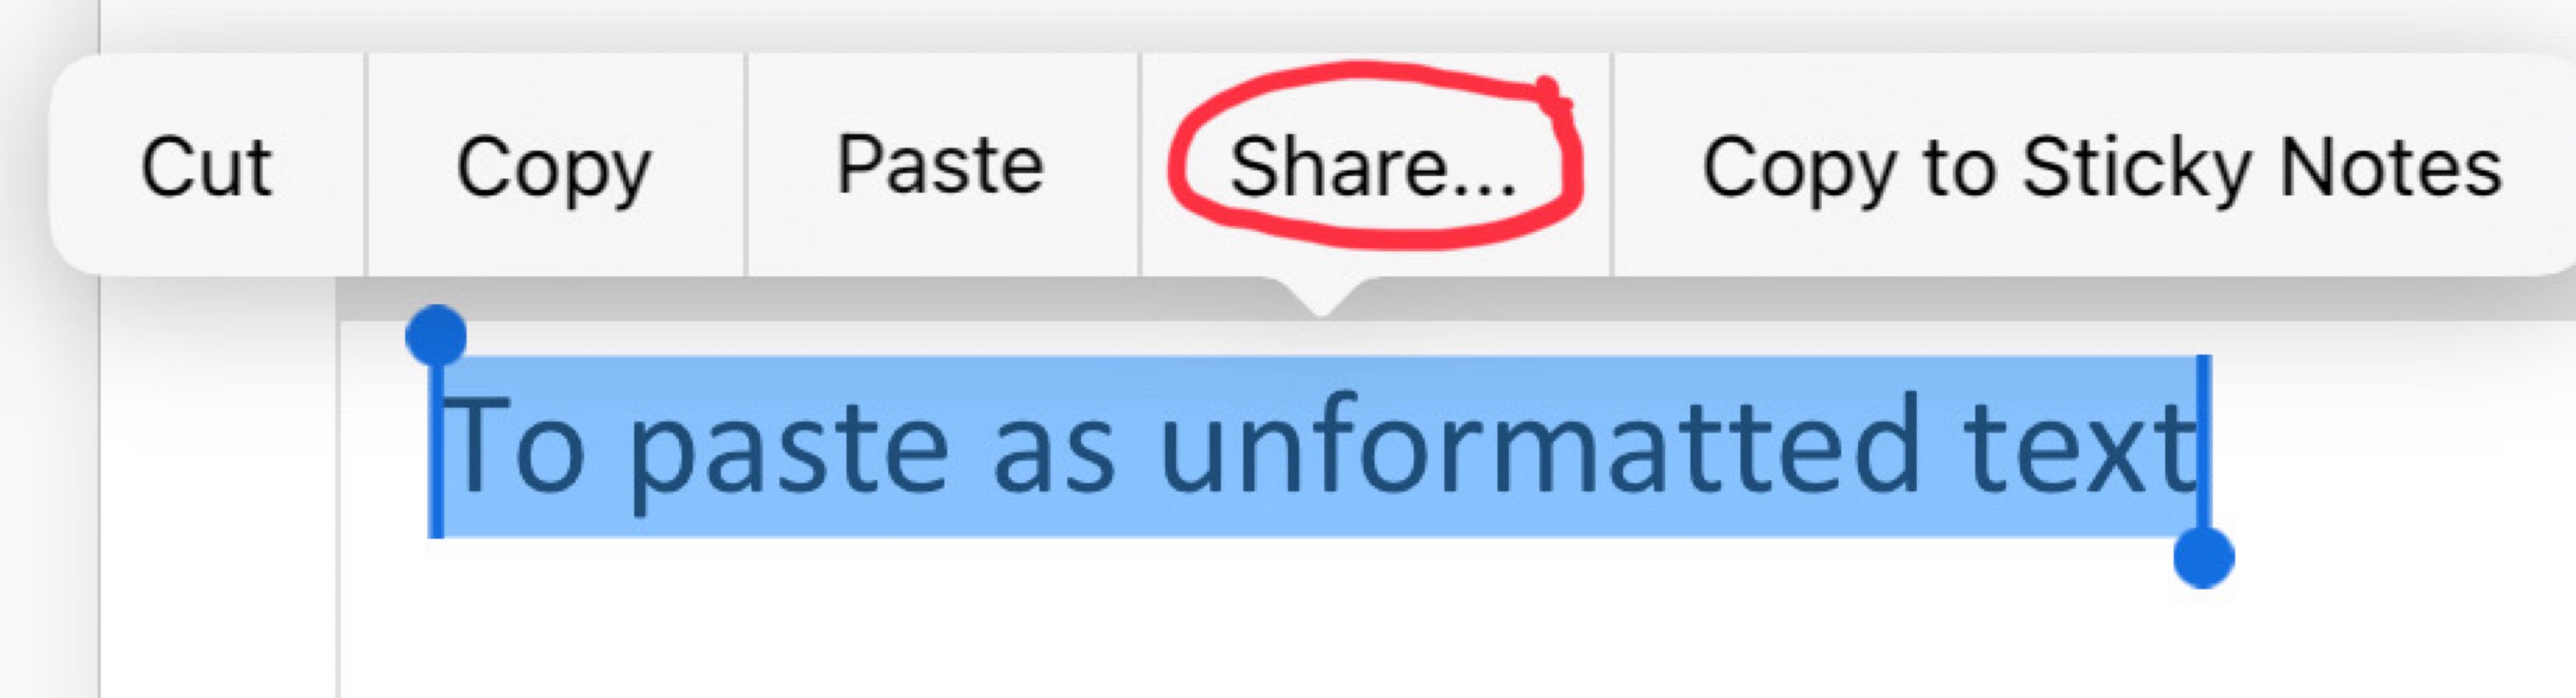
You can copy text as plain text by tapping highlighted text once and then hitting "Share." Then select "Copy." 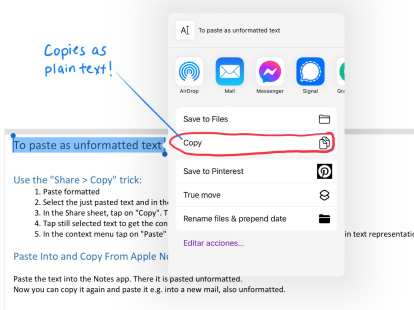
When you "Share" and then "Copy" highlighted text, it will be pasted as plain text. - Alternatively, select some text, copy it (Control-C is fine), then paste it into Apple Notes. Then re-copy the pasted text from Notes and paste it into OneNote (Control-V). The downside of this method is that although Apple Notes removes the original formatting, it re-formats the text into larger text. So when you re-paste in OneDrive, the text looks larger than the default font.
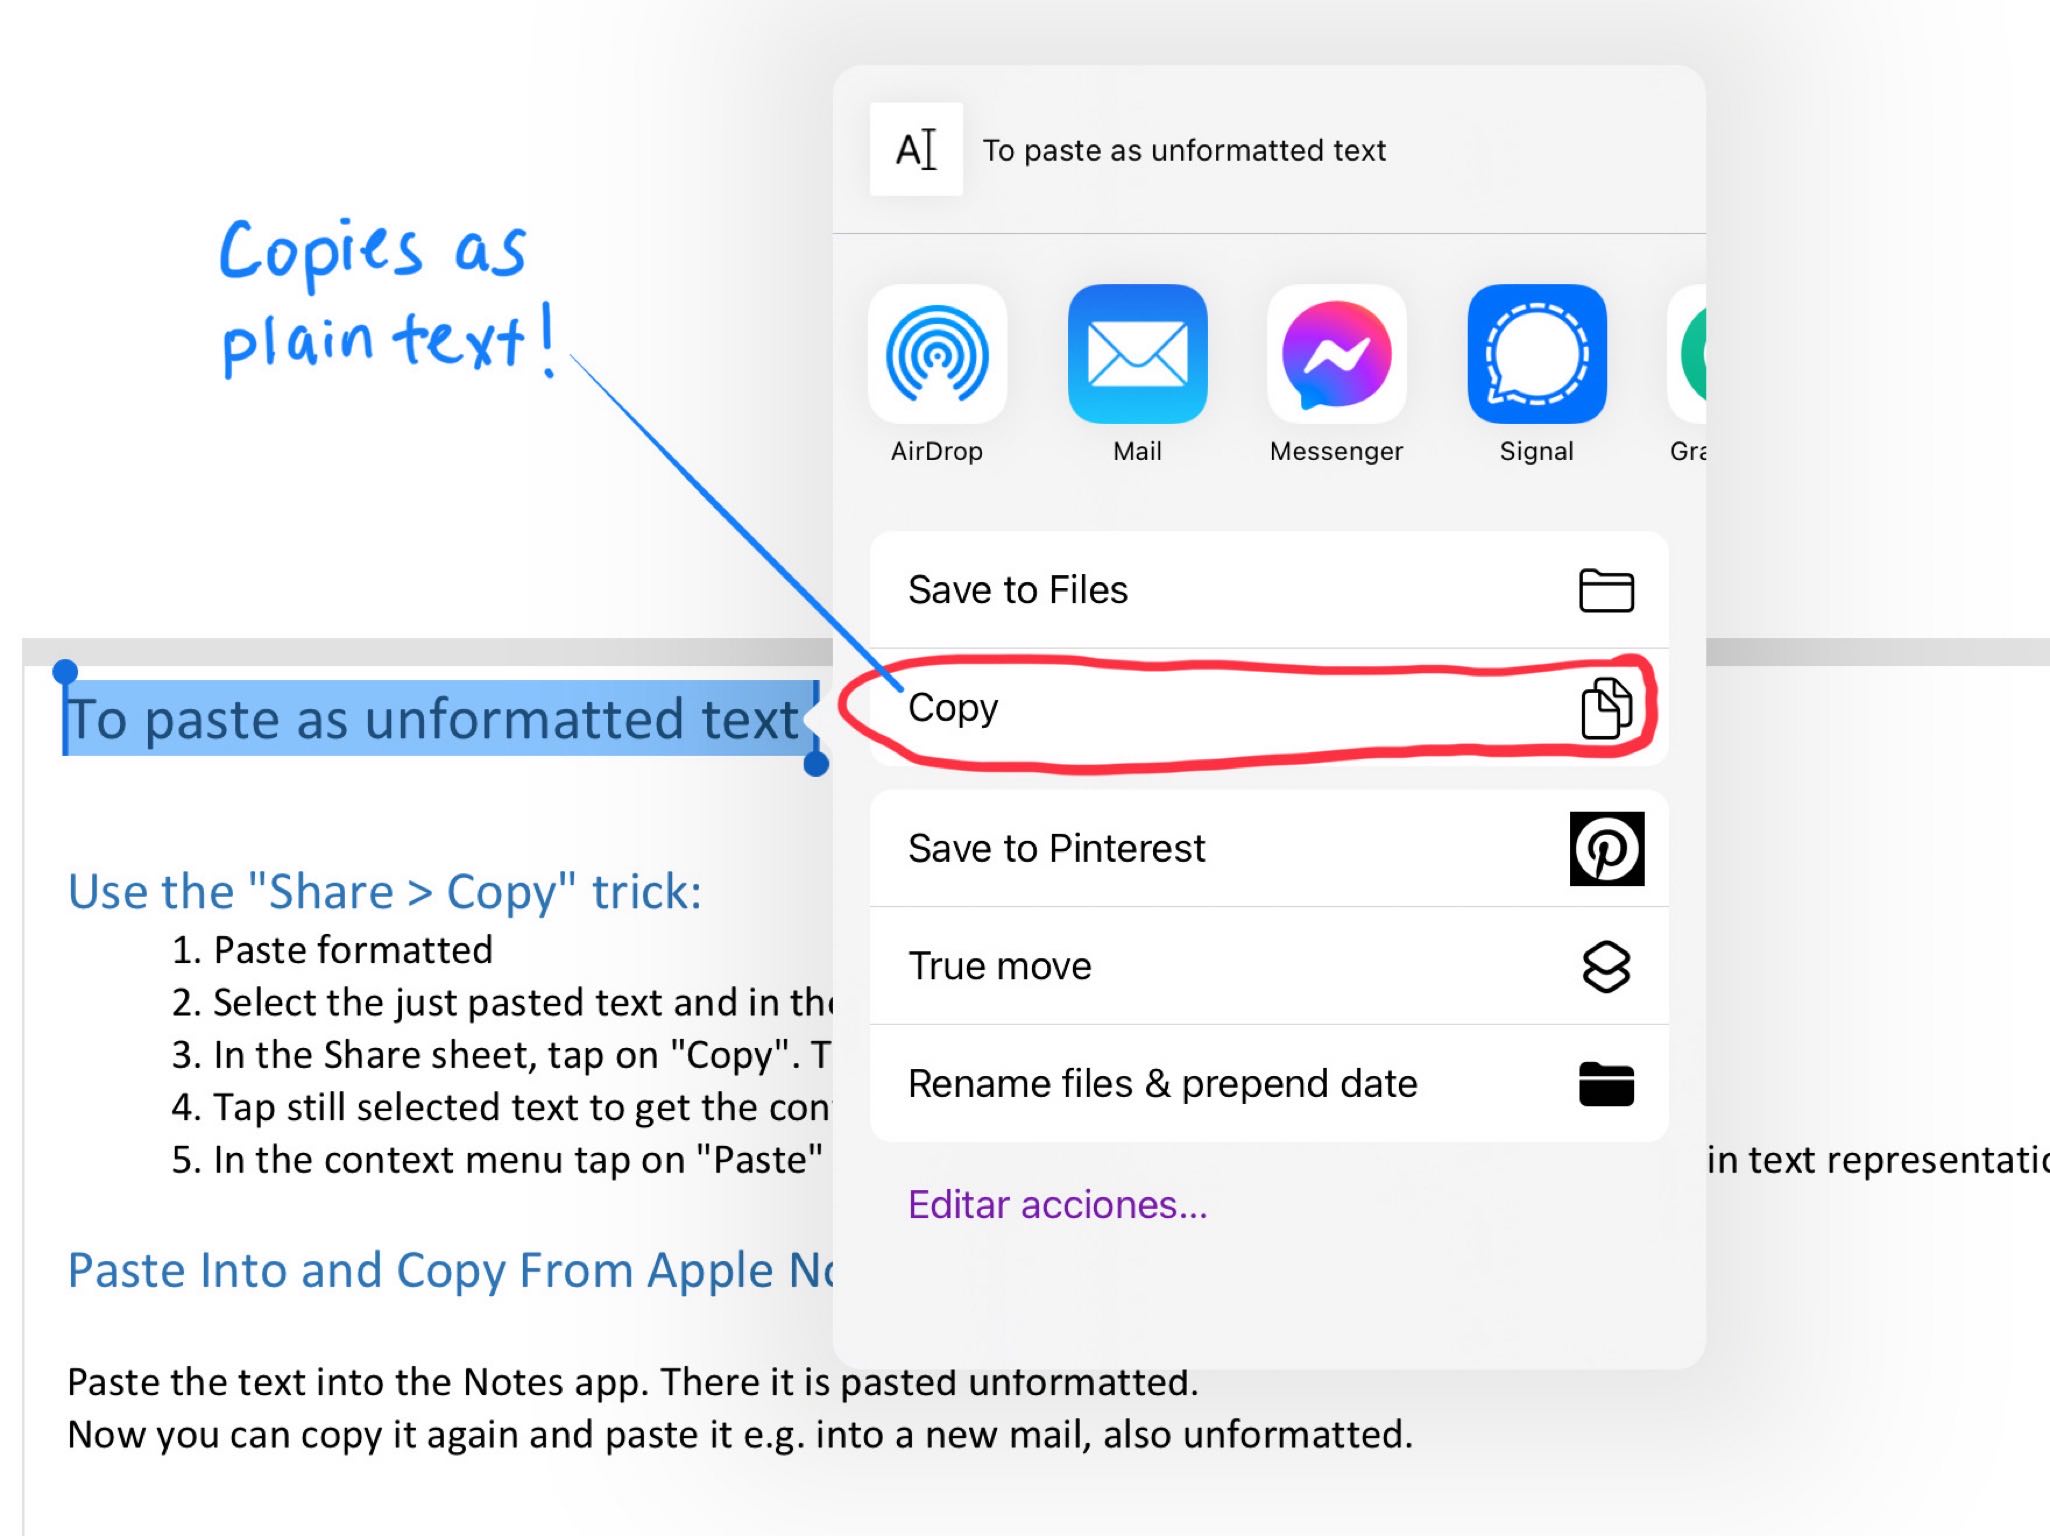
- Another option is to download and use the excellent–and free–Clipboard++ app. The procedure is as follows: copy text, open Clipboard++ (I use it so often, I have it in my dock), and the copied text appears as the first line in Clipboard++. Click on that text and it will be copied as unformatted text.

You can paste copied text as plain text using Clipboard++. In Clipboard++, click the copied text once to convert it to plain text, and then paste it into OneNote for iPad.
Again, it is vital that when you are pasting the plain text, you do so while the virtual keyboard is set to the correct language.
All three methods will remove the squiggly lines due to incorrect proofing language, but they come with limitations. If you copy text with images, they won’t be preserved, and you’ll lose formatting such as headers, bold or italicized text, and list items. You’ll also lose your hyperlinks.
If preservation of images, formatting, and hyperlinks are crucial, Workarounds #1 or #2 are more efficient.
How to Avoid Creating Notes in the “Wrong” Language in the First Place
The simplest way to prevent the issue of squiggly lines—short of turning off spell-check—is to set the language properly from the beginning. Here’s how:
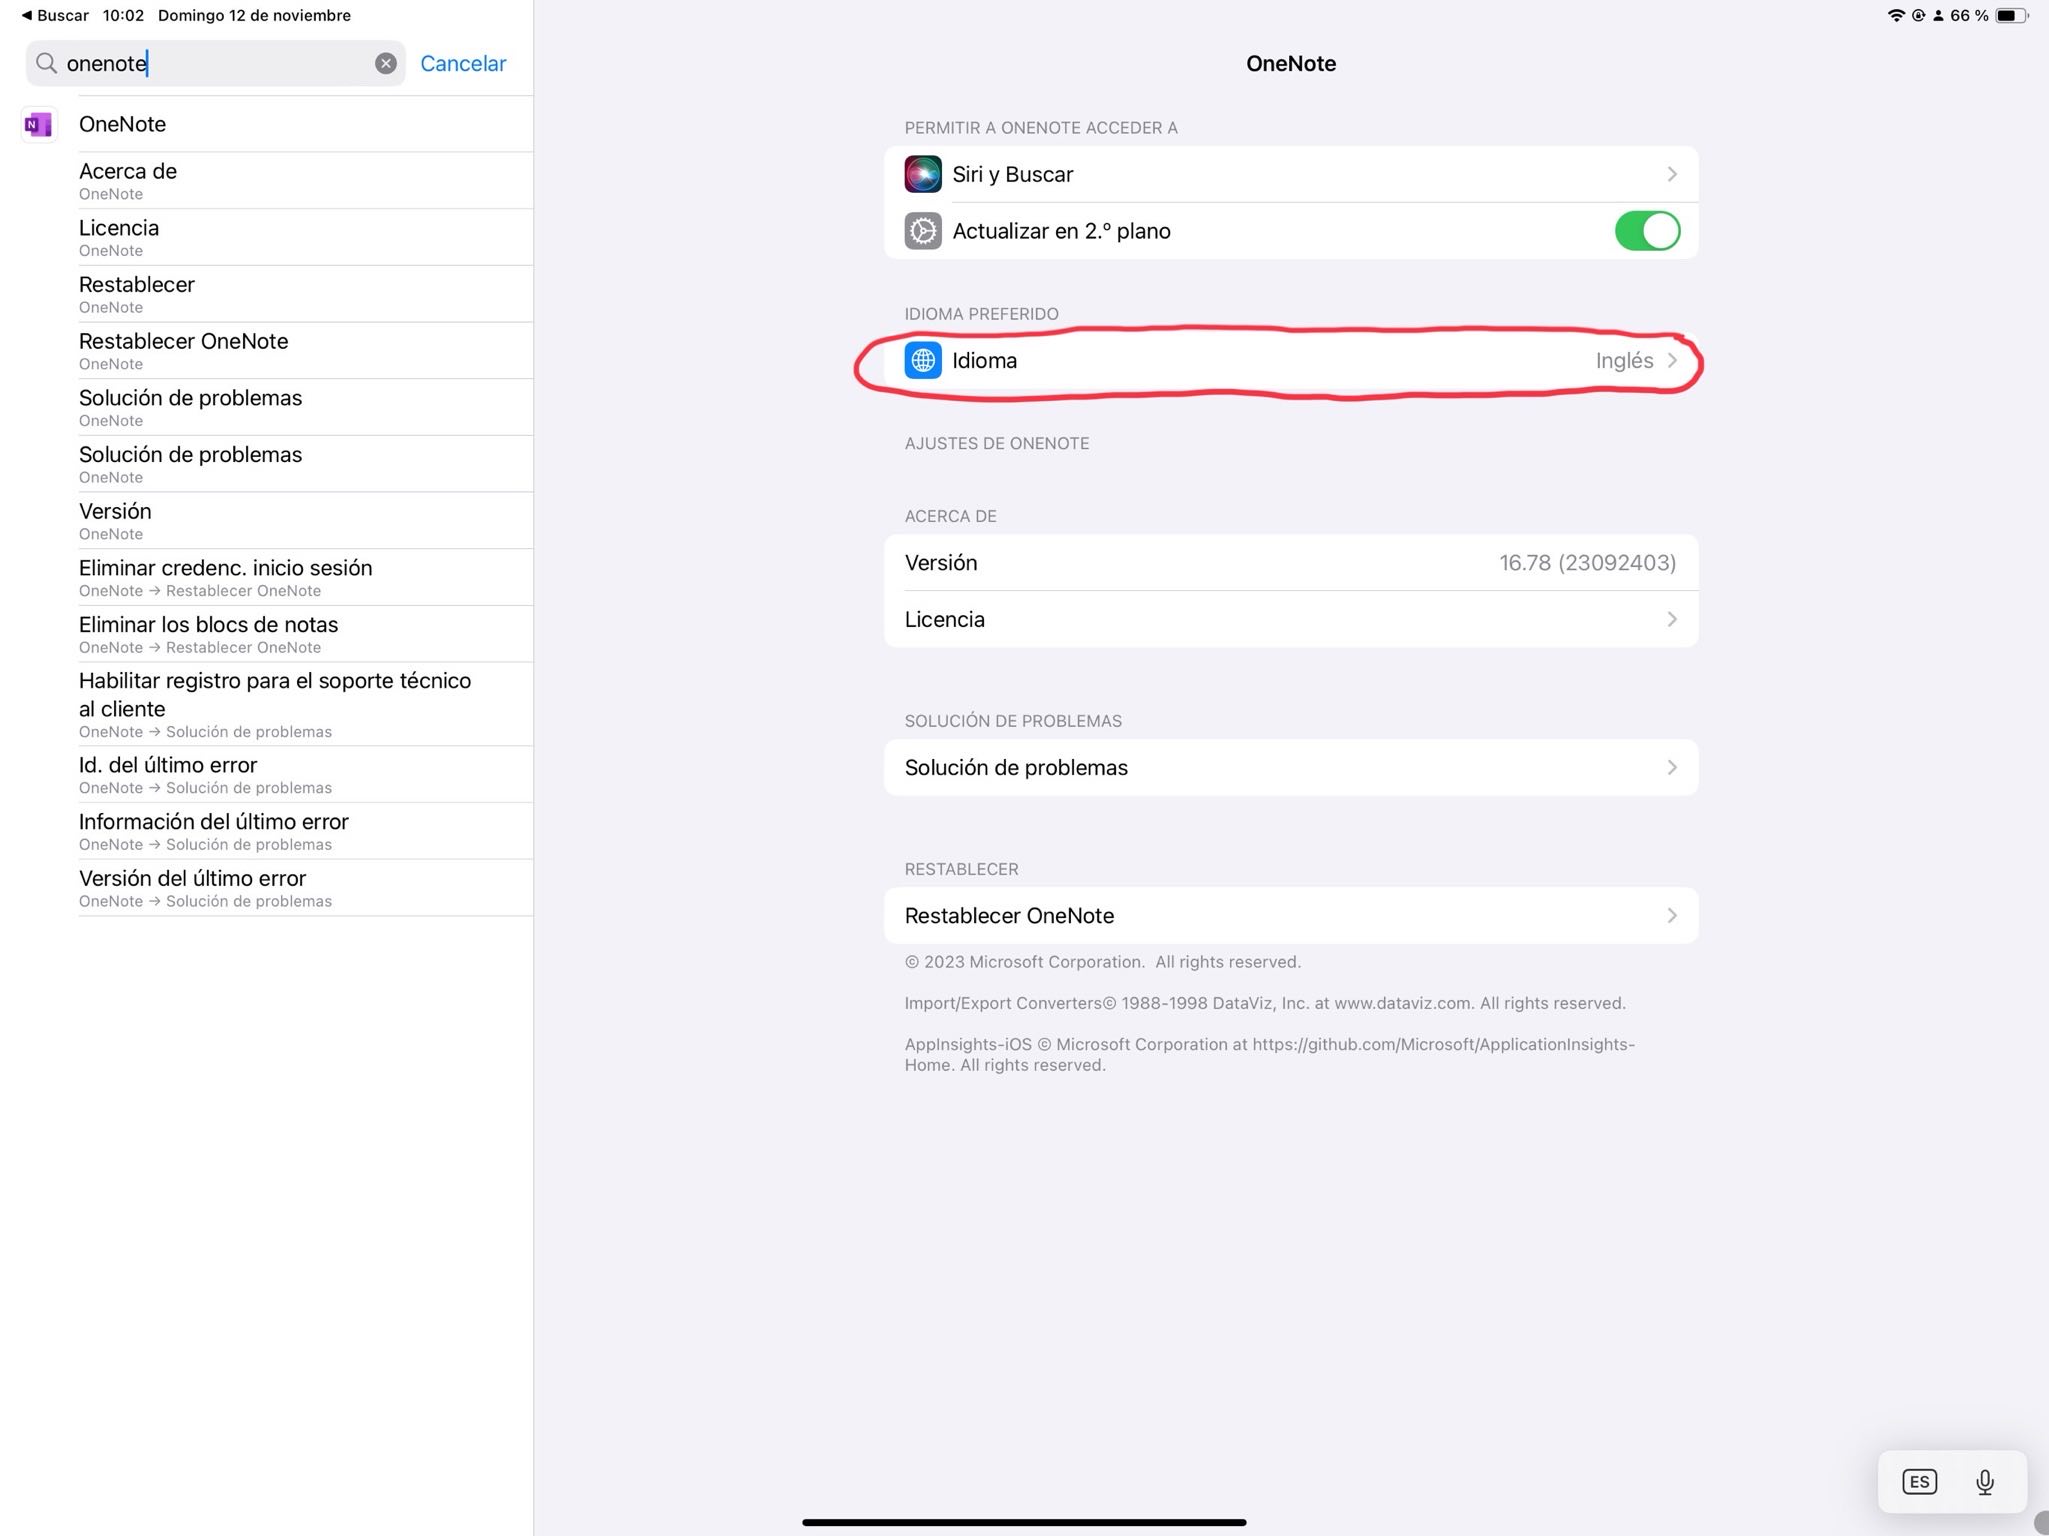
- If you’re pasting text from a web browser into OneNote for iPad, ensure that OneNote’s Preferred Language matches the language of the text. You can do this through iPad’s Settings → OneNote → Preferred Language, irrespective of your system language.
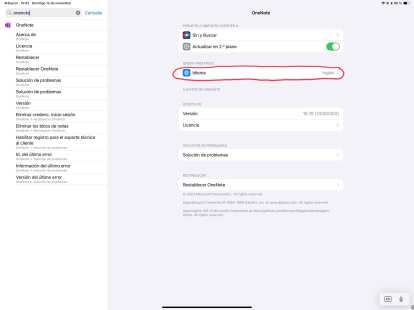
When pasting formatted text from a web page into OneNote for iPad, ensure that the language for OneNote (in iPadOS's system settings) matches the language of the pasted text.
This is crucial because when you are pasting text that was copied from a web browser, OneNote for iPad sets the proofing language to the “Preferred Language”. It otherwise has no intelligence to detect whether the text is in English, Spanish, French, etc. - If you’re typing text, make sure the virtual keyboard’s language matches what you’re typing. This is because when you are typing text, OneNote for iPad sets the proofing language to whatever language the virtual keyboard is set to (and not the “Preferred Language”).
When typing or pasting unformatted text in OneNote for iPad, make sure the text language matches the virtual keyboard's language.
Hopefully, this post has aided your understanding of OneNote for iPad’s spell-check and how to remove those pesky red squiggly lines.
If you have questions or additional insights, please leave a comment below.
")