Your MP3s on iPhone without iTunes, USB cable, or streaming: VLC
One year ago, I shared a method to transfer your music collection to Apple Music without the hassle of a USB cable or a traditional computer—a particularly relevant solution for people like myself who had a #soloiPad (no PC or Mac) lifestyle. Using a Windows virtual machine and an annual iTunes Music Match subscription, I found a workaround that, while incurring additional, albeit minimal costs, proved effective.
The discontent surrounding the iTunes and USB cable requirement is a common sentiment, often cited as an iPhone drawback. Despite the rise of streaming services like Spotify, there remains a sizable audience preferring to enjoy their existing music library without committing to a monthly subscription.
This issue hit close to home when my dad sought a way to add songs to his iPhone without relying on iTunes. Drawing from my experience with a solution I adopted for my iPhone 14 Pro last year, I recommended steering clear of Apple Music. Instead, advised him to opt for a third-party offline music player that seamlessly imports songs over the Internet, offering playback even without an internet connection. Like many iPhone users, he wasn’t aware that this was even a possibility.
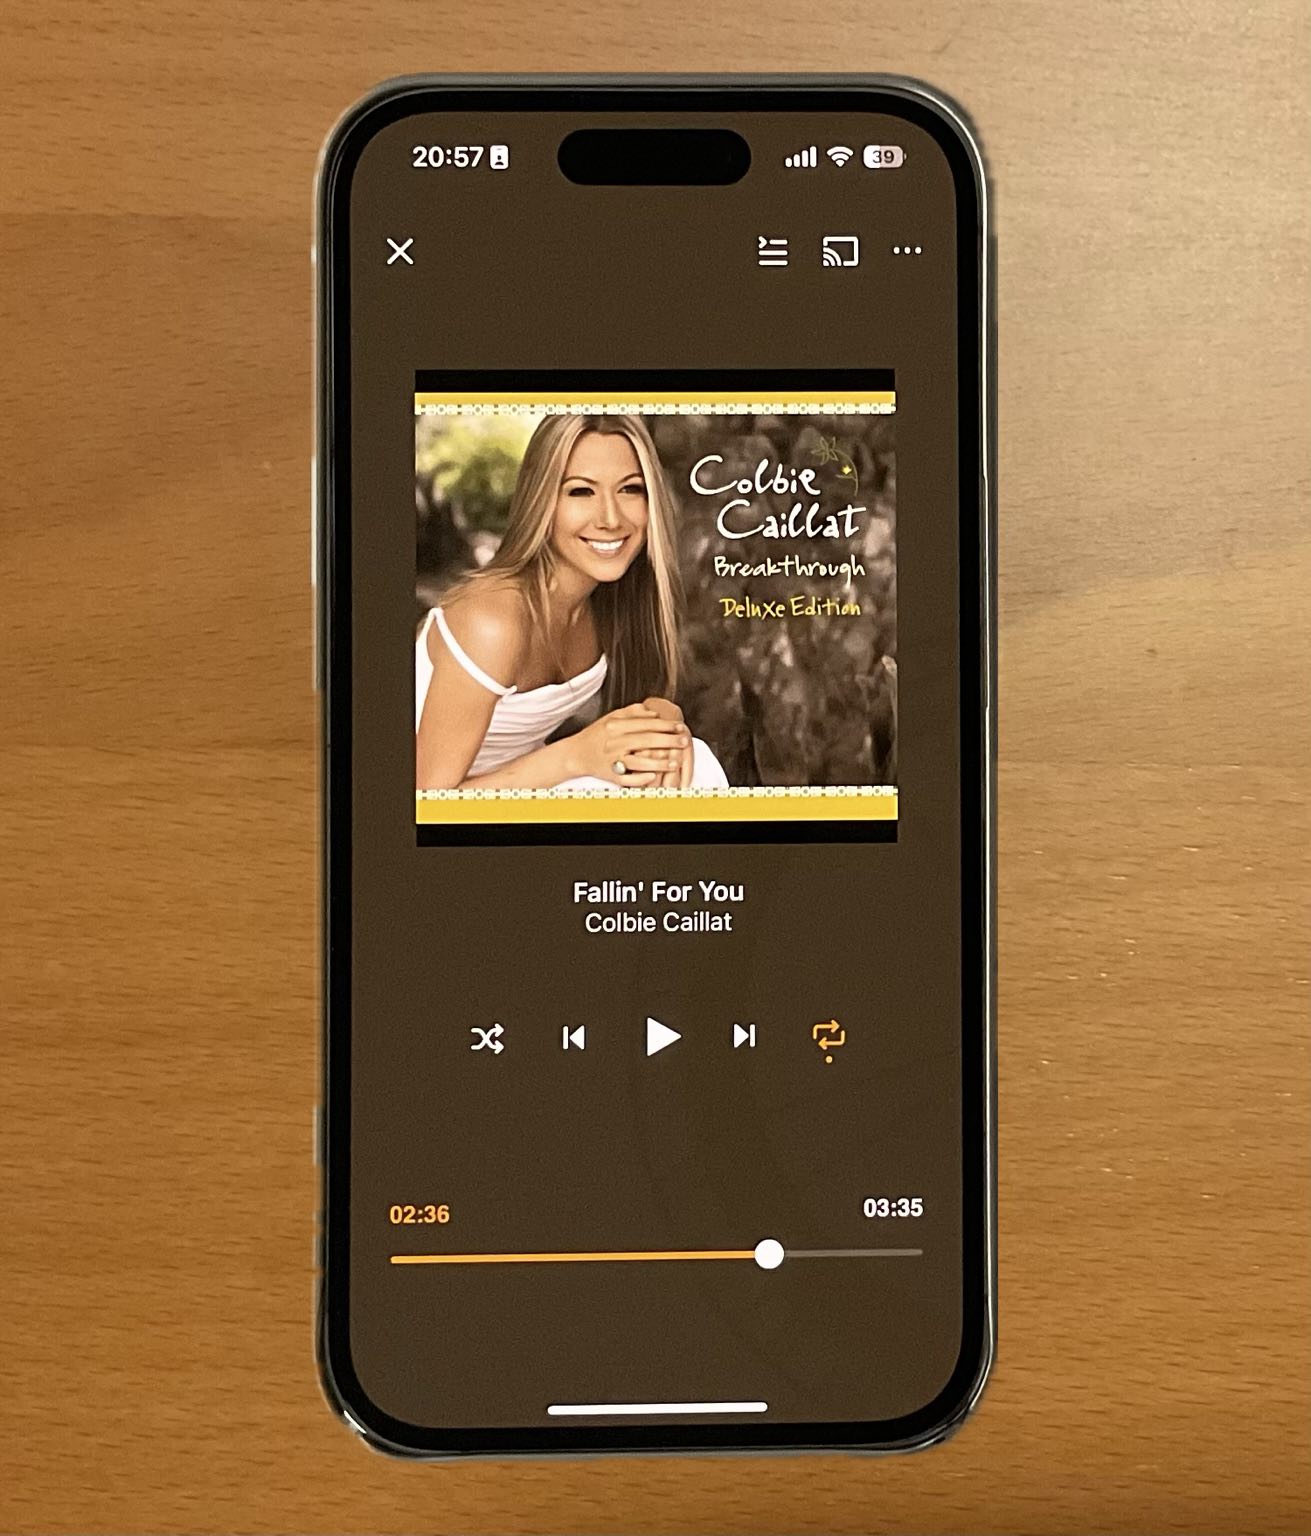
With numerous third-party apps available in the App Store, I personally explored several options and have happily settled on VLC. Its simple, yet powerful user interface with no ads due to being open source and 100% free made it my top choice. It’s also popular on other platforms, including Android, Windows, MacOS and Linux.
Recognizing that the process of transfering music to the iPhone—especially without cables—might seem daunting, especially for those unfamiliar with such procedures, I created a step-by-step video guide.
The procedure is fairly simple and involves the following steps:
- Download VLC. The be sure to open VLC as this will create a local folder named VLC on your Apple device. You will copy your MP3s into this folder in Step 4.
- Download the app for the cloud storage you use to store your music collection. I use OneDrive, but other popular options include Dropbox, Google Drive, and iCloud.
- Connect your cloud storage to the Files app. The Files app is the native file manager on iPhone and iPad.
- Copy your music from the cloud to VLC’s local folder on your iPhone or iPad.
Then, simply open the VLC app again and start playing music.
Watch the video below for a comprehensive walkthrough.
I paritcularly like VLC for the following reasons:
- It has the capability to play songs by genre. It’s bewildering how almost no other offline music player for iPhone has this functionality.
- You can copy folders containing MP3s into the local VLC folder.
- There are including: alphanumeric, by album, duration, and date of release. VLC can also play songs in random order.
- It works with Apple CarPlay and can cast to Apple Airplay-compatible devices like contemporary Samsung TVs.
- The app supports left/right and up/down finger-sliding gestures anywhere on the screen to rewind/forward and change the volume, respectively.
- It has an equalizer with 17 different presets.
- The app can also play videos.
- VLC is entirely free, with no need for payments to eliminate ads. (Consider supporting the developers through a donation; you can do this via Settings within the VLC app.)
Feel free to leave a comment with any questions or feedback. Here’s to enjoyable music listening without the iTunes hassle!
Alternate Methods to Adding Music to VLC
The method I described above seemed the easiest and most intuitive way for me to add my music collection to VLC. But there are other ways to do so, including:
- iTunes file sharing (but who wants to use iTunes?)
- Accessing Cloud Services through VLC’s network tab
- Downloading media files directly from the web
- Share via Wi-Fi
See VLC’s Media Synchronization guide for more information on the above methods.
Using Apple Shortcuts to Automatically Launch & Play VLC When You Start Your Car
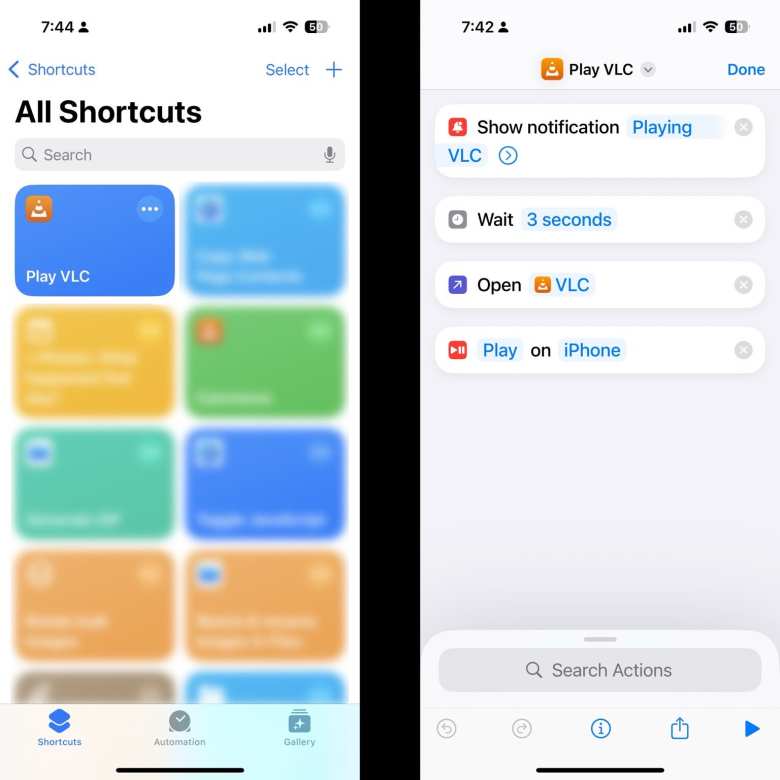
Below is an Apple Shortcut that I created to open and play VLC as soon as I turn on my car and my iPhone automatically connects to its Bluetooth receiver.

In short, it does the following steps:
- Shows the notification “Playing VLC” on the iPhone. The main point of this notification is to wake up the iPhone. The notification can say anything you want.
- Wait 3 seconds. The main point of this is to give the iPhone some time to wake up.
- Open VLC.
- Resume playing VLC from whatever playlist it was last playing.
You can download the Shortcut for your own use, or create it manually on your own phone.
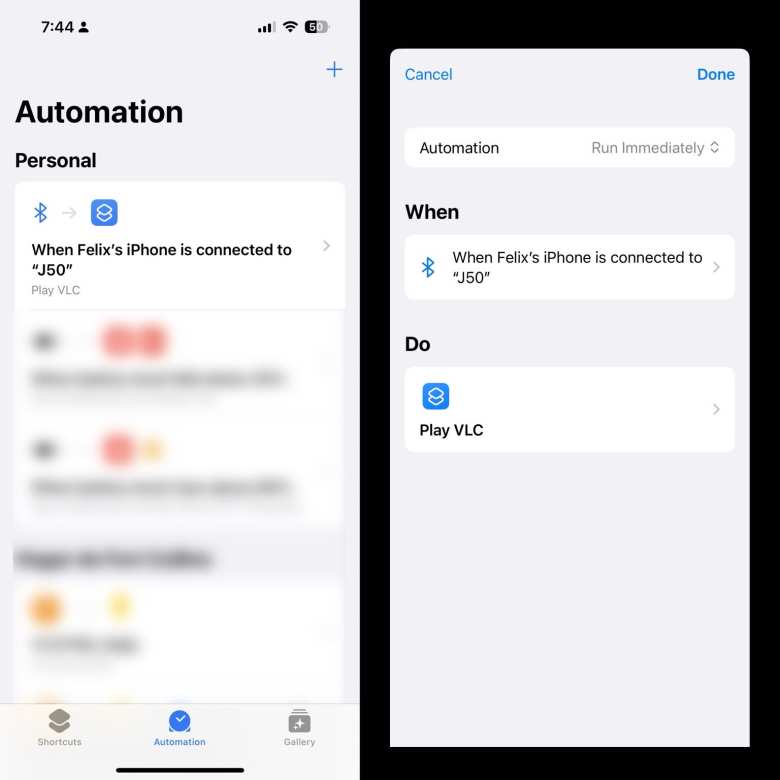
The last step is to create the following Automation to run the above Shortcut whenever your iPhone connects to your car’s Bluetooth. (Instead of “J50”—which is the name of my car’s Bluetooth—replace it with yours, such as “Honda Civic.”)

