Owning a now-classic car like the first-generation Audi TT Roadster comes with its charms and challenges. While it may lack modern amenities like Bluetooth connectivity and wireless charging, with a bit of ingenuity and effort, it’s possible to bring some of these conveniences to older vehicles.
Here’s how I retrofitted Bluetooth and wireless charging to Teeter, my beloved Audi TT, along with a rundown of how well the upgrades have performed.
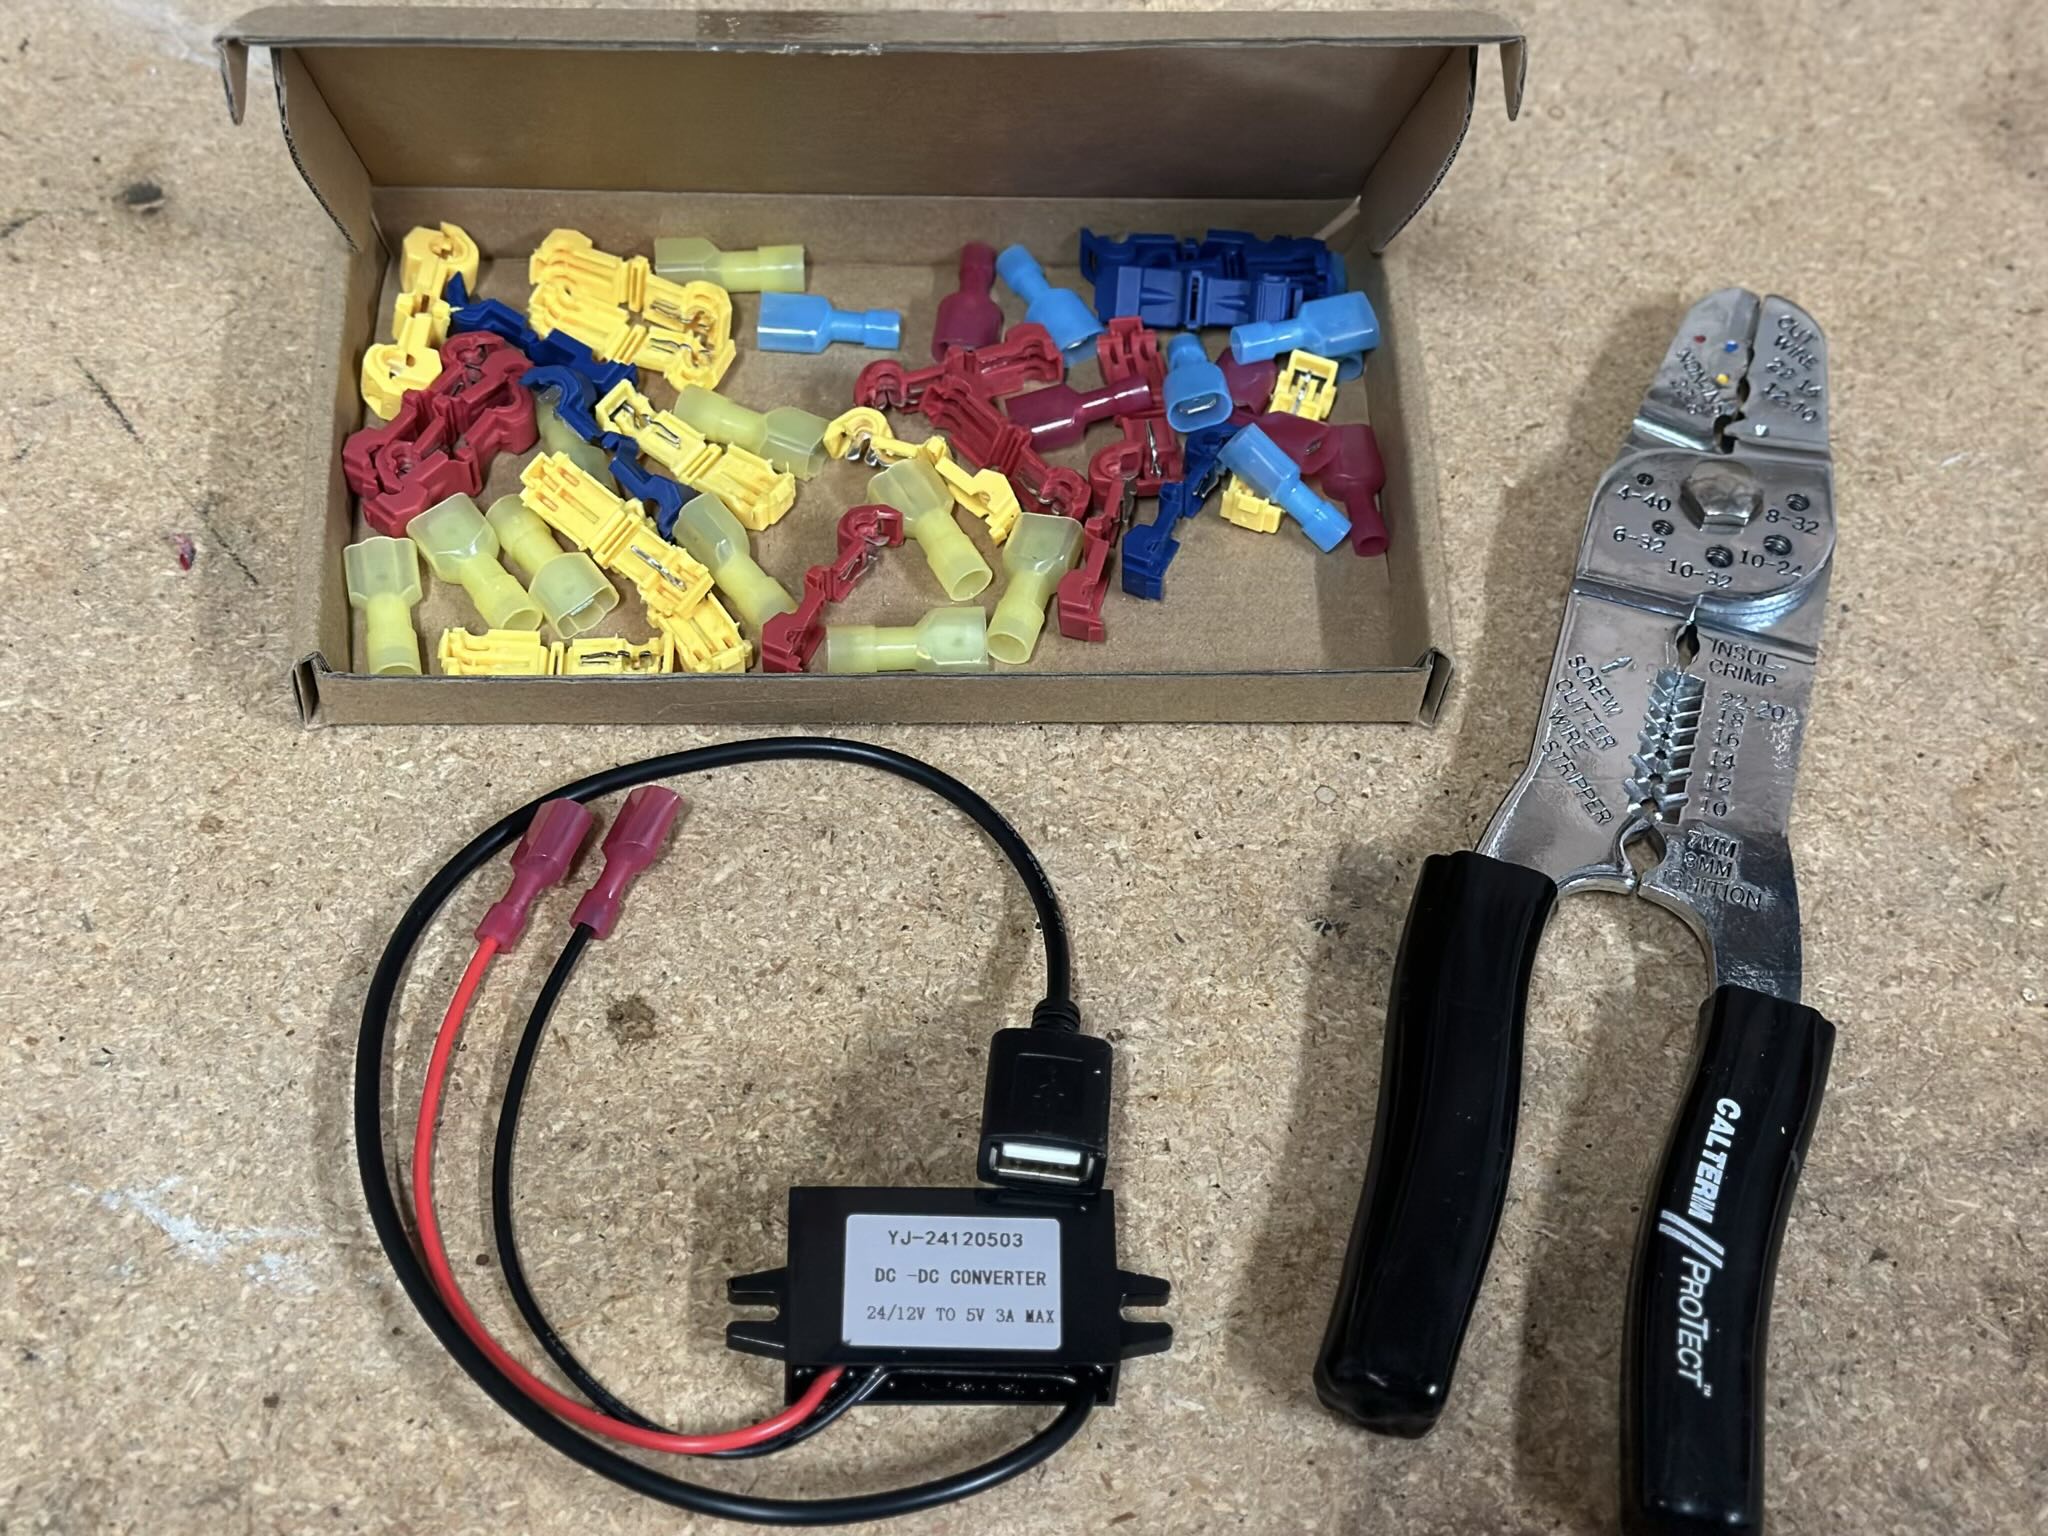
Parts List
I bought all the parts below from Amazon except for the vent mount. The prices below are what I paid for them, excluding sales tax and shipping unless noted.
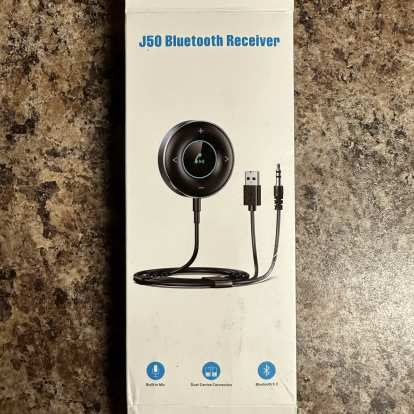
*In June 2024, I replaced the Jie Rui Bluetooth 5.0 Adapter with the J50 Bluetooth 5.3 Receiver, which preserves bass response much better, allows for hands-free calls, and provides buttons for activating the phone’s voice assistant (Siri in the case of my iPhone) and previous/next tracks. This enhancement entailed purchasing Items 3, 6, and 10.
The total cost of the above is $143 plus state sales tax and shipping. The vast majority of this was for the RoundMount vent mount and Apple’s Magsafe wireless charger.
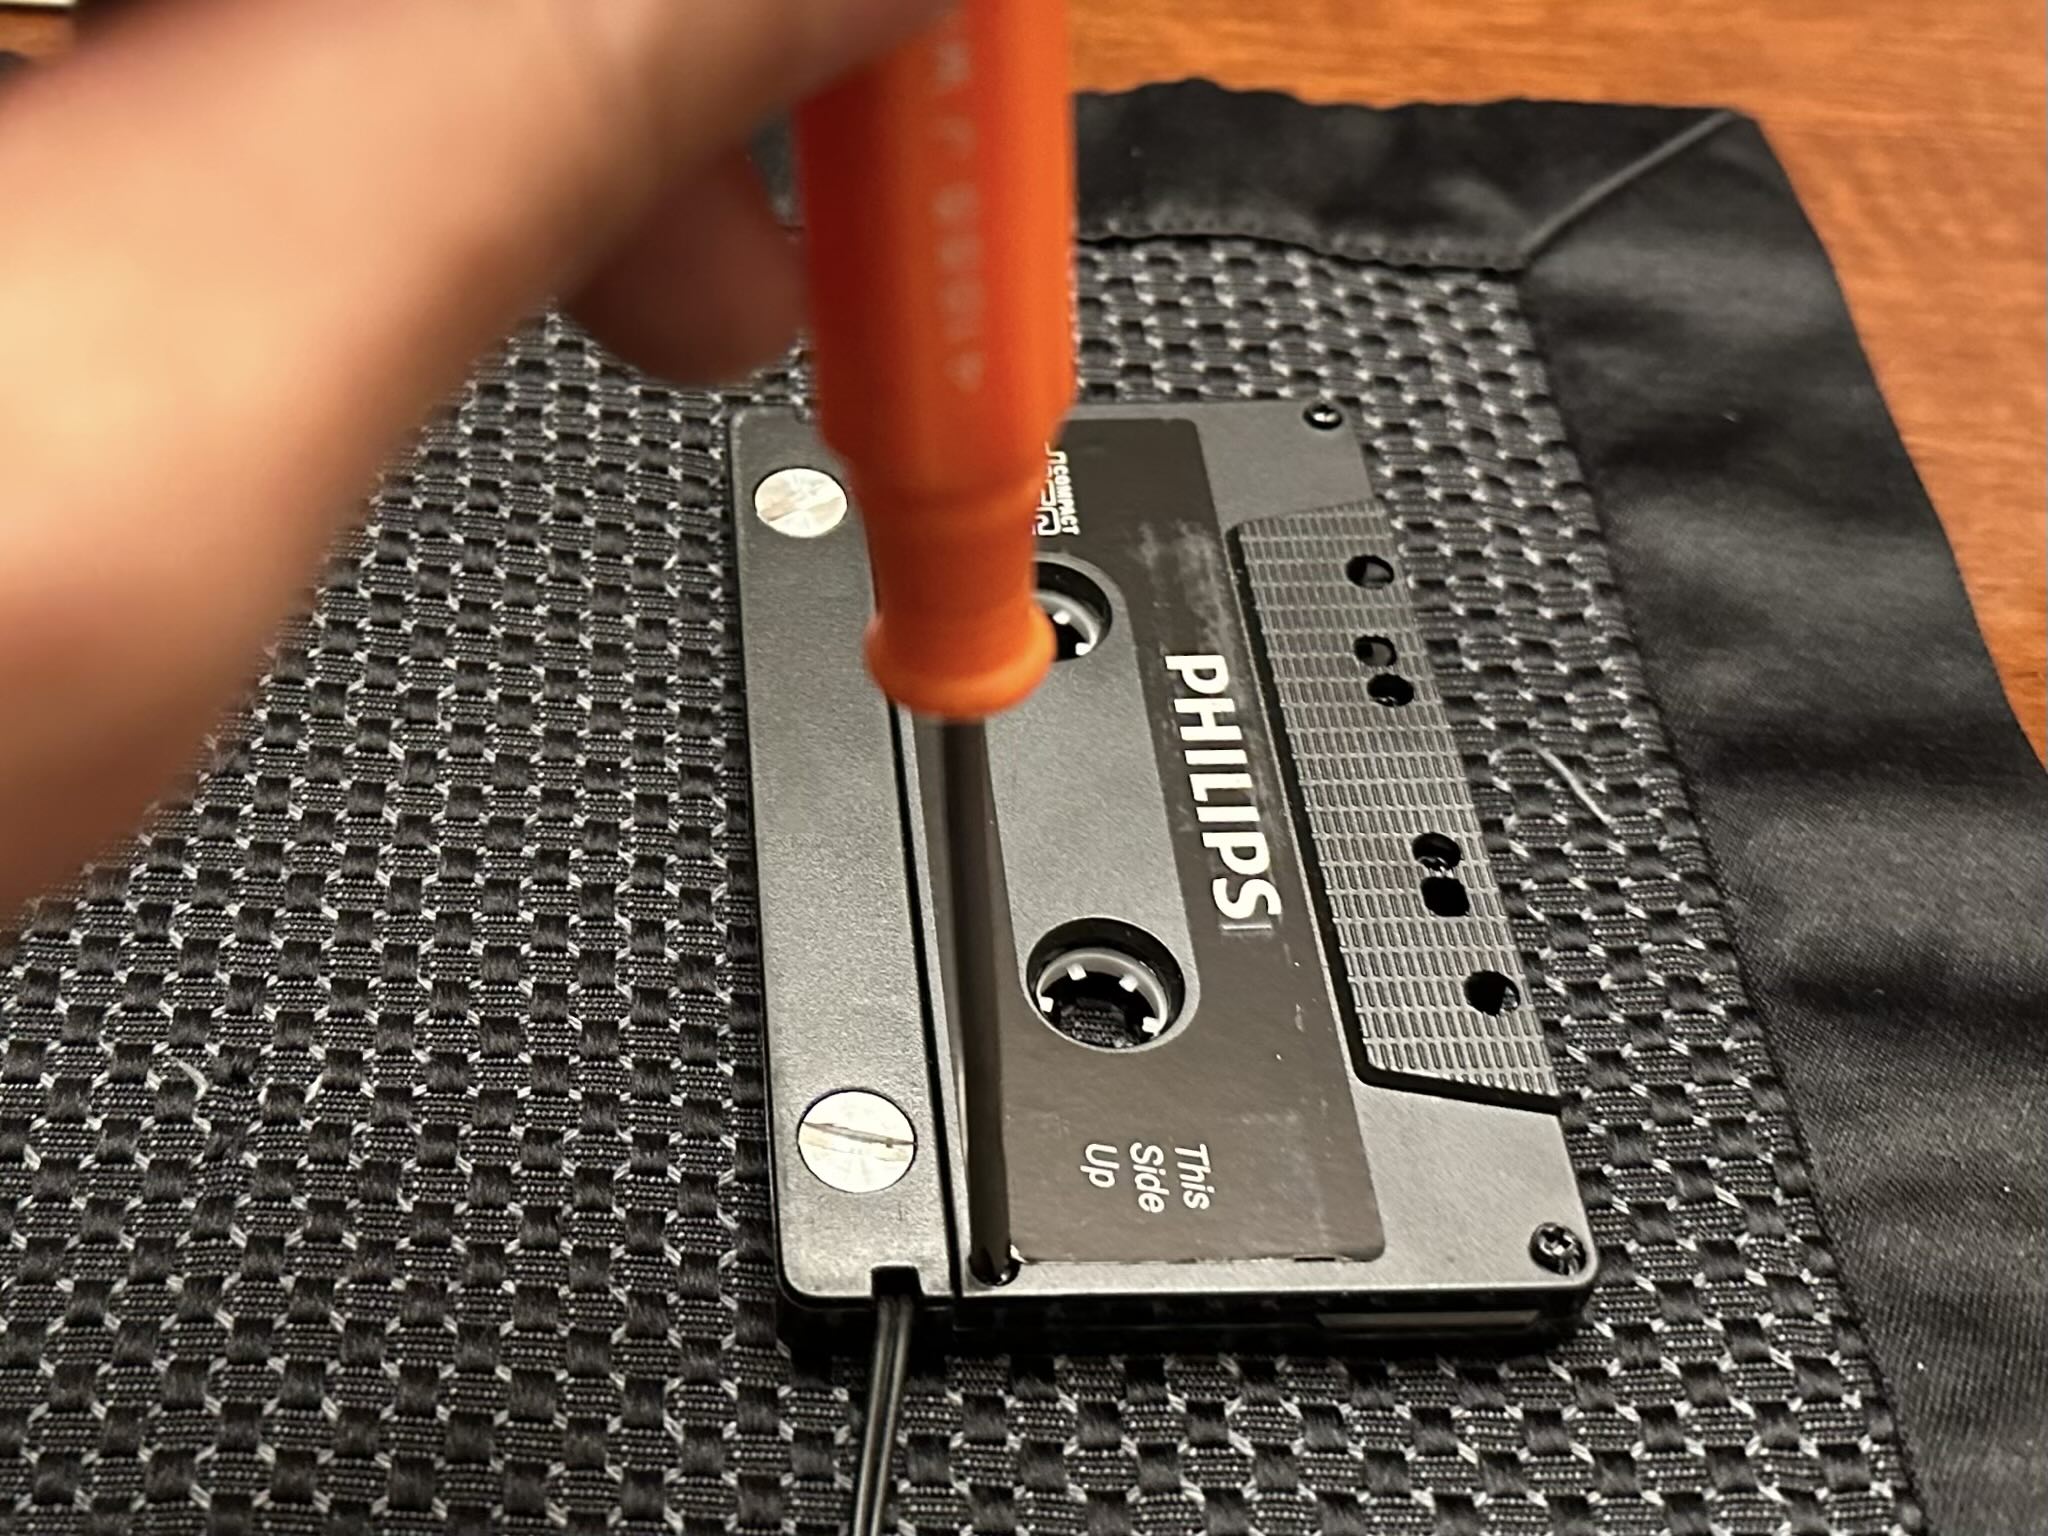
I already had a Phillips cassette adapter ($5 on ebay) which I used for an auxiliary input to the radio. I’ve used it reliably for the last 10 years, with good sound.
A better Aux-In solution would be using the CD changer input—instead of using the tape player—with an adapter. I believe that the Grom Audio AUDA1 AUX cable input car stereo kit would work. But it costs $97—significantly more than the humble cassette adapter.
It should be noted that I also used zip ties, a couple of wires, and 3M VHB tape for this project. But I already had those.
Procedure
Below is an overview of the steps I did to perform this retrofit.
Adding Aux-In to the Stock Radio: I opted to integrate an AUX-in functionality to the stock radio using a Philips tape adapter. By rerouting the cable through the rear of the radio and carefully reassembling it, I achieved a neater appearance while preserving functionality.
Unscrewing the Philips tape adapter so that I could make its 3.5mm cable go out the opposite side.
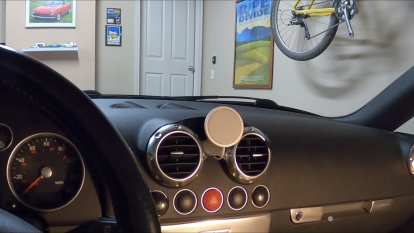
Installing Vent Mount and Wireless Charger: After acquiring a vent mount from RoundMount, I removed the magnets from its swivel mount and attached an Apple MagSafe wireless charger using 3M VHB (Very High Bond) tape. Despite a five-week wait for shipping from Poland, the mount’s high-quality construction and design made it worth the wait.
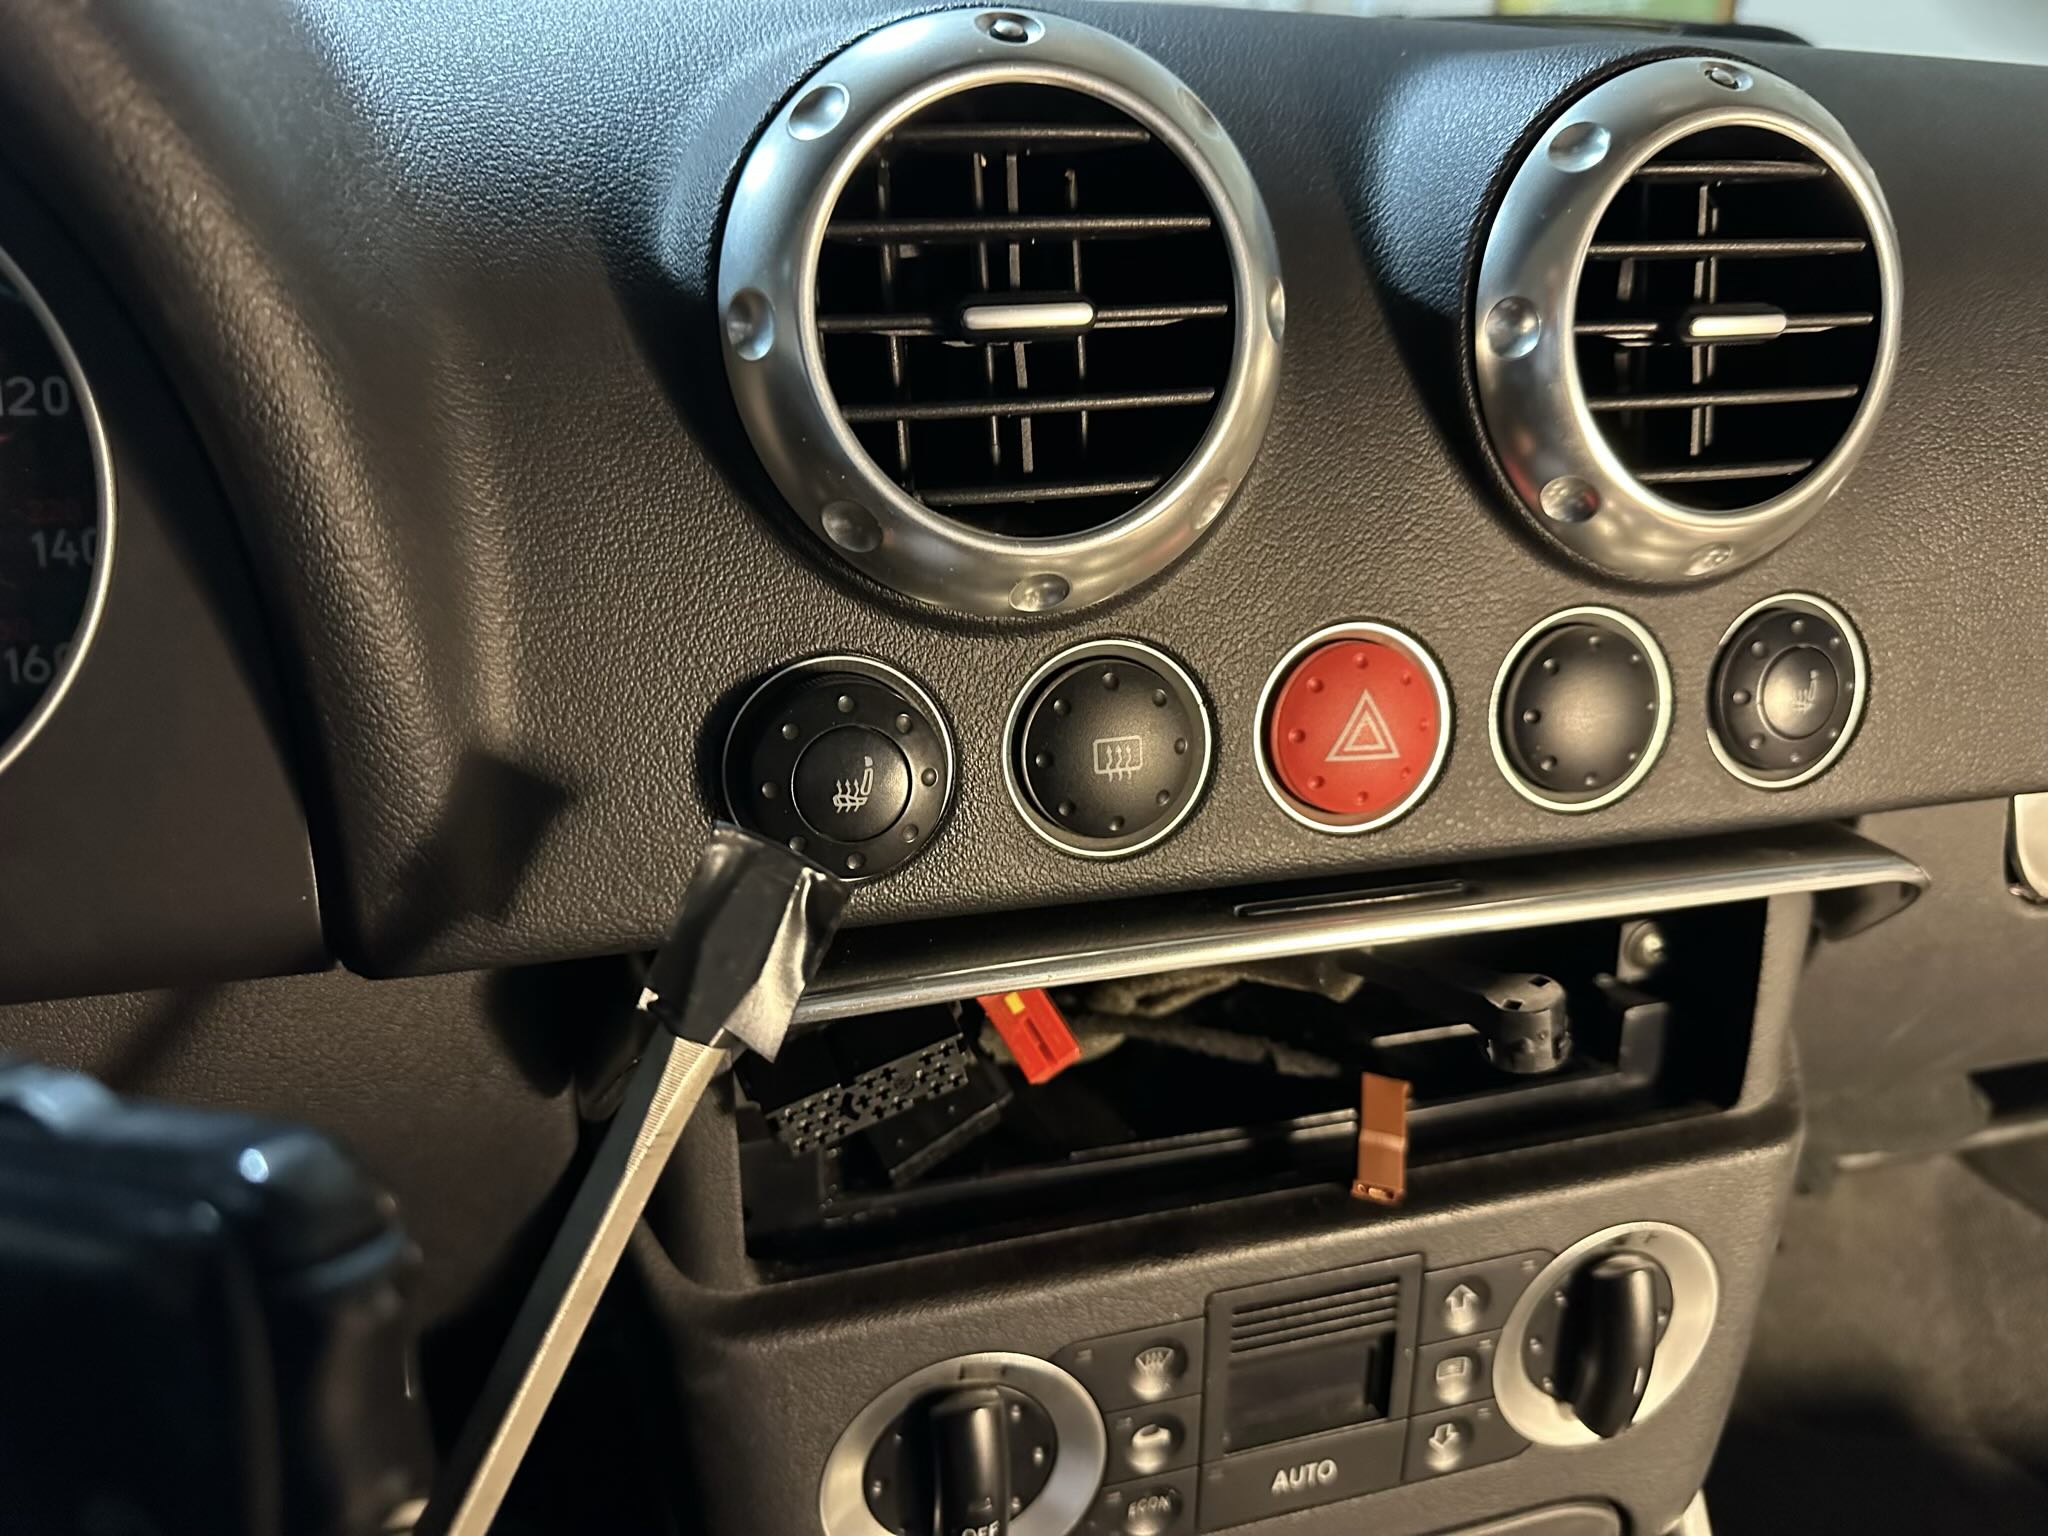
The Apple Magsafe charger mounted to a RoundMount vent mount made specifically for a first-generaiton Audi TT. Installing the mount required removing the center vents, which was achieved without too much difficulty using a flat screwdriver. I covered the screwdriver with electrical tape to avoid marring the vent bezels or the dash.
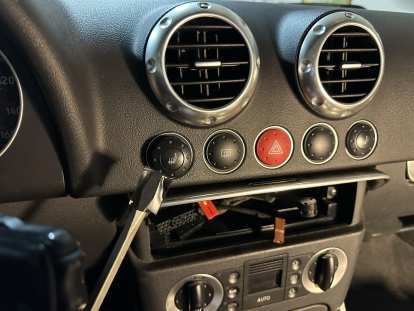
Using a big flat screw driver, covered with electrical tape, to pry out the center vents.
Installing the Microphone: I replaced the stock Audi microphone with one included in the Bluetooth module I purchased. This involved removing the instrument cluster, which sounds intimidating but is really quite easy (follow the instructions in this video).
Removing the instrument panel in order to remove its stock microphone and replace it with one that came with my Bluetooth module. Then I neatly glued the new microphone with silicone adhesive.
Glueing in the new microphone to the back of the instrument panel with silicone adhesive. I also neatly attached the microphone cable to the rear of the instrument cluster with zip tie mounts and zip ties. The J50 Bluetooth 5.3 Receiver I ultimately used in June 2024 featured a round, wired 4.5cm-diameter “puck” with buttons for the previous/next track, volume, stop/play, and voice assistant. This puck has a built-in microphone for phone calls and using the phone’s voice assistant (Siri in the case of my iPhone). It also had adhesive backing–handy for sticking it to the right side of the instrument cluster.
In June 2024, I replaced the Jie Rui Bluetooth Adapter I was initially using with this J50 Bluetooth Receiver that worked much better.
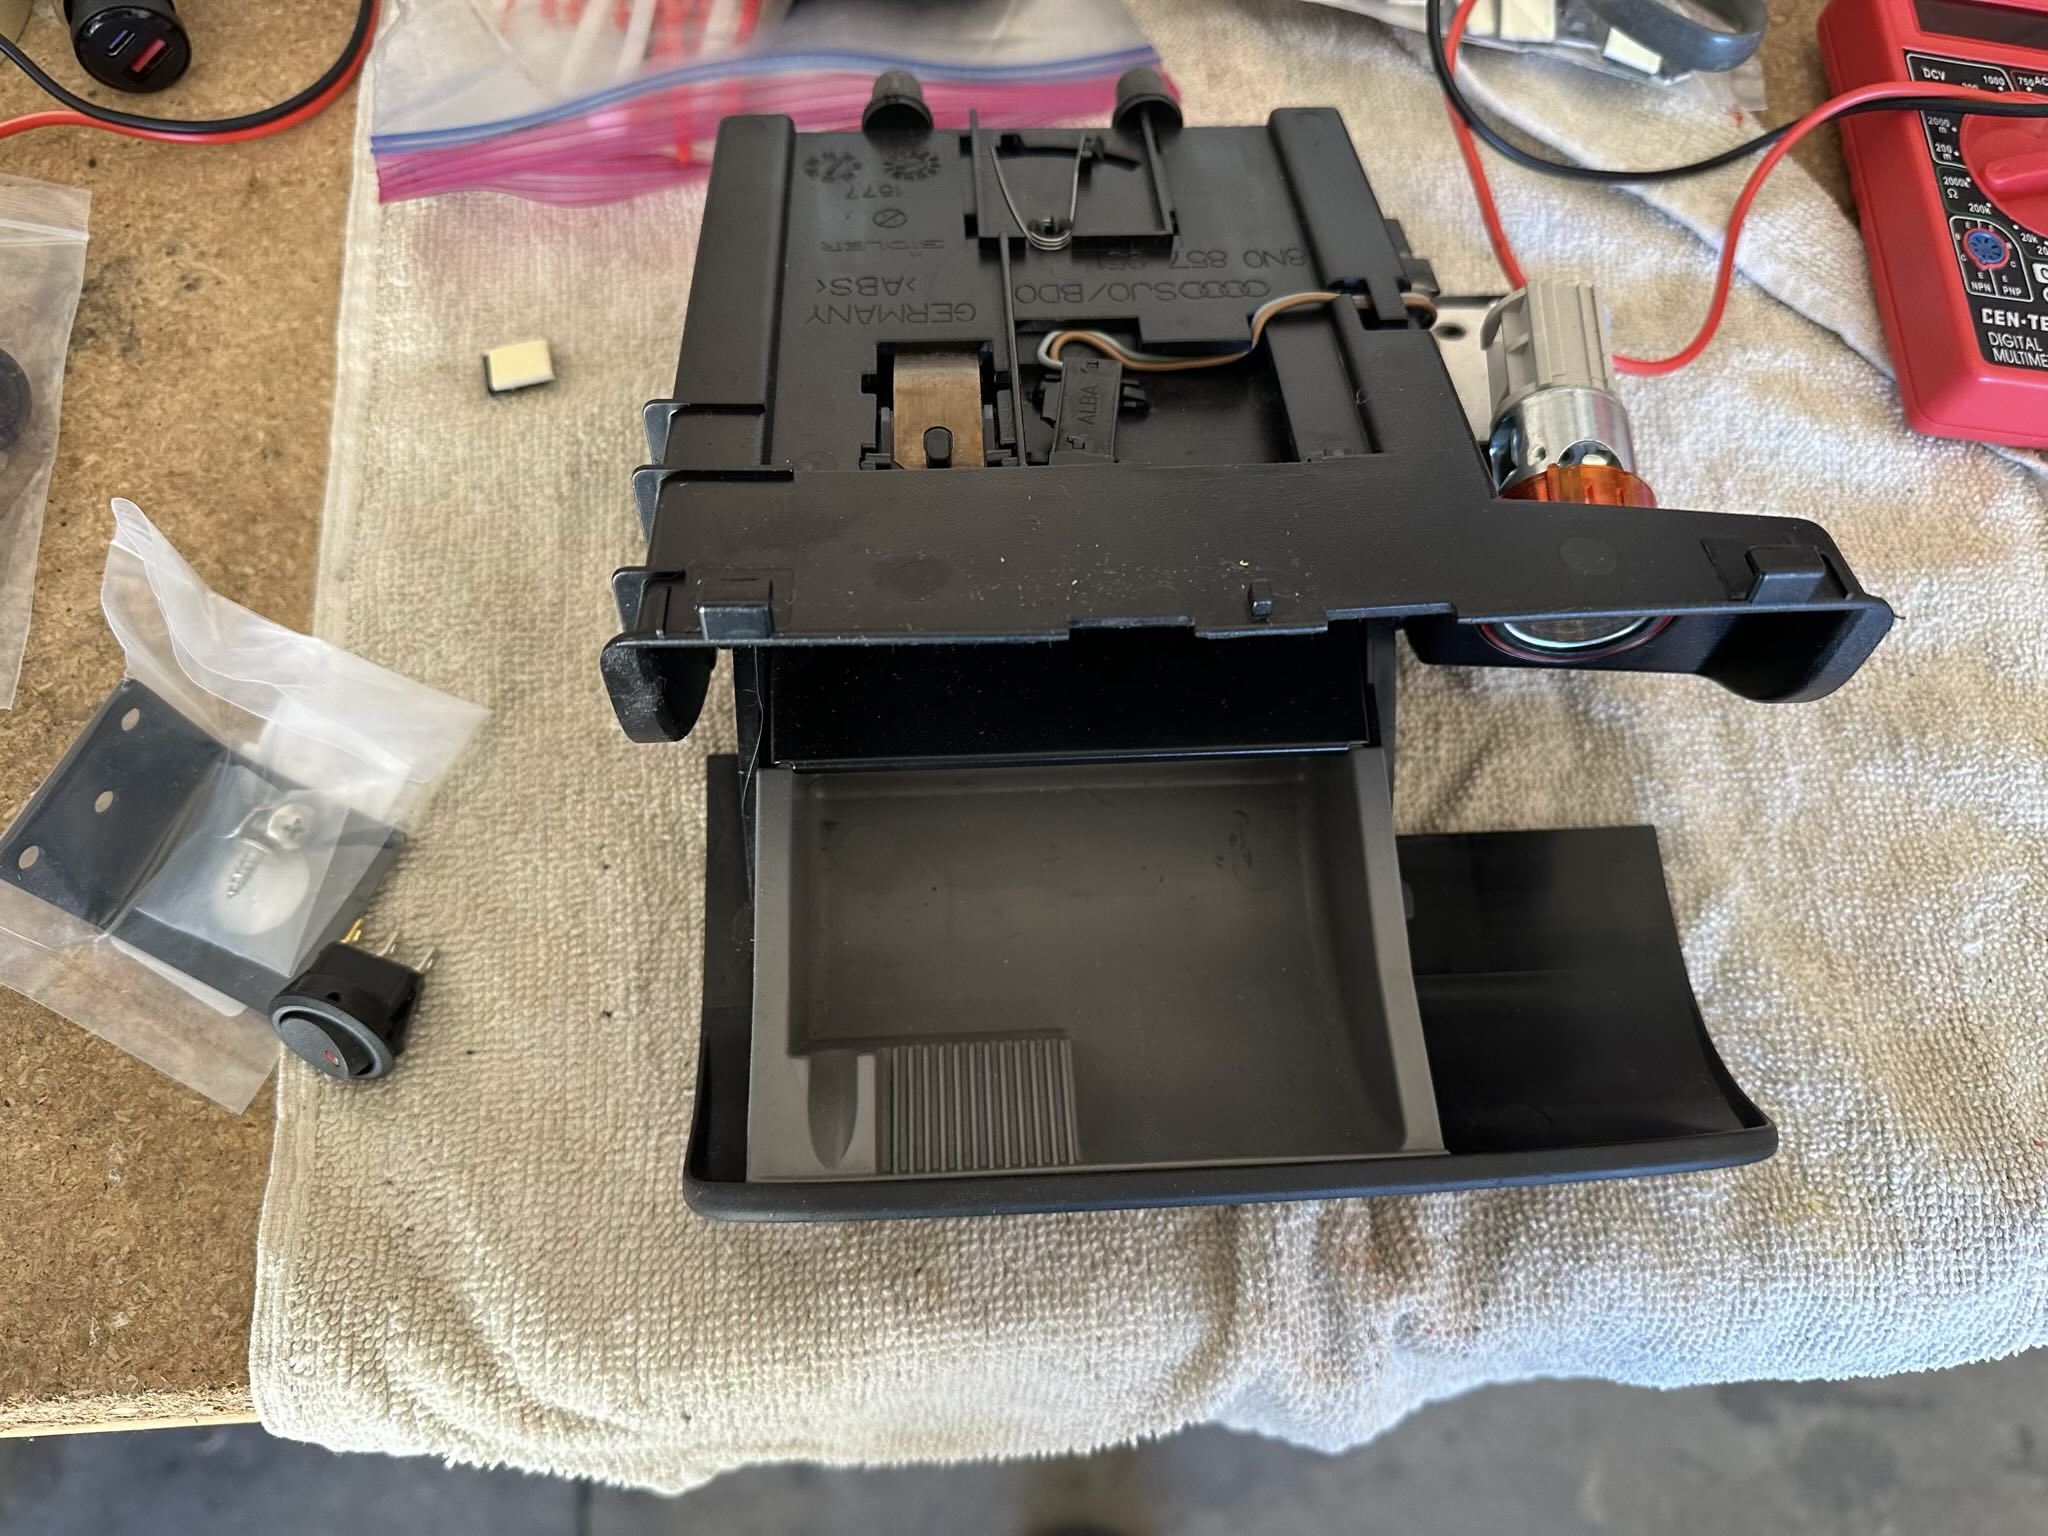
Adding USB Adapter and Power Switch: I incorporated a USB adapter and power switch for the MagSafe wireless charger, ensuring a clean installation while keeping the stock cigarette lighter free.
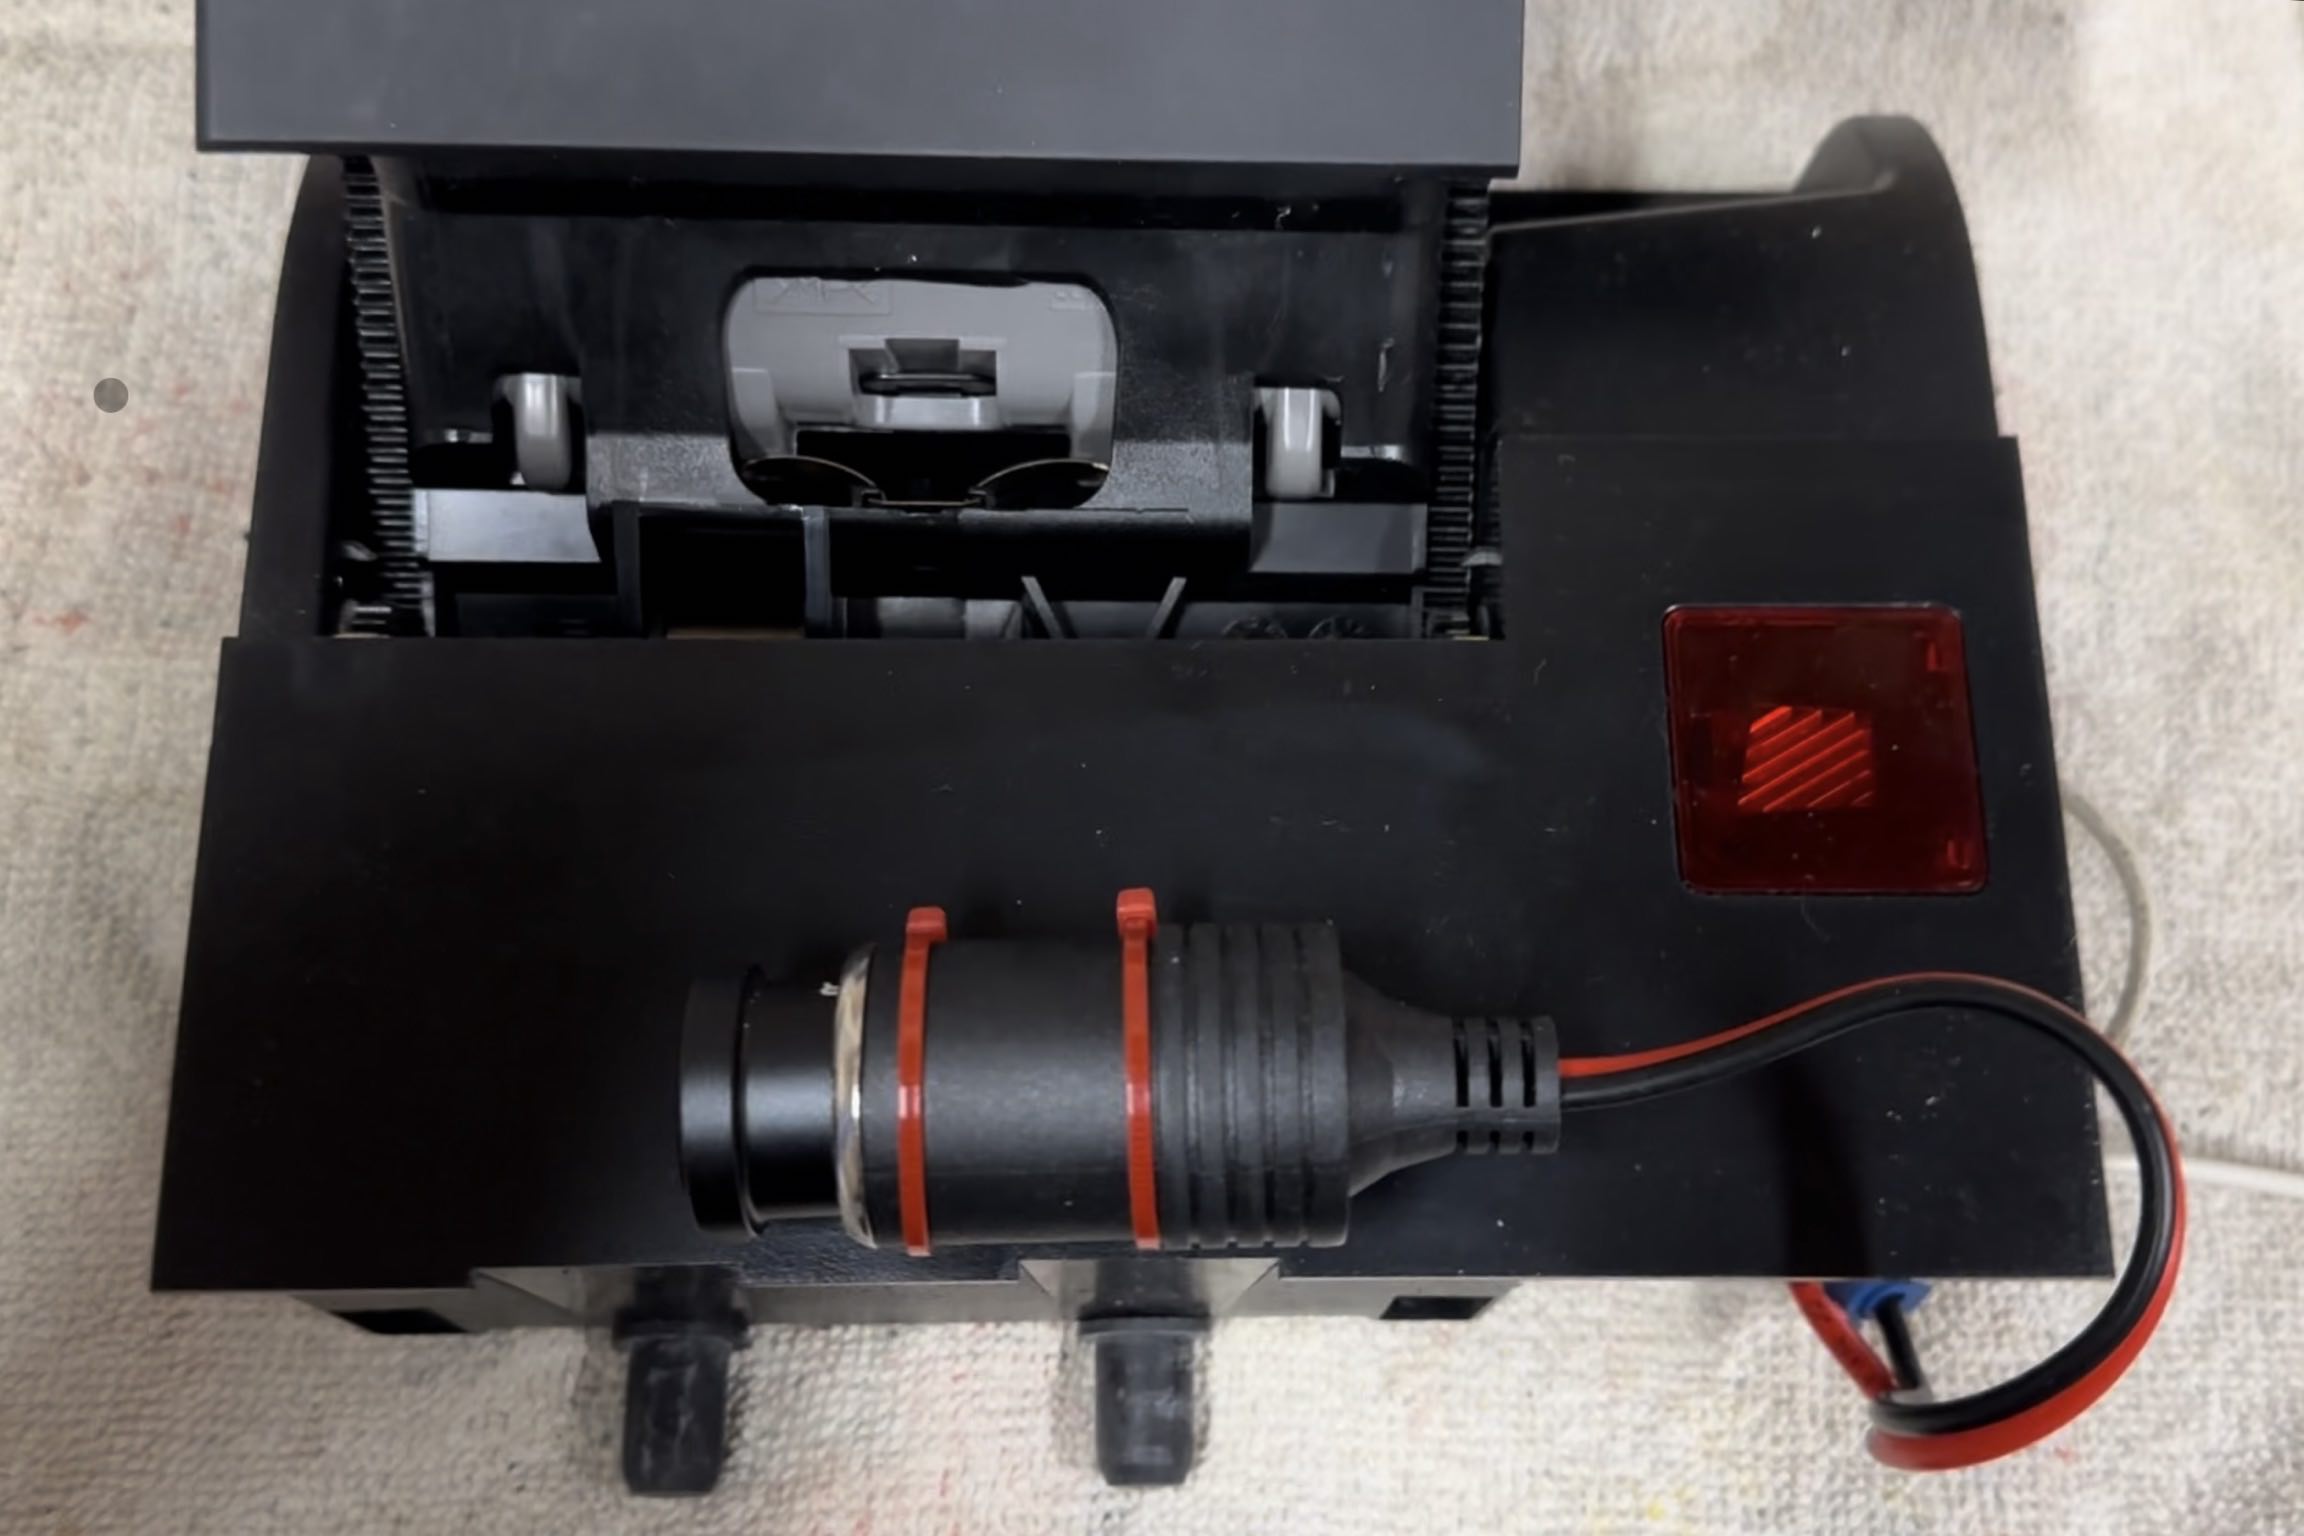
Removing the ashtray to add a switch for the wireless charger. By wiring a second cigarette lighter with a lighted switch, I gained control over the wireless charger’s power supply while keeping the first lighter socket available. The USB adapter—which plugged into the second lighter socket—was rated 30W and could provide 20W to its USB-C port. That is more than enough to power the 15W Magsafe charger.
I mounted a second cigarette lighter socket underneath the ashtray.
Installing the Bluetooth Module: Connecting the microphone and tape adapter’s 3.5mm jack to the Bluetooth module facilitated seamless integration. Since I wanted it to only operate whenever the radio was turned on, I tapped into the radio harness’ ignition-switched 12V (black/blue) and ground (brown) wires to power it. (When I upgraded to the J50 Bluetooth 5.3 Receiver in June 2024, I connected a 12V-to-USB adapter–Item 10–to those taps to power it.)
I used this 12V to 5V USB converter to power the J50 Bluetooth 5.3 Receiver. I connected it to the radio's input 12V leads using wire taps.
Videos
Below is a video of performing the steps above. It took me approximately five hours. However, I was being very meticulous. I also took a lot of photos and videos for this write-up.
The video above is from when I was using the Jie Rui Bluetooth 5.0 Adapter in December 2023. Had I initially installed the J50 Bluetooth receiver—the one I ended up using—I could have skipped the “Install microphone” step shown in above video altogether, since it already comes with a built-in mic.
The video below is a demonstration of my system after I replaced the Jie Rui adapter with the J50 Bluetooth 5.3 Receiver in June 2024. Bass response was much better and I could use it to activate my iPhone’s voice assistant. (With the Jie Rui Bluetooth adapter, Siri would not work through the car’s speakers, nor would phone calls.)
I also tried calling my mom using the J50 Bluetooth Receiver. She could hear me loud and clear, and I could hear her well through my car’s speakers. (With the former Jie Rui Bluetooth adapter, I had to use the phone’s speakerphone instead.)
For convenience, I set up an Apple Shortcut on my iPhone to automatically launch my preferred music player–VLC–whenever the car is started (and hence the J50 Receiver is connected via Bluetooth to my iPhone). If a song was already playing in VLC, the song will be resumed; otherwise, I would have to select a song or playlist.
Performance
Bluetooth Connectivity: Overall, the Bluetooth connection has been quick and reliable, with no signal interruptions.
Mount and Wireless Charging: The vent mount positions the phone perfectly for easy access while driving, and the Apple MagSafe charger provides strong and efficient wireless charging.
Hands-Free Calling:Unfortunately, the Jie Rui Bluetooth module’s hands-free calling feature doesn’t work with my iPhone, necessitating the use of the iPhone’s speakerphone instead. This is a big enough issue that I will probably replace the Bluetooth module with another one someday. This works great with the J50 Bluetooth 5.3 Receiver I installed in June 2024!
Audio Quality:Sound quality through the Bluetooth module seems inferior compared to a direct connection through the tape adapter. I have to compensate for reduced bass and treble by changing the equalizer settings on my music player app (VLC)—something I never felt compelled to do before in my Audi TT. It’s adequate, but is another reason to find a better Bluetooth module. Sound quality is superb with the J50 Bluetooth 5.3 Receiver I installed in 2024, with no perceptible quality loss compared to a wired connection.
Switch for Wireless Charger: While the lighted switch for the wireless charger is convenient, its current placement inside the ashtray feels makeshift and I may reposition it for a more polished look in the future. But it’s good enough for now.
Conclusion
In conclusion, retrofitting Bluetooth and wireless charging to my Audi TT Roadster Quattro has enhanced its functionality and convenience, despite some minor drawbacks. With careful planning and execution, it’s possible to bring modern features to classic cars without compromising their original charm, for nominal cost.
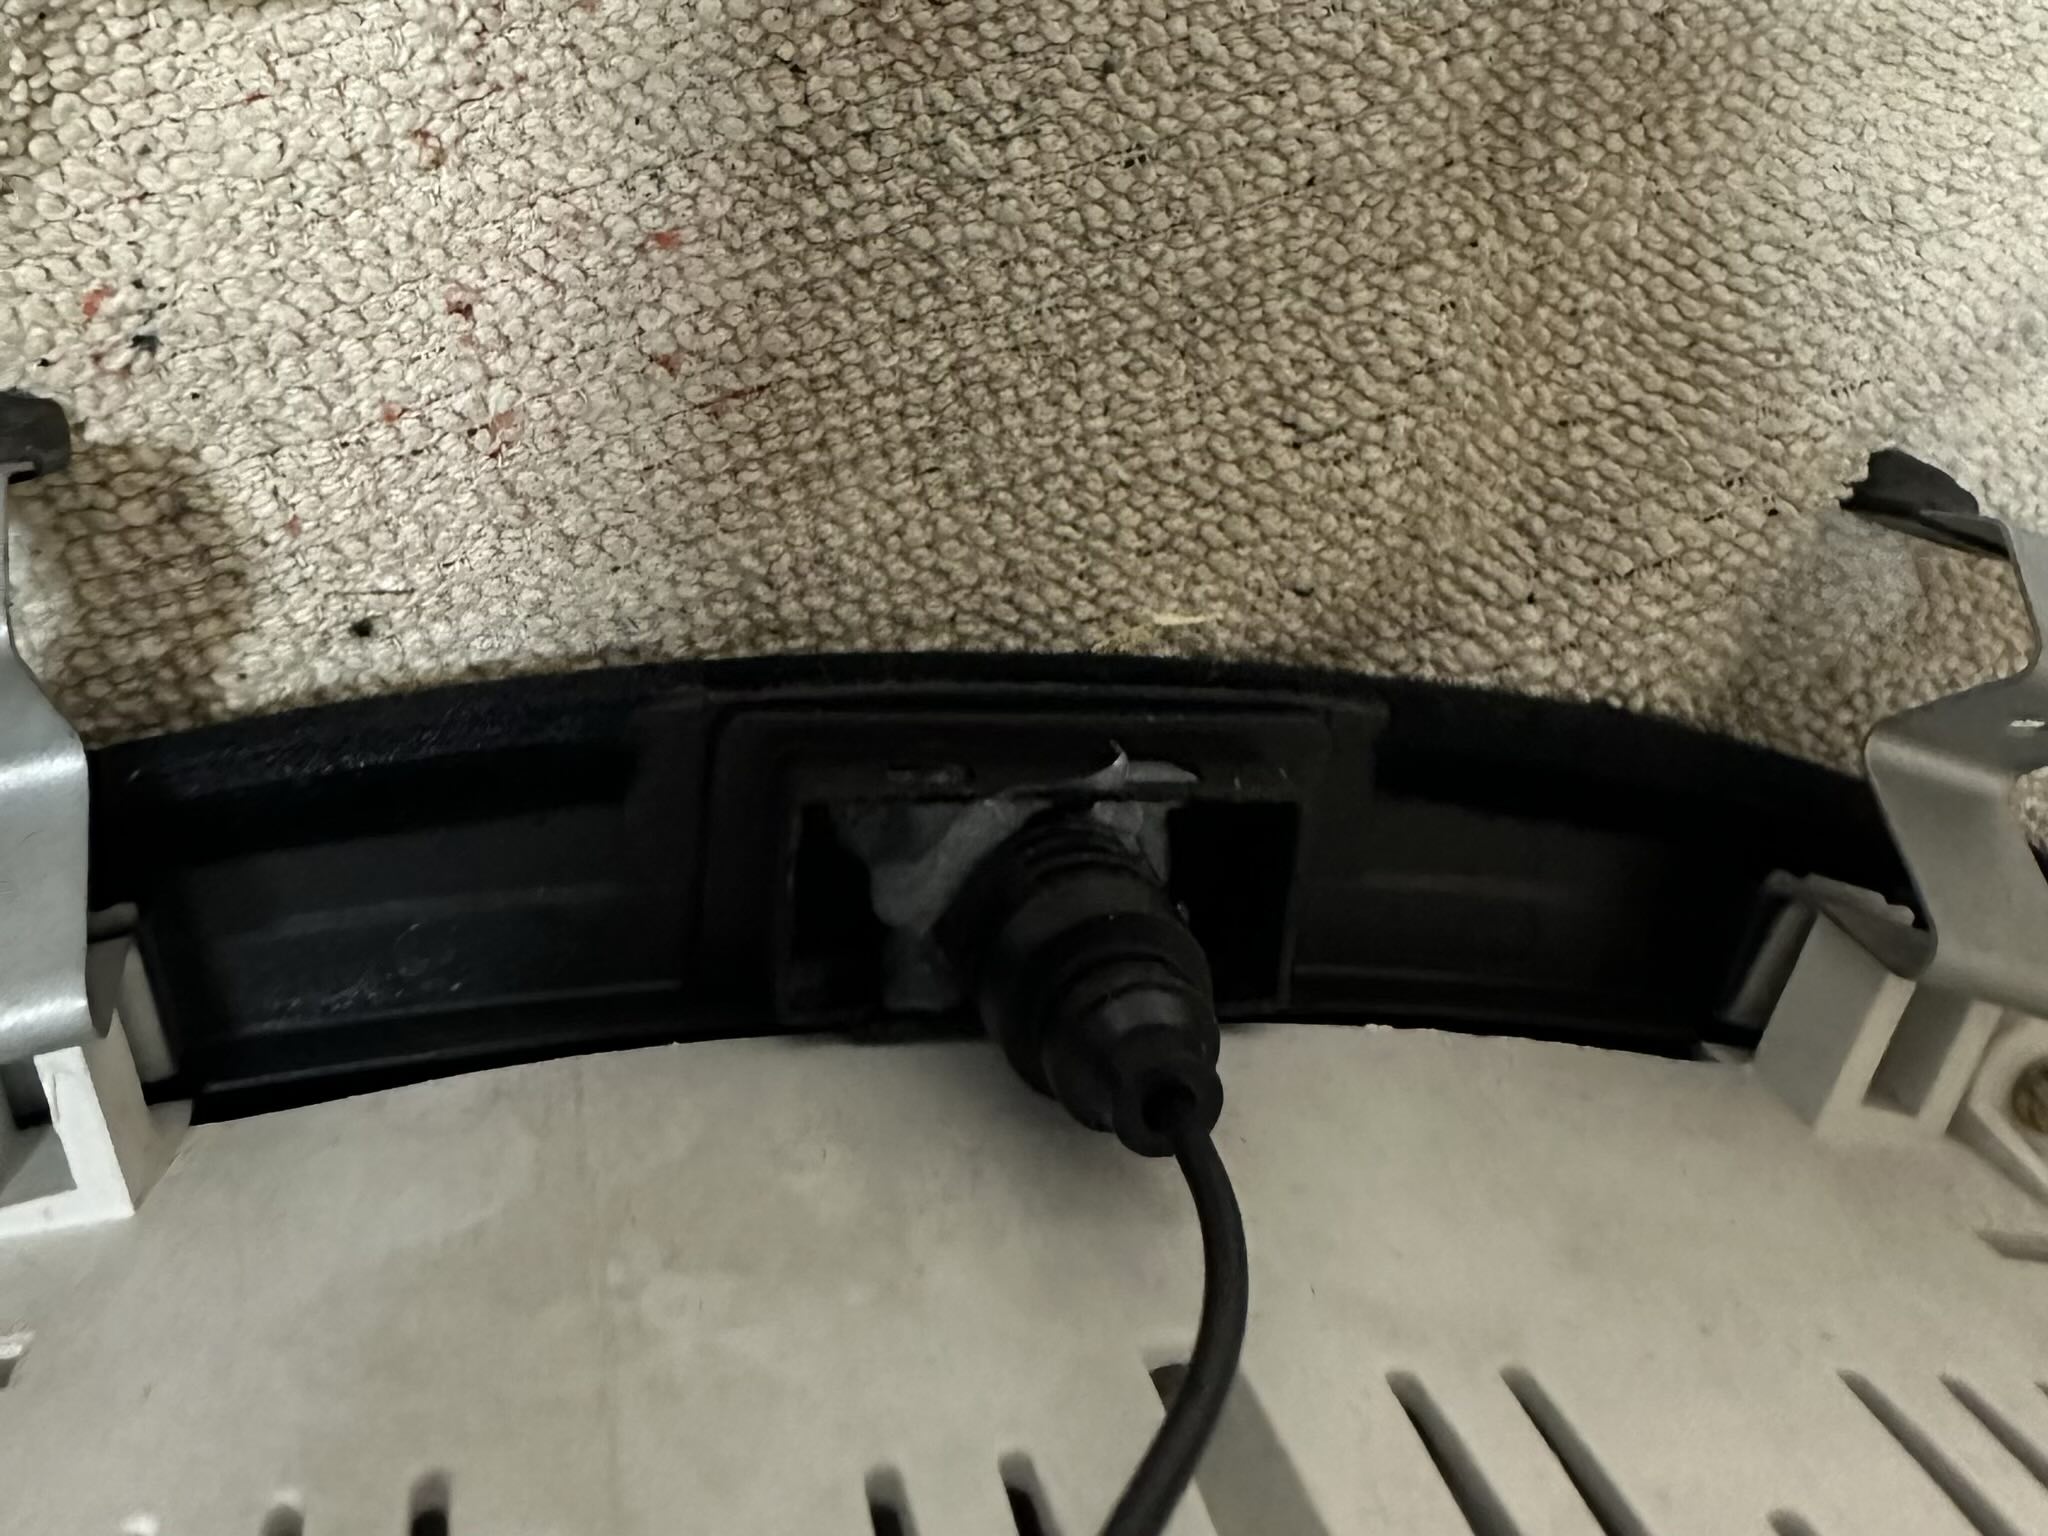
Hi Ken. No drilling of the dashboard was necessary. I created a groove on the side of the plastic vent that inserts into the dashboard using a Dremel tool.
To be honest, the groove might have been unnecessary. I seem to recall thinking afterward that there was enough clearance between the vent and the vent hole for the cable. But my memory may be faulty.
I have rounded up all the pieces, my question is that the magnetic strength of the cordless charger isn’t up to the task of holding a phone, especially in a vertical setting? If the magnets are removed from base of round mount it’s even less. I am asking before surgery is undertaken.
Hi Ken. The magnetic strength of the official Apple MagSafe charger is absolutely strong enough to hold onto the iPhone. I am using it with my iPhone in a Torras MagSafe case, and not once has the phone been accidentally dislodged. The magnets are super strong! Were I to use the phone without a case, I am positive that Apple's MagSafe charger would hold on to it just as securely as well.
Good luck, and let me know if you have any other concerns. ↩ Reply
B
by Brian |
This is really great! Thanks so much for the detailed explanation.
I'm curious if you are able to elaborate further on the steps in which you added the second lighter plug, and the switch. ↩ Reply
I connected the second lighter plug to the wires of the stock lighter, which is always powered even when the car is off. I mounted it to the bottom rear of the ashtray assembly using stick-on cable tie mounts and cable ties to secure it.
Unfortunately, my switch (which has an LED light when turned on) was a bit of a makeshift solution. I intended to attach it to the inside of the ashtray assembly with a small bracket, but I found it too much work to make one. So, I simply attached the switch to wires, wrapped the wires in electrical tape, and left the switch dangling inside the ashtray. I have to open the ashtray to turn on or off the switch, but at least it remains somewhat hidden. I say "somewhat" because the LED light of the switch is visible when it’s on, so I don’t forget to turn it off.
A more elegant solution for the switch might be to affix it inside, for example, the storage console underneath the ashtray. However, functionally, what I did works perfectly. ↩ Reply


There are 6 comments.
Where did you run power cord for charging pad? Did you drill the dash behind phone holder between vents?
Hi Ken. No drilling of the dashboard was necessary. I created a groove on the side of the plastic vent that inserts into the dashboard using a Dremel tool.
You can clearly see this modification at 0:56 in the YouTube video I posted.
To be honest, the groove might have been unnecessary. I seem to recall thinking afterward that there was enough clearance between the vent and the vent hole for the cable. But my memory may be faulty.
Regardless, I hope this helps!
I have rounded up all the pieces, my question is that the magnetic strength of the cordless charger isn’t up to the task of holding a phone, especially in a vertical setting? If the magnets are removed from base of round mount it’s even less. I am asking before surgery is undertaken.
Thanks again👍🏴☠️🎅🏼
Hi Ken. The magnetic strength of the official Apple MagSafe charger is absolutely strong enough to hold onto the iPhone. I am using it with my iPhone in a Torras MagSafe case, and not once has the phone been accidentally dislodged. The magnets are super strong! Were I to use the phone without a case, I am positive that Apple's MagSafe charger would hold on to it just as securely as well.
Good luck, and let me know if you have any other concerns.
This is really great! Thanks so much for the detailed explanation.
I'm curious if you are able to elaborate further on the steps in which you added the second lighter plug, and the switch.
I connected the second lighter plug to the wires of the stock lighter, which is always powered even when the car is off. I mounted it to the bottom rear of the ashtray assembly using stick-on cable tie mounts and cable ties to secure it.
Unfortunately, my switch (which has an LED light when turned on) was a bit of a makeshift solution. I intended to attach it to the inside of the ashtray assembly with a small bracket, but I found it too much work to make one. So, I simply attached the switch to wires, wrapped the wires in electrical tape, and left the switch dangling inside the ashtray. I have to open the ashtray to turn on or off the switch, but at least it remains somewhat hidden. I say "somewhat" because the LED light of the switch is visible when it’s on, so I don’t forget to turn it off.
A more elegant solution for the switch might be to affix it inside, for example, the storage console underneath the ashtray. However, functionally, what I did works perfectly.