My Cannondale 3.0’s 30th Anniversary: How to Turn a Classic into a Near-Super Bike

I love the whole retro-modern concept. Think Singer Porsches. Singer marries the vintage styling of the original Porsche 911s with modern internals, effectively rivaling modern-day supercars despite the decades-old look. They are beautiful, fast, and highly prized.
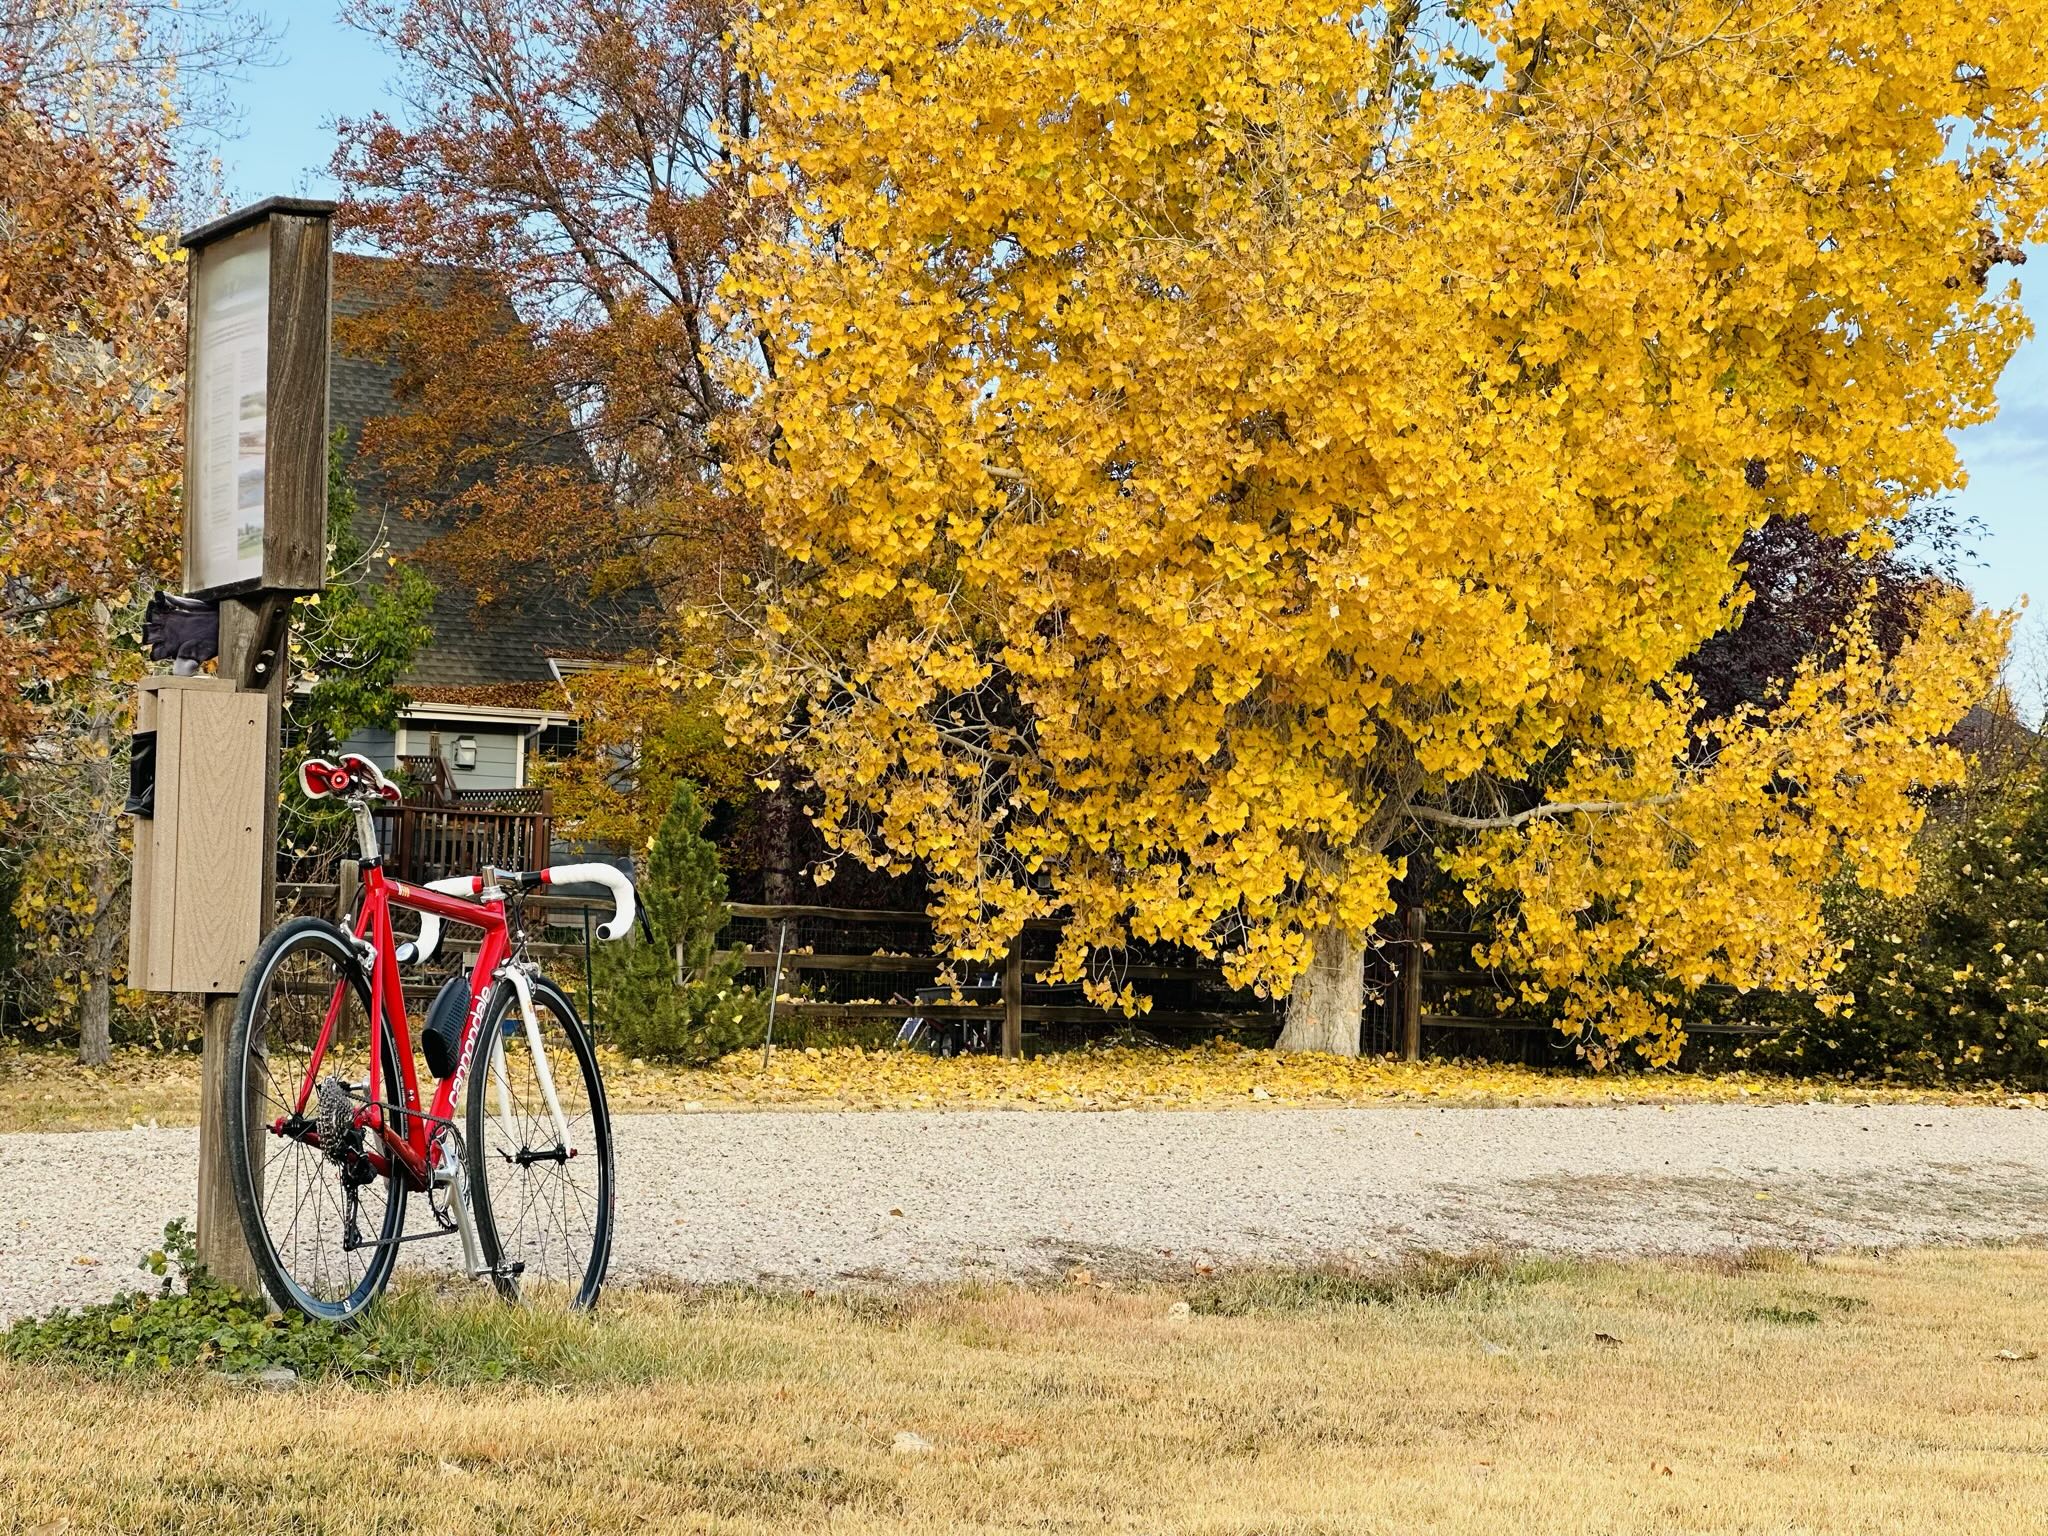
Approaching the 30th anniversary of my enduring partnership with the Cannondale R500, affectionately dubbed Canny the uncanny Cannondale, I felt a strong desire to embark on a similar retromodding journey. This steadfast two-wheeler had been my faithful companion for over 37,000 miles over three decades—more than half of my lifetime cycling mileage. Recently, it had reassumed the role of being my primary road bike in the picturesque backdrops of Colorado, after the Litespeed “Super Bike” relocated to Spain with me. Despite its timeless diamond-frame design, the Cannondale 3.0 Series Road Race frame is still impressively stiff and lightweight, especially when compared to contemporary aluminum racing bikes.
The modularity of the bicycle, one of the most efficient human inventions, made it relatively straightforward to upgrade with modern components, without requiring complex fabrication techniques. If Singer was only so lucky.
For this project, I had several objectives in mind: to make Canny lighter, faster, more comfortable, safer, and even more aesthetically appealing. I’m proud to say that I successfully achieved these goals. Below, I’ve outlined how I accomplished each of these objectives.
New Shimano 1×11 Gearing
When I embarked on this project, I knew I wanted to transition to a single-chainring drivetrain, commonly referred to as “one-by” or 1X. Six years ago, I had considered this shift but ultimately opted for a 2×10 system. In fact, I even wrote a post titled “Why I Upgraded to 2×10 Speed and Not 2×11 or 1×11.” In that article, I highlighted the complexities of building a Shimano 1×11 system with adequate gearing, as it required various workarounds since Shimano lacked an official solution. Additionally, I argued that the weight savings from eliminating the front derailleur and second chainring were offset by the need for a cassette with larger cogs, a requirement of the one-by system. I also mentioned my disdain for DoubleTap by SRAM—one of the biggest advocates of 1X—thereby ruling out that option.
However, the cycling landscape has evolved since then. Shimano introduced a clutched Ultegra rear derailleur capable of accommodating wide gear spreads. The aftermarket has produced narrow-wide chainrings adaptable to various cranksets, along with ultralight aluminum cassettes providing a wide gear range.
Watching professional cyclists like Primoz Roglic, Wout van Aert, and Jonas Vingegaard embrace 1X in both time trials and mountain stages further inspired me. One-by systems offer several advantages:
- Utter Simplicity: With the absence of a front derailleur, gear selection becomes straightforward. Need a higher gear? Simply press the inner shift lever of the right Shimano STI brifter once. Need an easier one? Just downshift the outer lever. This eliminates the complexity of simultaneously upshifting the front derailleur while needing to downshift the rear multiple times to avoid too large cadence changes.
With 1X, I’ve noticed that I glance back at the rear cassette far less often since I no longer need to be concerned about cross-chaining or preemptively shifting the front derailleur. - Quicker Shifting: Shifting the rear alone is notably faster than having to simultaneously shift both front and rear derailleurs. Rear derailleurs shift much more rapidly and reliably than front derailleurs, even (and especially) while you are applying power.
- No Chain Rub: The removal of the front derailleur eliminates any chain rubbing against it. No need for front derailleur trimming and no more chain rub noise.
- No Chain Drop: By avoiding front derailleur shifts, the risk of dropping the chain is significantly reduced. A narrow-wide chainring, exclusive to 1X systems, further minimizes this risk, as do clutched rear derailleurs. (I’m aware that Roglic dropped his chain while riding with a 1X setup in the concluding stage of the 2023 Giro d’Italia when he rode over a pothole. However, such incidents are exceedingly rare for 1X setups like mine.)
- Better Chainline and Less Drivetrain Friction: Most rides take place on relatively level terrain. With a one-by system, you primarily use the higher gears on the rear cassette. Placing the single chainring on the outer position of the crankset results in a better chainline angle, reducing drivetrain friction.
- Lighter Weight: 1X systems eliminate the front derailleur, one chainring (compared to 2X), front derailleur mount, front derailleur cable, and cable stop. You can even forego the left shifter mechanism.
The primary disadvantage of 1X is a reduced gear range and/or larger cadence changes during shifts.
In my specific case, I don’t require the monster gears that professional cyclists often use. Firstly, I lack the horsepower to effectively utilize them. Secondly, I don’t ride in groups or draft for safety reasons, as I’ve witnessed and been part of too many accidents resulting from reduced visibility of hazards or overlapping wheels caused by drafting. Thirdly, when I’m traveling faster than 30 miles per hour, it’s typically on a downhill slope, and I’m coasting to conserve energy.
This doesn’t imply that Canny’s new 1X system lacks a sufficiently wide gear range or imposes significant cadence changes during shifts. The gear spread of the 46-tooth chainring and 11-34T cassette combination I chose, when compared to the original 3X7 gearing of the Cannondale R500, is marginally wider, measuring 309.1% compared to the original’s 306.7%.
| Number of cog teeth | 52T chainring | 42T chainring | 30T chainring |
|---|---|---|---|
| 13 | 105.7 | 85.4 | 61.0 |
| 14 | 98.2 | 79.3 | 56.6 |
| 15 | 91.6 | 74.0 | 52.9 |
| 17 | 80.8 | 65.3 | 46.6 |
| 19 | 72.3 | 58.4 | 41.7 |
| 21 | 65.4 | 52.9 | 37.8 |
| 23 | 59.8 | 48.3 | 34.5 |
The 1X lowest gear (35.4 gear inches) is nearly identical to the granny gear (34.5 gear inches) of the original triple setup. However, the 1X highest gear is slightly taller, leading to a higher speed at the same cadence (31.2 MPH compared to 29.9 MPH at 95 RPM with the original 52×13 highest gear).
| Number of cog teeth | 46T chainring | MPH @ 95 RPM |
|---|---|---|
| 11 | 110.5 | 31.2 |
| 13 | 93.5 | 26.4 |
| 15 | 81.1 | 22.9 |
| 17 | 71.5 | 20.2 |
| 19 | 64.0 | 18.1 |
| 21 | 57.9 | 16.4 |
| 23 | 52.9 | 14.9 |
| 25 | 48.6 | 13.7 |
| 27 | 45.0 | 12.7 |
| 31 | 39.2 | 11.1 |
| 34 | 35.8 | 10.1 |
Recently, while pedaling hard on a gentle downhill slope, I achieved a speed of 60 km/hr (37.3 MPH) by pushing the highest gear at a cadence of 114 rpm. For me, this speed is more than sufficient and atypical of my riding. In most cases when I attain such speeds, I’m conserving energy and not pedaling. Instead, I’m primarily relying on gravity on downhill terrain while I maintain an aerodynamic tuck, unless I need to sit up and air brake for safety.
The maximum cadence change observed is 14.6 RPM. That occurs when shifting from the second-highest gear to the first-highest gear. In other words, transitioning from the 13-tooth to the 11-tooth cog would lower my cadence from, say, 95 RPM to 80. In my perspective, this is quite manageable.
| Number of cog teeth | Cadence before upshift (RPM) | Speed at upshift (MPH) | Cadence after upshift (RPM) | Cadence drop (RPM) |
|---|---|---|---|---|
| 34 | 95 | 10.1 | 86.6 | 8.4 |
| 31 | 95 | 11.1 | 82.7 | 12.3 |
| 27 | 95 | 12.7 | 88.0 | 7.0 |
| 25 | 95 | 13.7 | 87.4 | 7.6 |
| 23 | 95 | 14.9 | 86.7 | 8.3 |
| 21 | 95 | 16.4 | 86.0 | 9.0 |
| 19 | 95 | 18.1 | 85.0 | 10.0 |
| 17 | 95 | 20.2 | 83.8 | 11.2 |
| 15 | 95 | 22.9 | 82.3 | 12.7 |
| 13 | 95 | 26.4 | 80.4 | 14.6 |
| 11 | 95 | 31.2 (can’t upshift further) | already in highest gear | – |
As satisfied as I am with these gear ratios, if I were to embark on this project once more, I would opt for the 11-36T cassette instead of the 11-34T. This small change, adding a mere 4 grams, would have provided me with an even lower gear (and a 327.2% gear spread) while still avoiding large cadence changes after shifting. My choice of the 11-34T cassette stemmed from a misunderstanding of Shimano’s literature, as I believed that 34T was the maximum cog size that the clutched Ultegra derailleur could handle. In reality, it can officially accommodate a 39-tooth cog, and one user even reported successful use with an 11-42T cassette, with the B-screw adjusted almost to its limits.
In the next section, I’ll detail the components I used to convert to 1×11. It’s worth noting that I would have preferred a 12-speed cassette. However, the challenge lies in the fact that there are no Shimano groupsets offering mechanical shifting, a 12-speed cassette, and rim brakes. The Shimano 12-speed groups accommodating rim brakes are limited to electronic shifting, which is much more expensive and requires battery charging. Besides, the advantages of electronic shifting, such as crisper/faster front derailleur shifts, automatic trimming, and automatic rear derailleur shifting when the front derailleur is engaged, are nullified when compared to 1X systems. My one-by system shifts flawlessly and I have a hard time imagining how it can be bettered.
Reduced Weight
While the importance of bicycle weight is often overemphasized, it remains one of the few objective metrics that imply a bike’s potential for speed. After all, there’s something satisfying about a bike that can be effortlessly lifted with just two fingers.
So, when I made adjustments to the components, I did so with a keen awareness of weight. I suppose deep down, I’m a weight weenie at heart.
| Item | Old Component | Old Weight, grams | New Component | New Weight, grams | Weight difference, grams | Cost (including sales tax) |
|---|---|---|---|---|---|---|
| Frame | Cannondale 3.0 Series Road Race | 1374 | 2X M5x1.0 screws for front derailleur hangar instead of 2X(M5x2.0 + flat washers) | 1371 | -3 | |
| Fork | Cannondale aluminum alloy | 538 | 538 | |||
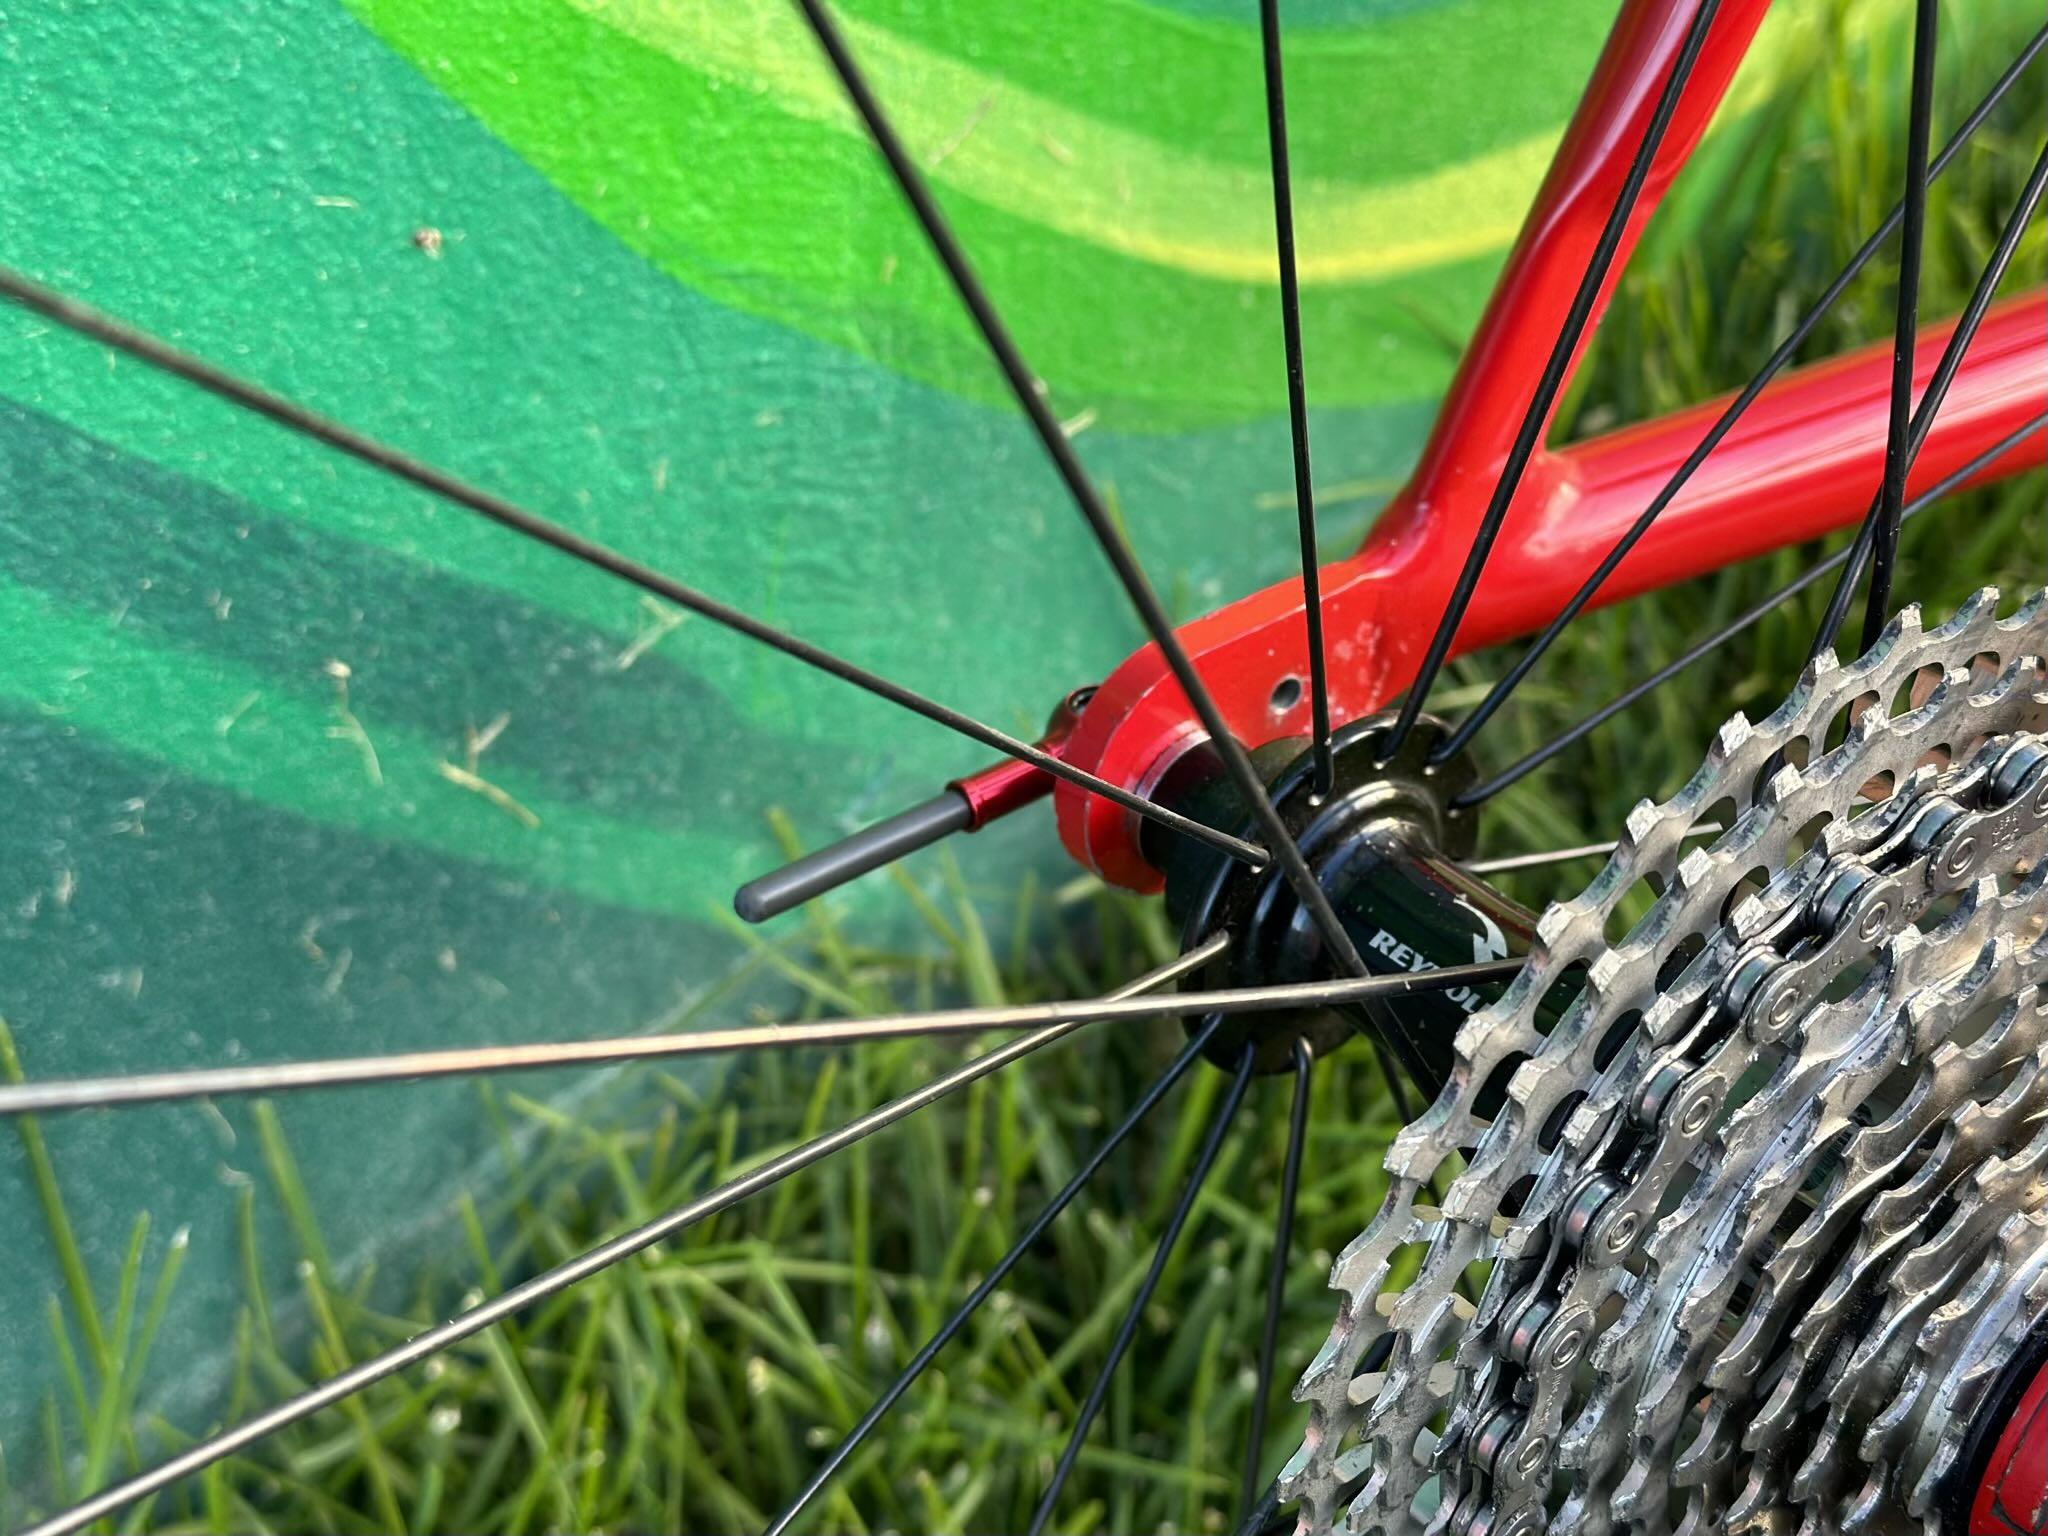
| Front wheel | Shimano Ultegra 6700 | 680 | Reynolds Solitude 30mm | 675 | -5 | $160 for wheelset (Craigslist) |
| Rear wheel | Shimano Ultegra 6700 | 940 | Reynolds Solitude 30mm | 863 | -77 | part of wheelset above |
| Rim tape for 2 wheels | none | Thinvik tubeless rim tape, 19mm | 8 | +8 | $15,05 (Amazon) | |
| Skewers | Yishun red anodized | 100 | Risk Ti 130/135 mm skewers | 39 | -61 | $27,16 (Amazon) |
| Tires | Hutchinson Fusion 3 tubeless, 700x23c | 560 | Schwalbe Pro One tubeless, 700x25c | 550 | -10 | $128,32 (Amazon) |
| Valve stems + sealant | Shimano valve stems + 2 ounces of Stan’s NoTubes sealant | 105 | Thinvik Presta valve stems, 44mm, Gold + 1 ounce Stan's NoTubes sealant | 76 | -29 | $13.97 (Amazon) |
| Crankset | Shimano Dura Ace FC-7700, 53x39T | 607 | replace 53T & 39T chainrings with YBEKI 46T narrow-wide chainring (130 BCD) | 545 | -62 | $24.83 (Amazon) |
| Chain | KMC 10-speed, 110 links | 253 | Shimano 105 CN-HG601-11 11-speed, 110 links | 247 | -6 | $29.20 (Amazon) |
| Cassette | Shimano 10-speed, 12-28T | 236 | JFOYH 11-speed, 11-34T | 235 | -1 | $83.14 (Amazon) |
| Bottom Bracket | Shimano Dura-Ace 7700 Octalink | 180 | 180 | |||
| Front Derailleur | Shimano Dura-Ace FD-7700 | 75 | eliminate | -75 | ||
| Chain catcher | K-Edge, red | 10 | eliminate | -10 | ||
| Front derailleur hanger | Cannondale hangar + 2X(M5x20 screws + flat washers) | 21 | 2X M5x10 pan-head screws (no washers) | eliminate | -21 | |
| Rear Derailleur | Shimano Dura-Ace 7700 | 195 | Shimano Ultegra RD-RX800-GS | 242 | +47 | $103.20 (Amazon) |
| Left brake lever | Shimano 105 (5700) shift/brake lever, gutted | 185 | Shimano 105 (5800) shift/brake lever, gutted | 181 | -4 | $93.67 for left + right (eBay, used) |
| Left shift lever | Shimano RX100 downtube shifter | 28 | eliminate and replace with plastic schrader valve cap (<1 gram) | 0 | -28 | |
| Right shift/brake lever | Shimano 105 (5700) | 251 | Shimano 105 (5800) | 246 | -5 | part of pair above |
| Handlebars | Modolo Brevetato, 38 cm | 372 | BNVB, 38 cm, black | 287 | -85 | $22.85 (Amazon) |
| Handlebar tape | Fizik Microtex, white | 70 | Cannondale KnurlCork, white | 61 | -9 | $19.10 (Amazon) |
| Handlebar plugs | black, plastic | 2 | Cannondale, black, plastic | 2 | came with Cannondale KnurlCork handlebar tape above | |
| Stem | Italmanubri Eclipse quill stem, 12 cm | 285 | 285 | |||
| Headset | Campagnolo Athena | 110 | 110 | |||
| Front Brake | Shimano Ultegra BR-6500 | 167 | new Shimano brake shoes | 167 | $13.99 for pair of brake shoes (Amazon) | |
| Rear Brake | Shimano Ultegra BR-6500 | 164 | new Shimano brake shoes | 164 | part of pair above | |
| Seat Post | Kalloy, cut from 12 to 7 inches, 27 mm diameter | 210 | 210 | |||
| Seat Collar | Cannondale, stock | 28 | 28 | |||
| Saddle | Specialized Romin Evo Expert Gel, 143mm | 227 | 227 | |||
| Cables | standard cables & housing | 147 | eliminate cable for front derailleur & a little bit of length of cable from from to rear derailleur | 136 | -11 | $6.80 for new brake cable housing (local bike shop) |
| Pedals | Speedplay X/1 | 208 | Venzo VZ-SCPD-02 82x55mm, SPD-type | 295 | +87 | $43.28 (Amazon) |
| Aerobars | Profile Aerostryke with flip-up arm rests (modified) | 560 | eliminate | -560 | ||
| Total | 8907 (19.6 lbs.) | 7979 (17.6 lbs.) | -928 | $784.65 |
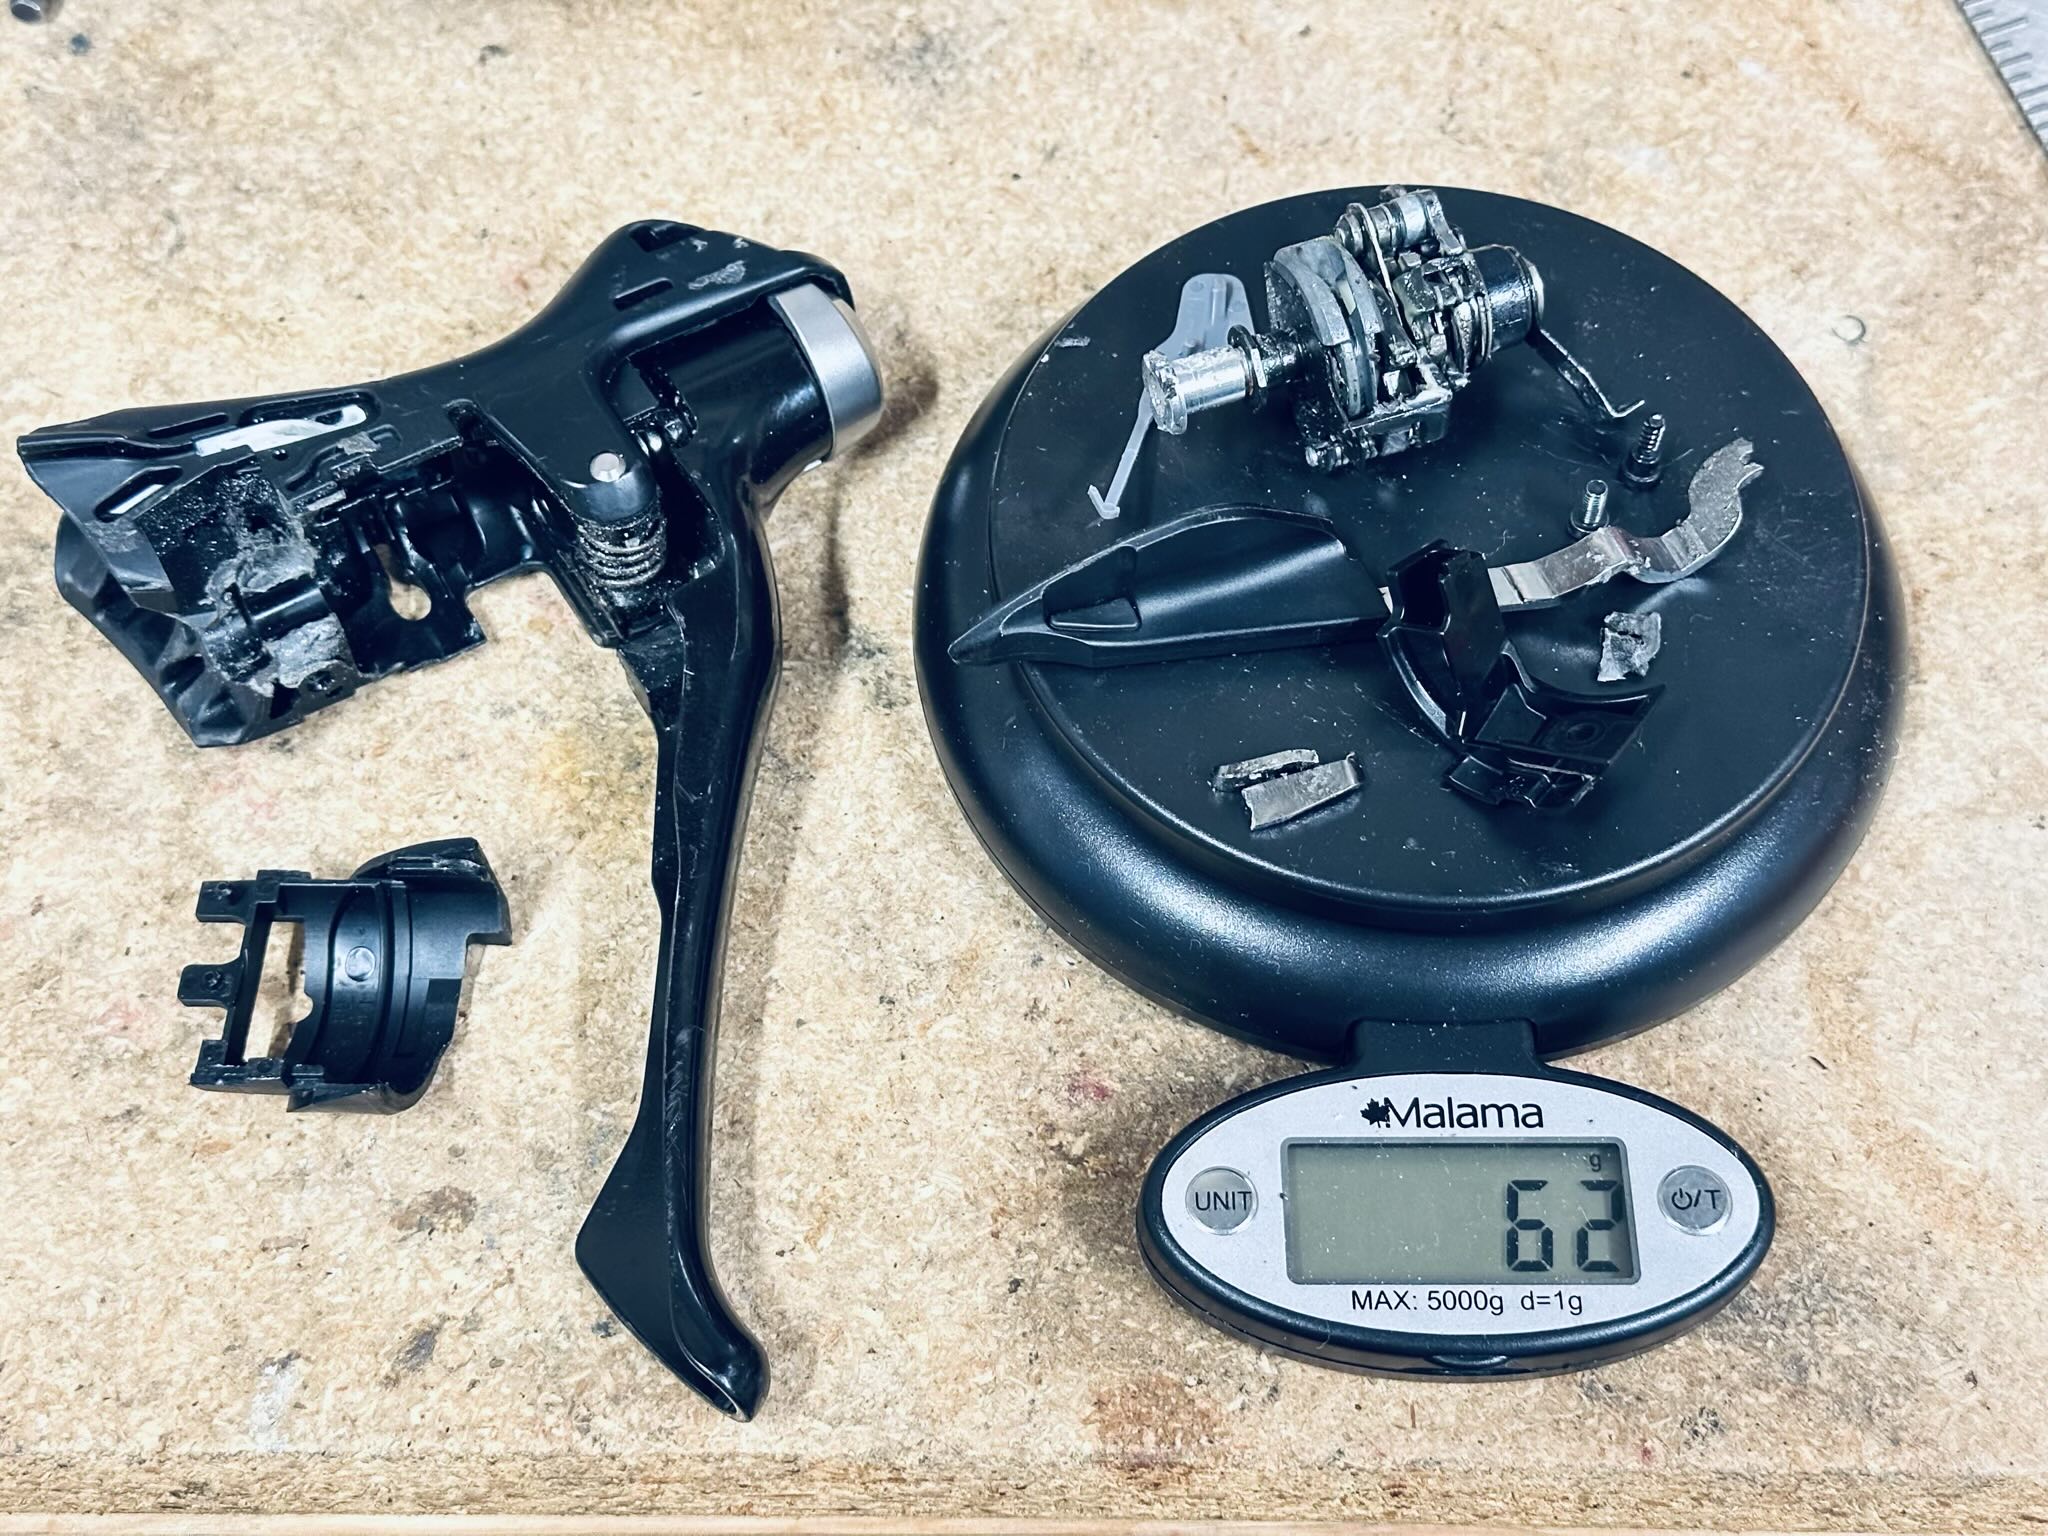
This is how far my pursuit of weight reduction took me: I extracted the shifter mechanism from a fully functional Shimano 105 (5800) left “brifter” because it was no longer needed to shift a front derailleur. I did this with the following tools: a small Philips screwdriver, pliers, and a Dremel. I then employed JB Weld to immobilize the outer lever, preventing its typical inward motion for downshifting. Essentially, I transformed the brifter into a brake lever that still matched the right shift/brake lever, including the brake hood shape. This modification resulted in a weight savings of 62 grams.
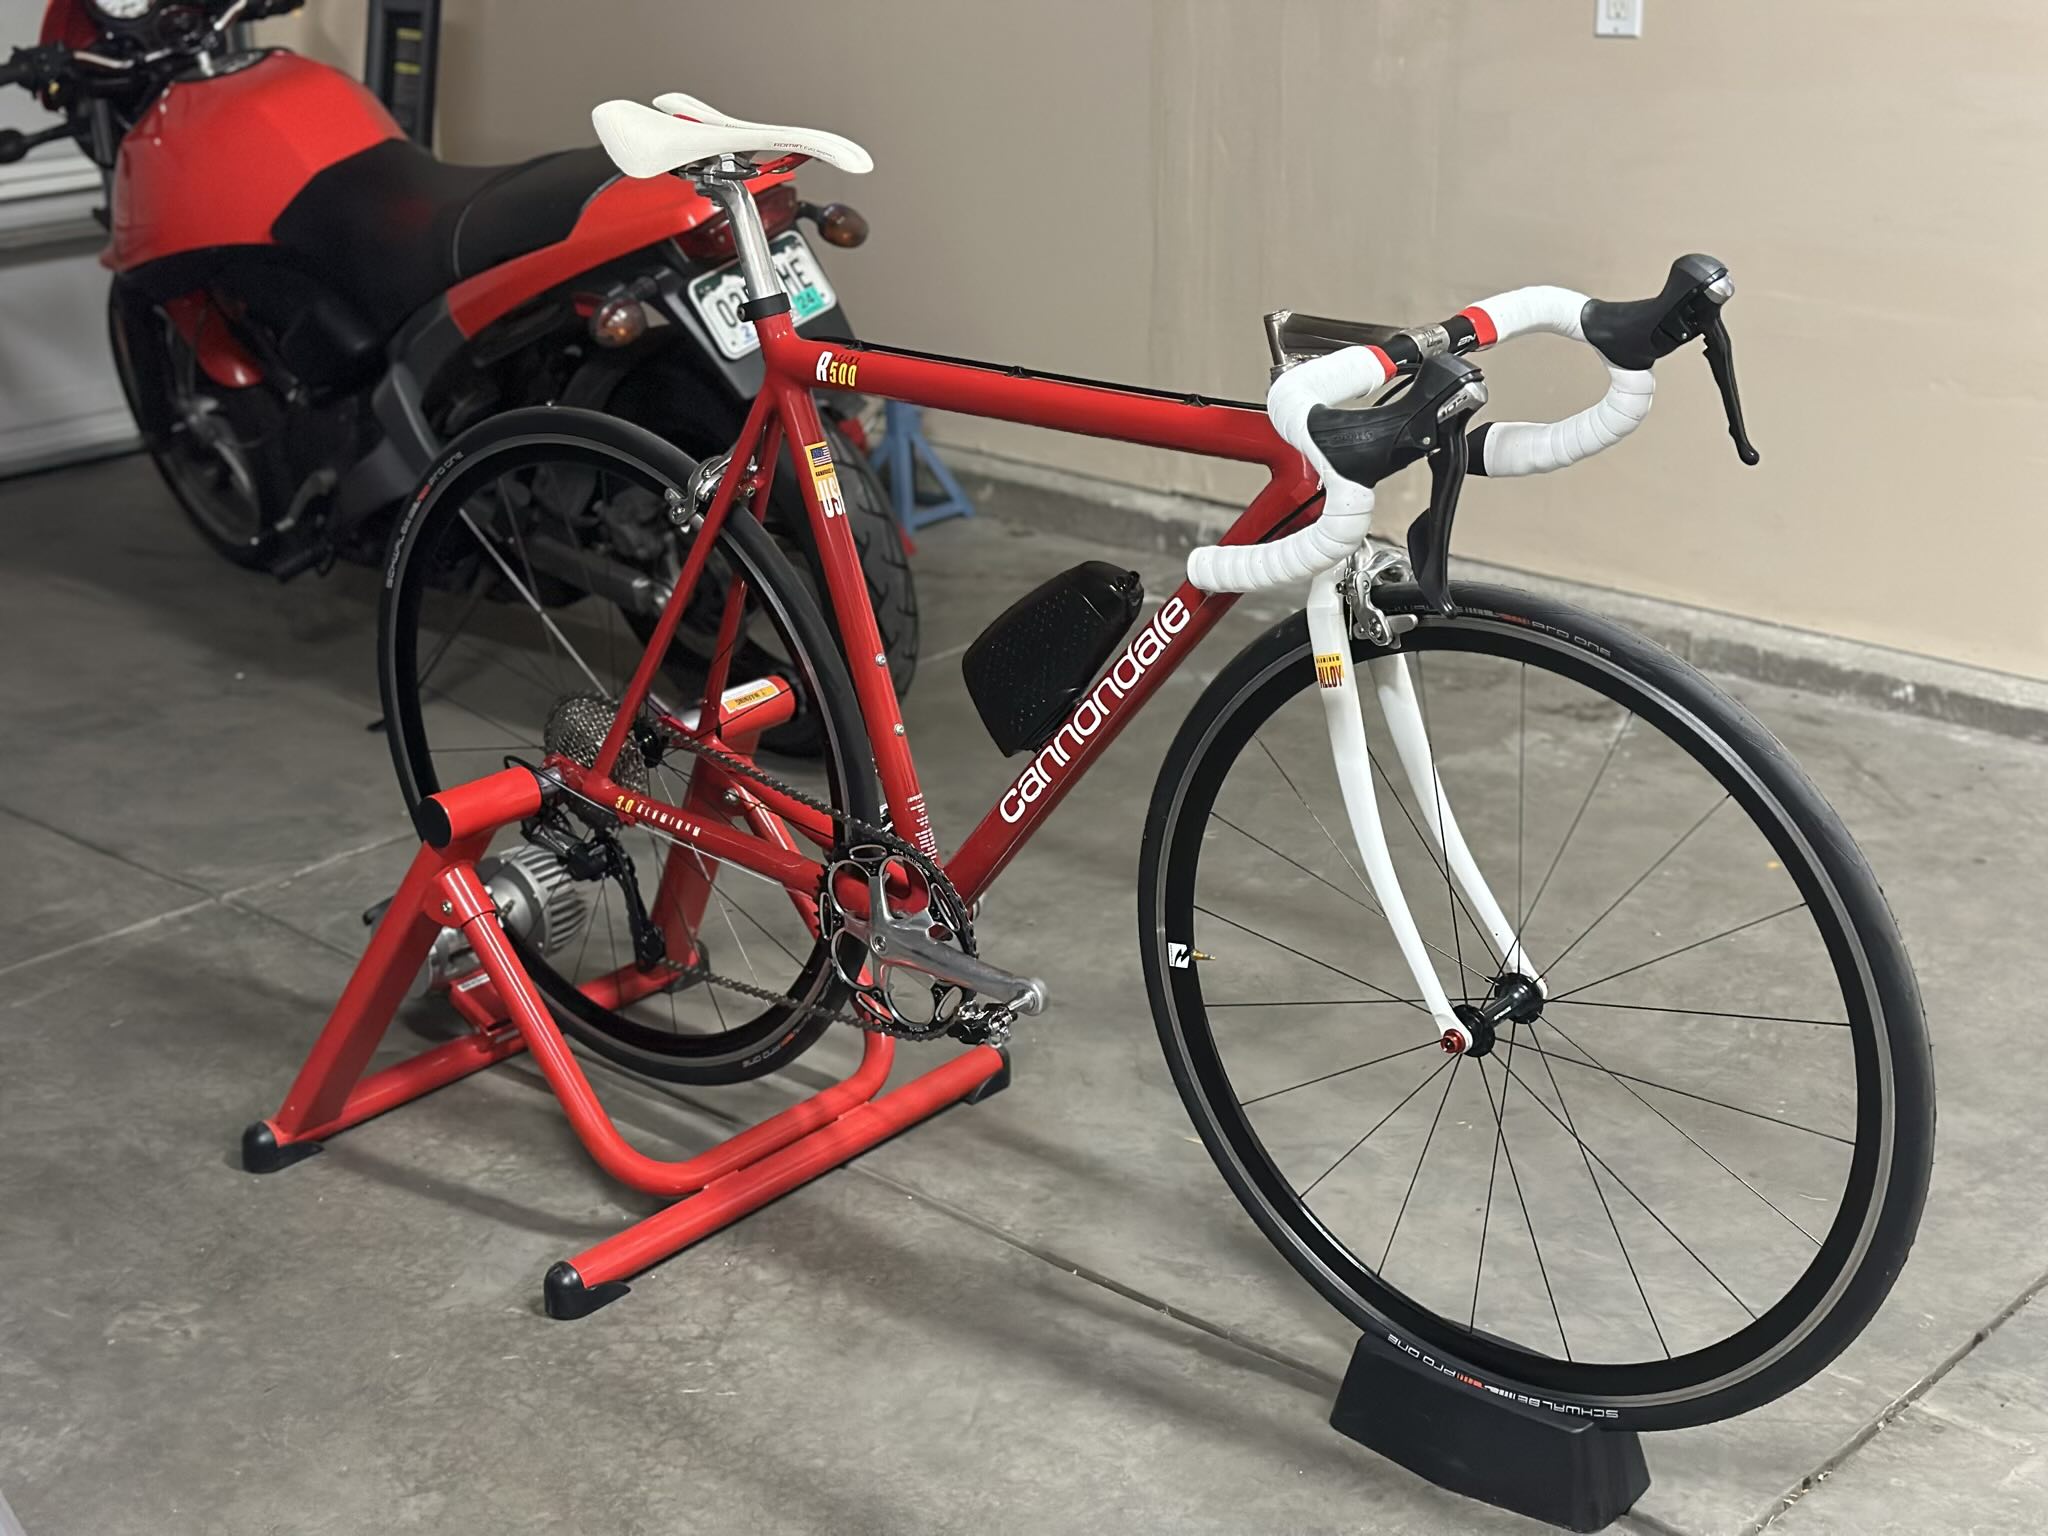
As of now, Canny’s weight, including pedals, stands at 7.979 kilograms (17.6 pounds). Remarkably, this is almost five pounds lighter than her original 10.2 kg (22.5 lb.) weight when I purchased her brand new in 1993.
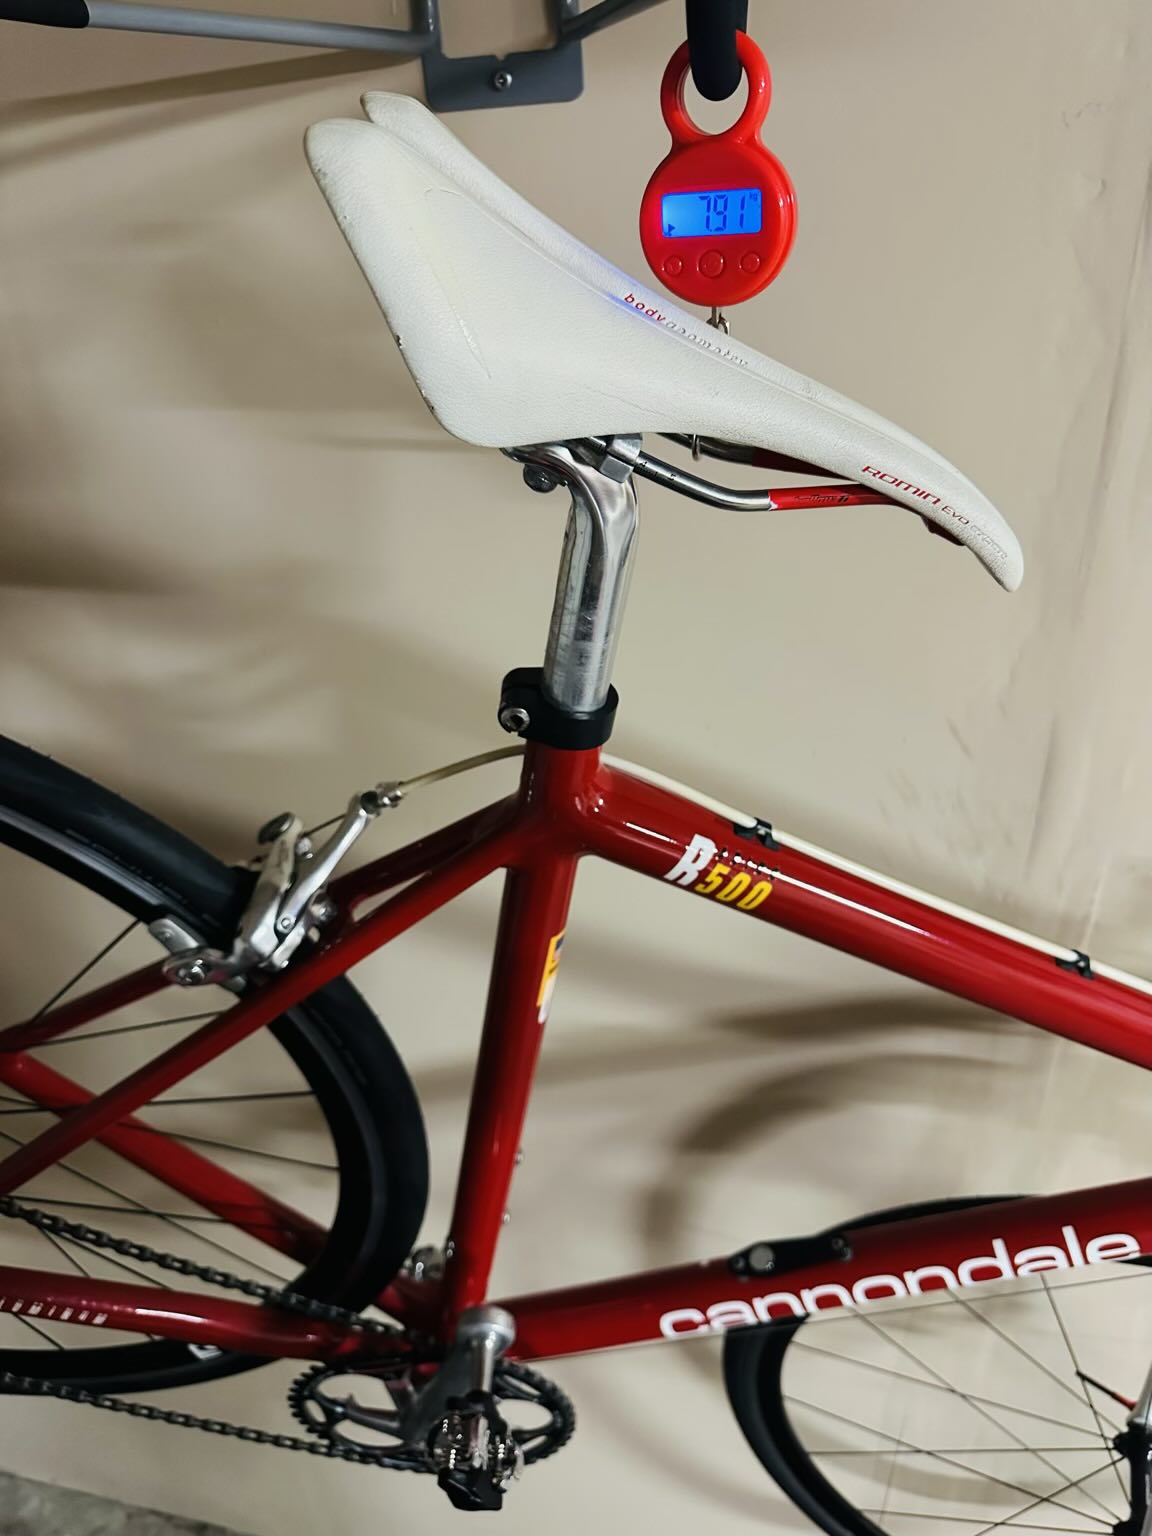
There’s a chance that she is actually even lighter. The weight mentioned above is the sum of all the components I individually weighed. However, when I weighed the fully assembled bike, it came in at just 7.91 kilograms (17.4 pounds). Whether this discrepancy is due to a possible mistake in the table above or a slight inaccuracy in the hanging scale compared to the kitchen scale used for individual part weighing, I’m not entirely certain.
In any case, for a bike that’s reached its thirtieth year, she’s impressively lightweight. To put it in perspective, let’s contrast it with Cannondale’s present-day lineup. The rim brake-equipped $1975 Cannondale CAAD13 105 aluminum bicycle is advertised with a pedal-less weight of 9.0 kilograms (19.9 pounds). Once you attach pedals, the weight increases to 9.3 kg (20.5 lbs.). The disc brake variant priced at $2325 is even heavier. The CAAD13’s welds are also lumpier and less smooth, although Cannondale asserts that the tubes are designed for improved aerodynamics and compliance.
As another point of reference, Mathieu van der Poel, this year’s UCI World Road Champion, raced a carbon fiber Canyon Aeroad in the 2023 Tour de France that weighed 7.94 kilograms (17.5 pounds). His bike likely cost upwards of $10,000; granted, it features disc brakes, electronic shifting, a power meter, and aero-optimized parts. But the fact that his bike and Canny essentially weigh the same reveals just how lightweight she is, particularly considering her foundation is a three-decade-old frame.
Regarding accessories, I would be remiss to not mention what I typically ride with: a cyclometer, cadence sensor, mirror, taillight, Schrader-Presta valve adapter, and water bottle mount:
| Accessory | Description | Weight, grams |
|---|---|---|
| Head unit | XOSS G+ | 49 |
| Custom mount for head unit | XOSS | 8 |
| Cadence sensor | Cycplus cadence sensor, Bluetooth + Ant+ | 10 |
| Mirror | Italian Road Bike Mirror | 57 |
| Taillight | ebuyfire | 55 |
| Schrader-Presta valve adapter | copper; I store it on the rear wheel valve stem | 4 |
| Water bottle mount | for aero water bottle | 16 |
| Total | 199 (.44 pounds) |
So Canny’s total weight, including all accessories above, hovers at approximately 17.9 pounds. Notably, some of the items mentioned above are not intended for racing purposes but are installed for safety. These items include the mirror, taillight, and Schrader-Presta valve adapter (potentially useful for emergency gas-station tire top-offs).
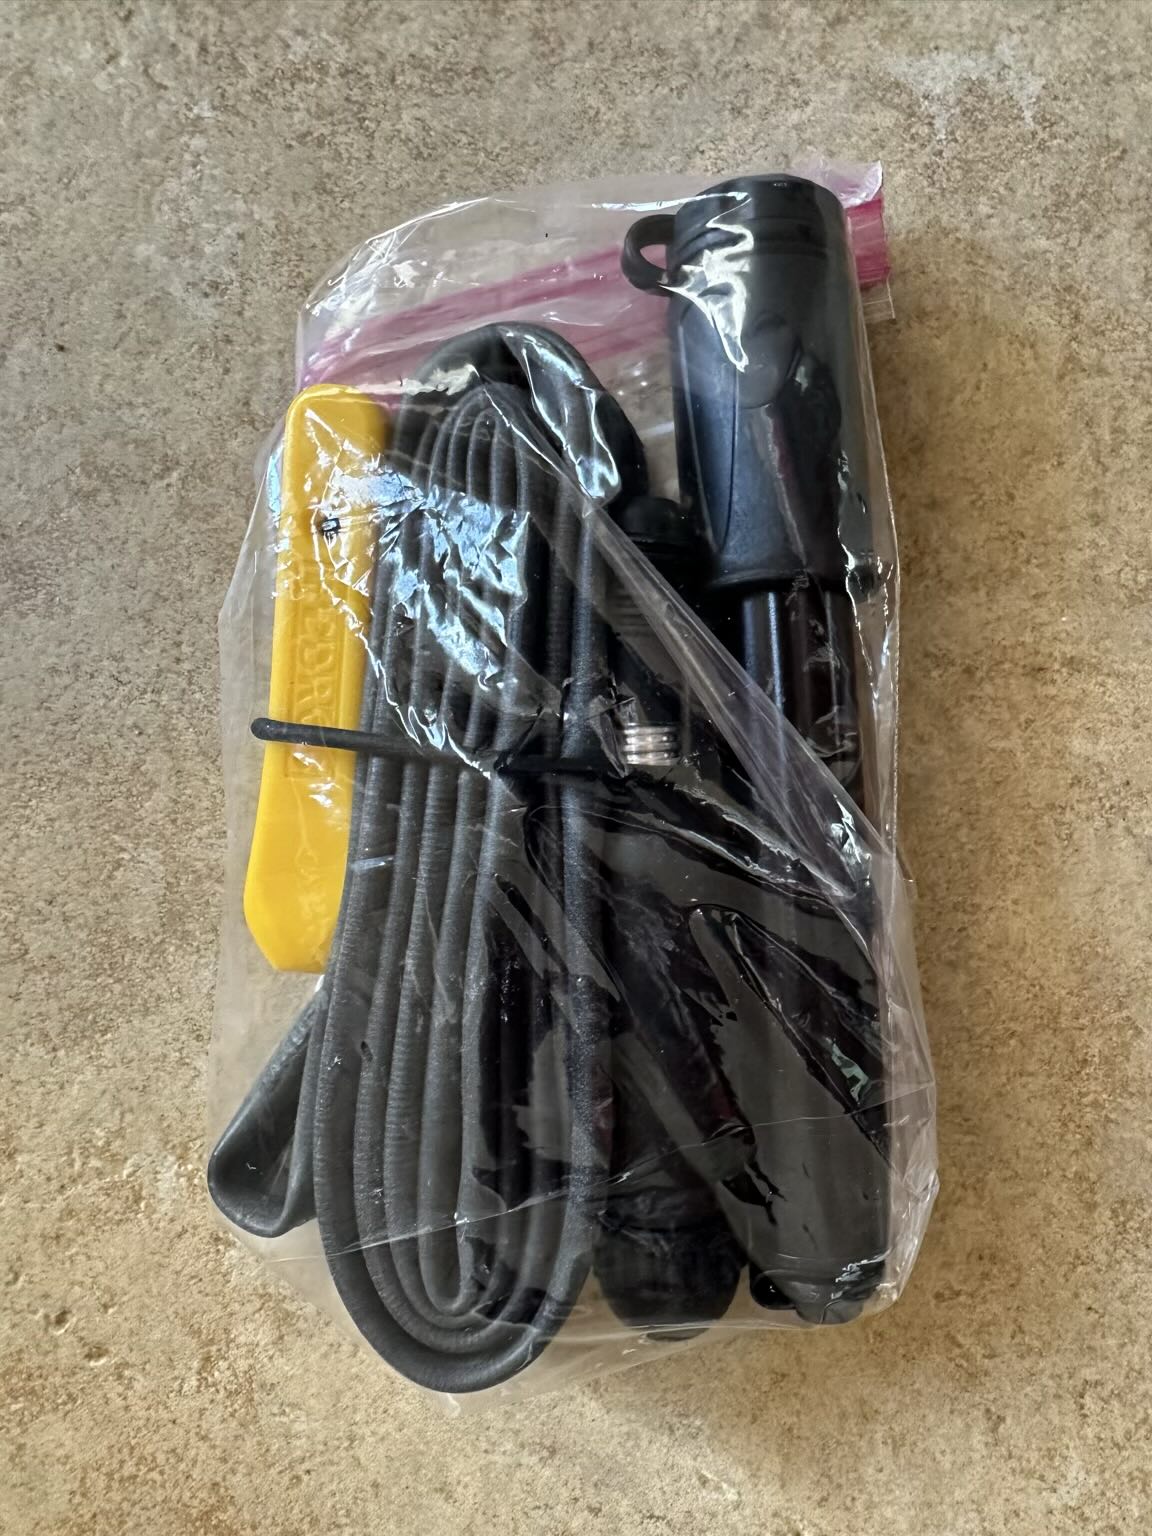
Additionally, I carry a mini-pump, tire plugs, tire levers, and a spare tube in my jersey pocket. But as they are not attached to the bike, I haven’t included them as part of the bike’s overall weight.
In terms of costs, let’s break them down:
- $523.06 was allocated to items required for the 1X conversion.
- $168.30 was spent on consumables like tires, brake pads, handlebar tape, and brake cable housing, which were due for replacement regardless.
- $50.01 was invested in two items primarily for weight reduction: a new handlebar and quick-release skewers. These two components alone shed 146 grams, at a cost of 34 cents per gram of weight saved, providing excellent value.
- $43.28 was used for new SPD-type pedals, as I favor their cleats due to their much better walkability in comparison to Speedplays’. The pedals added 87 grams, but SPD cleats are considerably lighter than Speedplay cleats.
- $28.23 was for a pair of aero water bottles and their mounts. I’ll discuss them in the section about aerodynamics.
I had to purchase a new wheelset, as the existing Shimano Ultegra 6700 wheelset could only accommodate 7-, 8-, 9-, and 10-speed cassettes. I found a Reynolds Solitude wheelset, which is compatible with 11-speed systems, on Craigslist. This switch led to a weight reduction of 74 grams, even when factoring in the need to use 19 mm rim tape to convert it to tubeless.
I’m currently attempting to sell the old wheelset, shift/brake levers, derailleurs, pedals, and chain catcher. If I’m fortunate, these sales could offset the expenditures by around $300. This would reduce the overall expenses for these upgrades and basic maintenance to under $500.
Improved Aerodynamics
While the weight of a bicycle primarily affects performance on climbs steeper than 6%, aerodynamics play a crucial role at all but the lowest speeds. Depending on the road gradient, a significant 56-96% of a cyclist’s effort is needed to overcome air resistance. However, it’s important to note that up to 80% of this air resistance is attributable to the rider, with the bicycle playing a far less significant role.
With this in mind, here are the steps I took to enhance the overall aerodynamics of the system. Note that I had slammed the stem decades ago and removed the saddle bag in 2020. However, there were still further optimizations I could undertake.
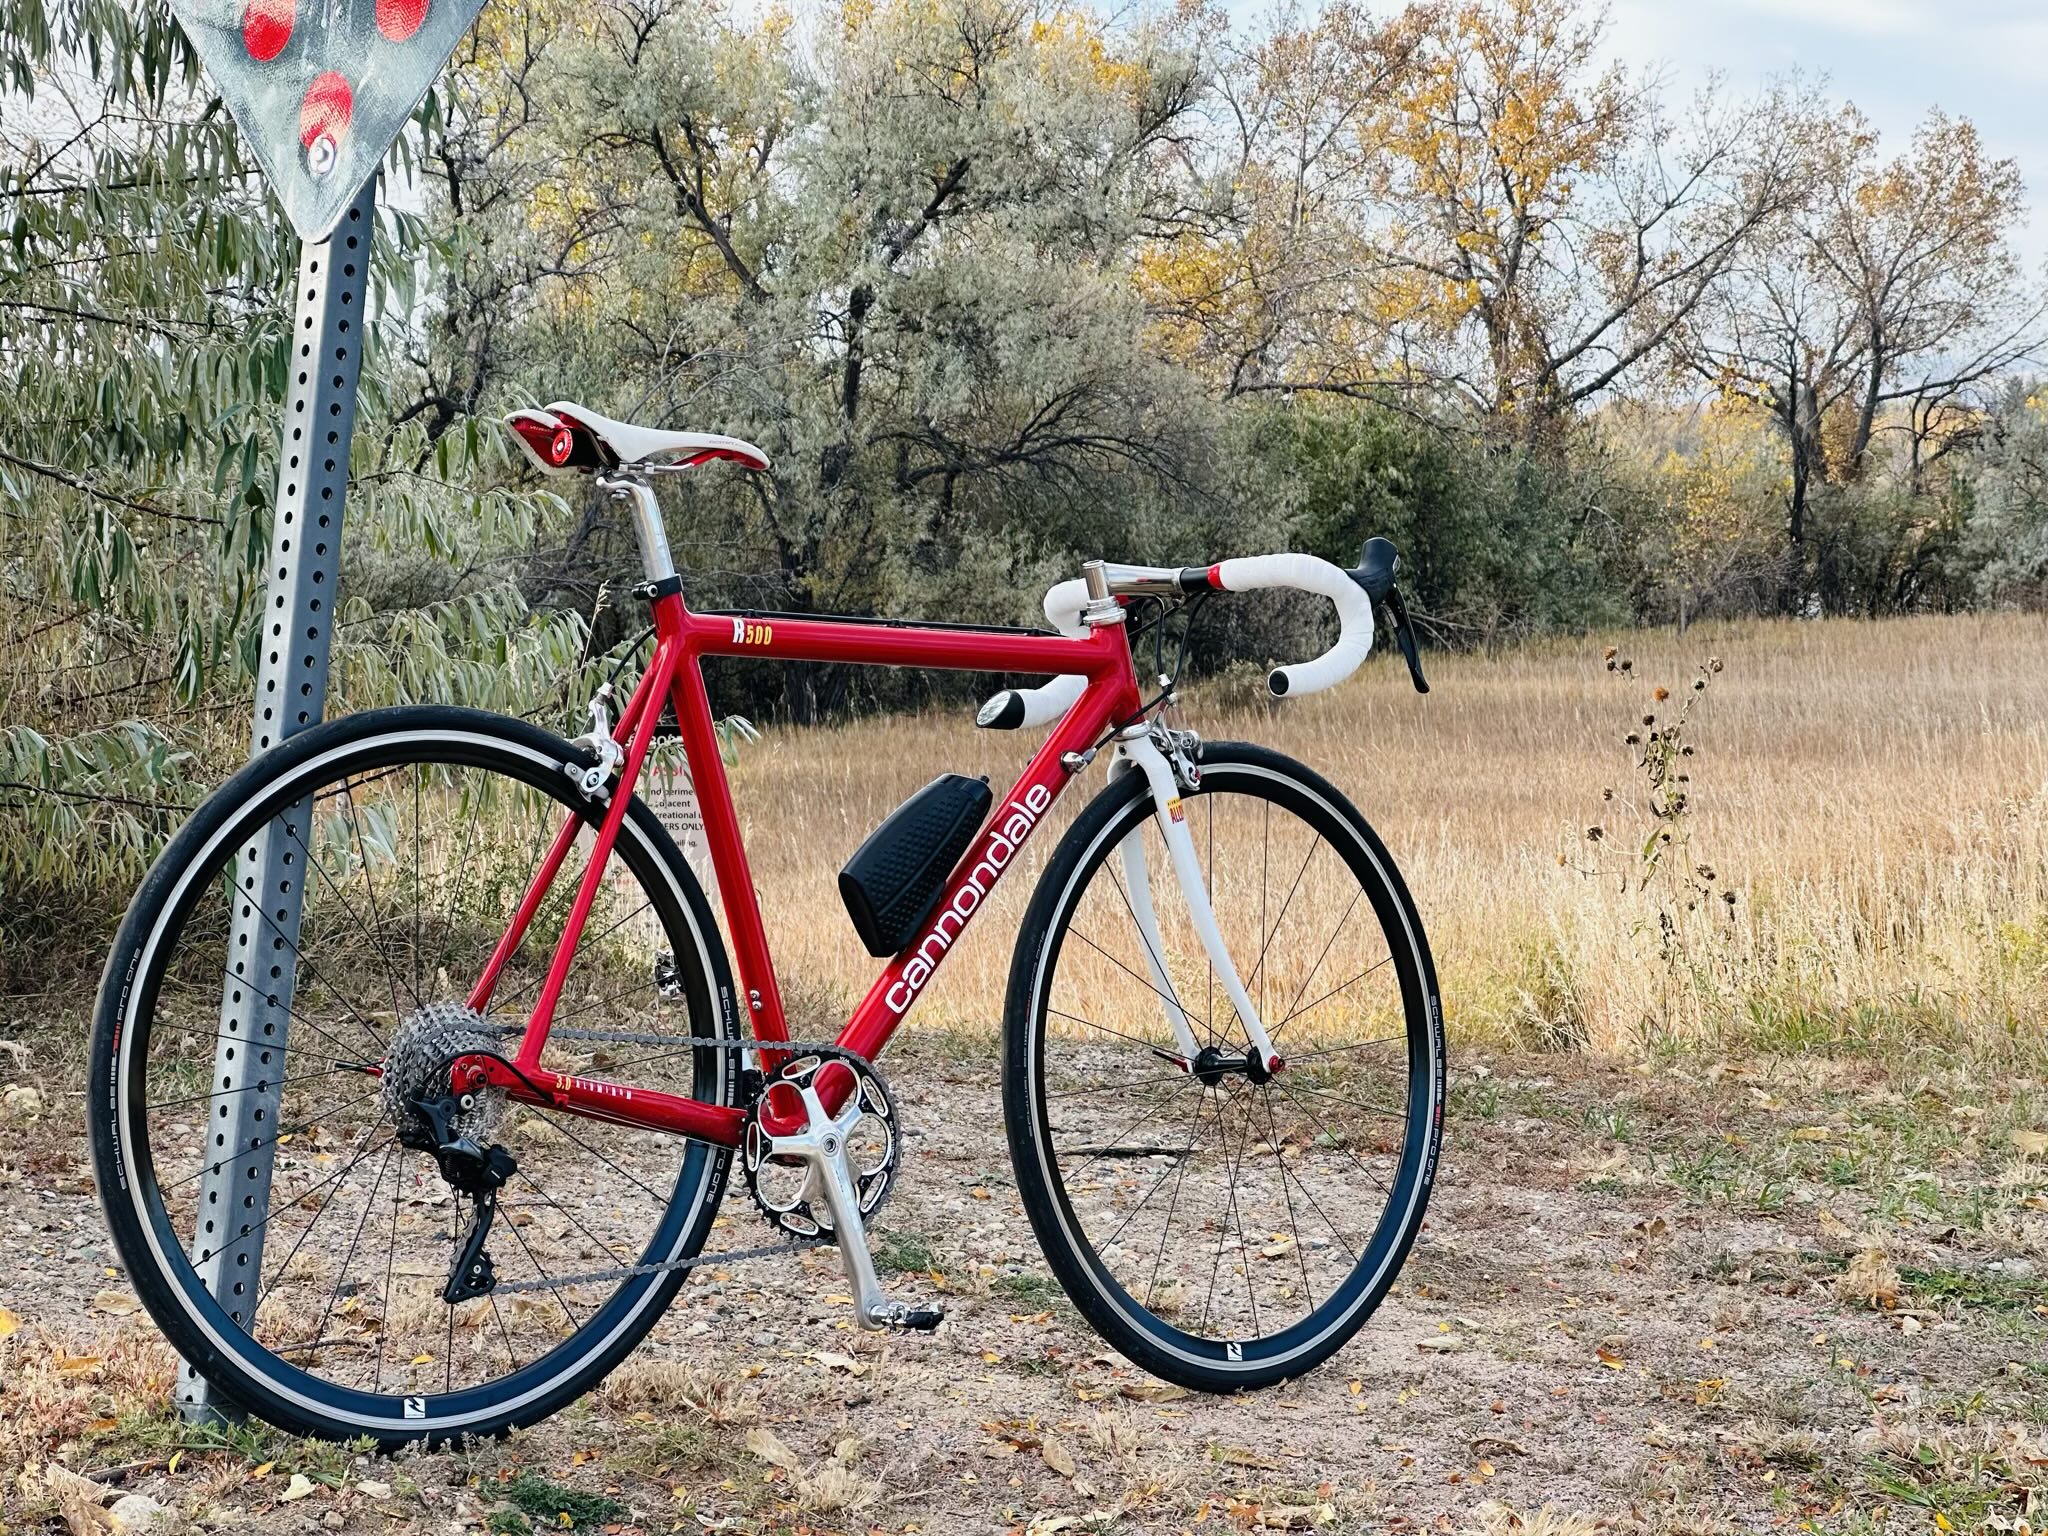
Switched to a 1X drivetrain
Adopting a single chainring setup allowed the removal of several components that caused turbulence, including the front derailleur, chain catcher, shifter lever, front derailleur cable, front derailleur mount, and inner chainring.
Installed new handlebars
The $22.85 BNVB handlebars were not only 85g lighter than the existing Modolo ones but had a shallower profile, reducing their frontal area. They were also relatively narrow at 38 cm wide, measured center-to-center.
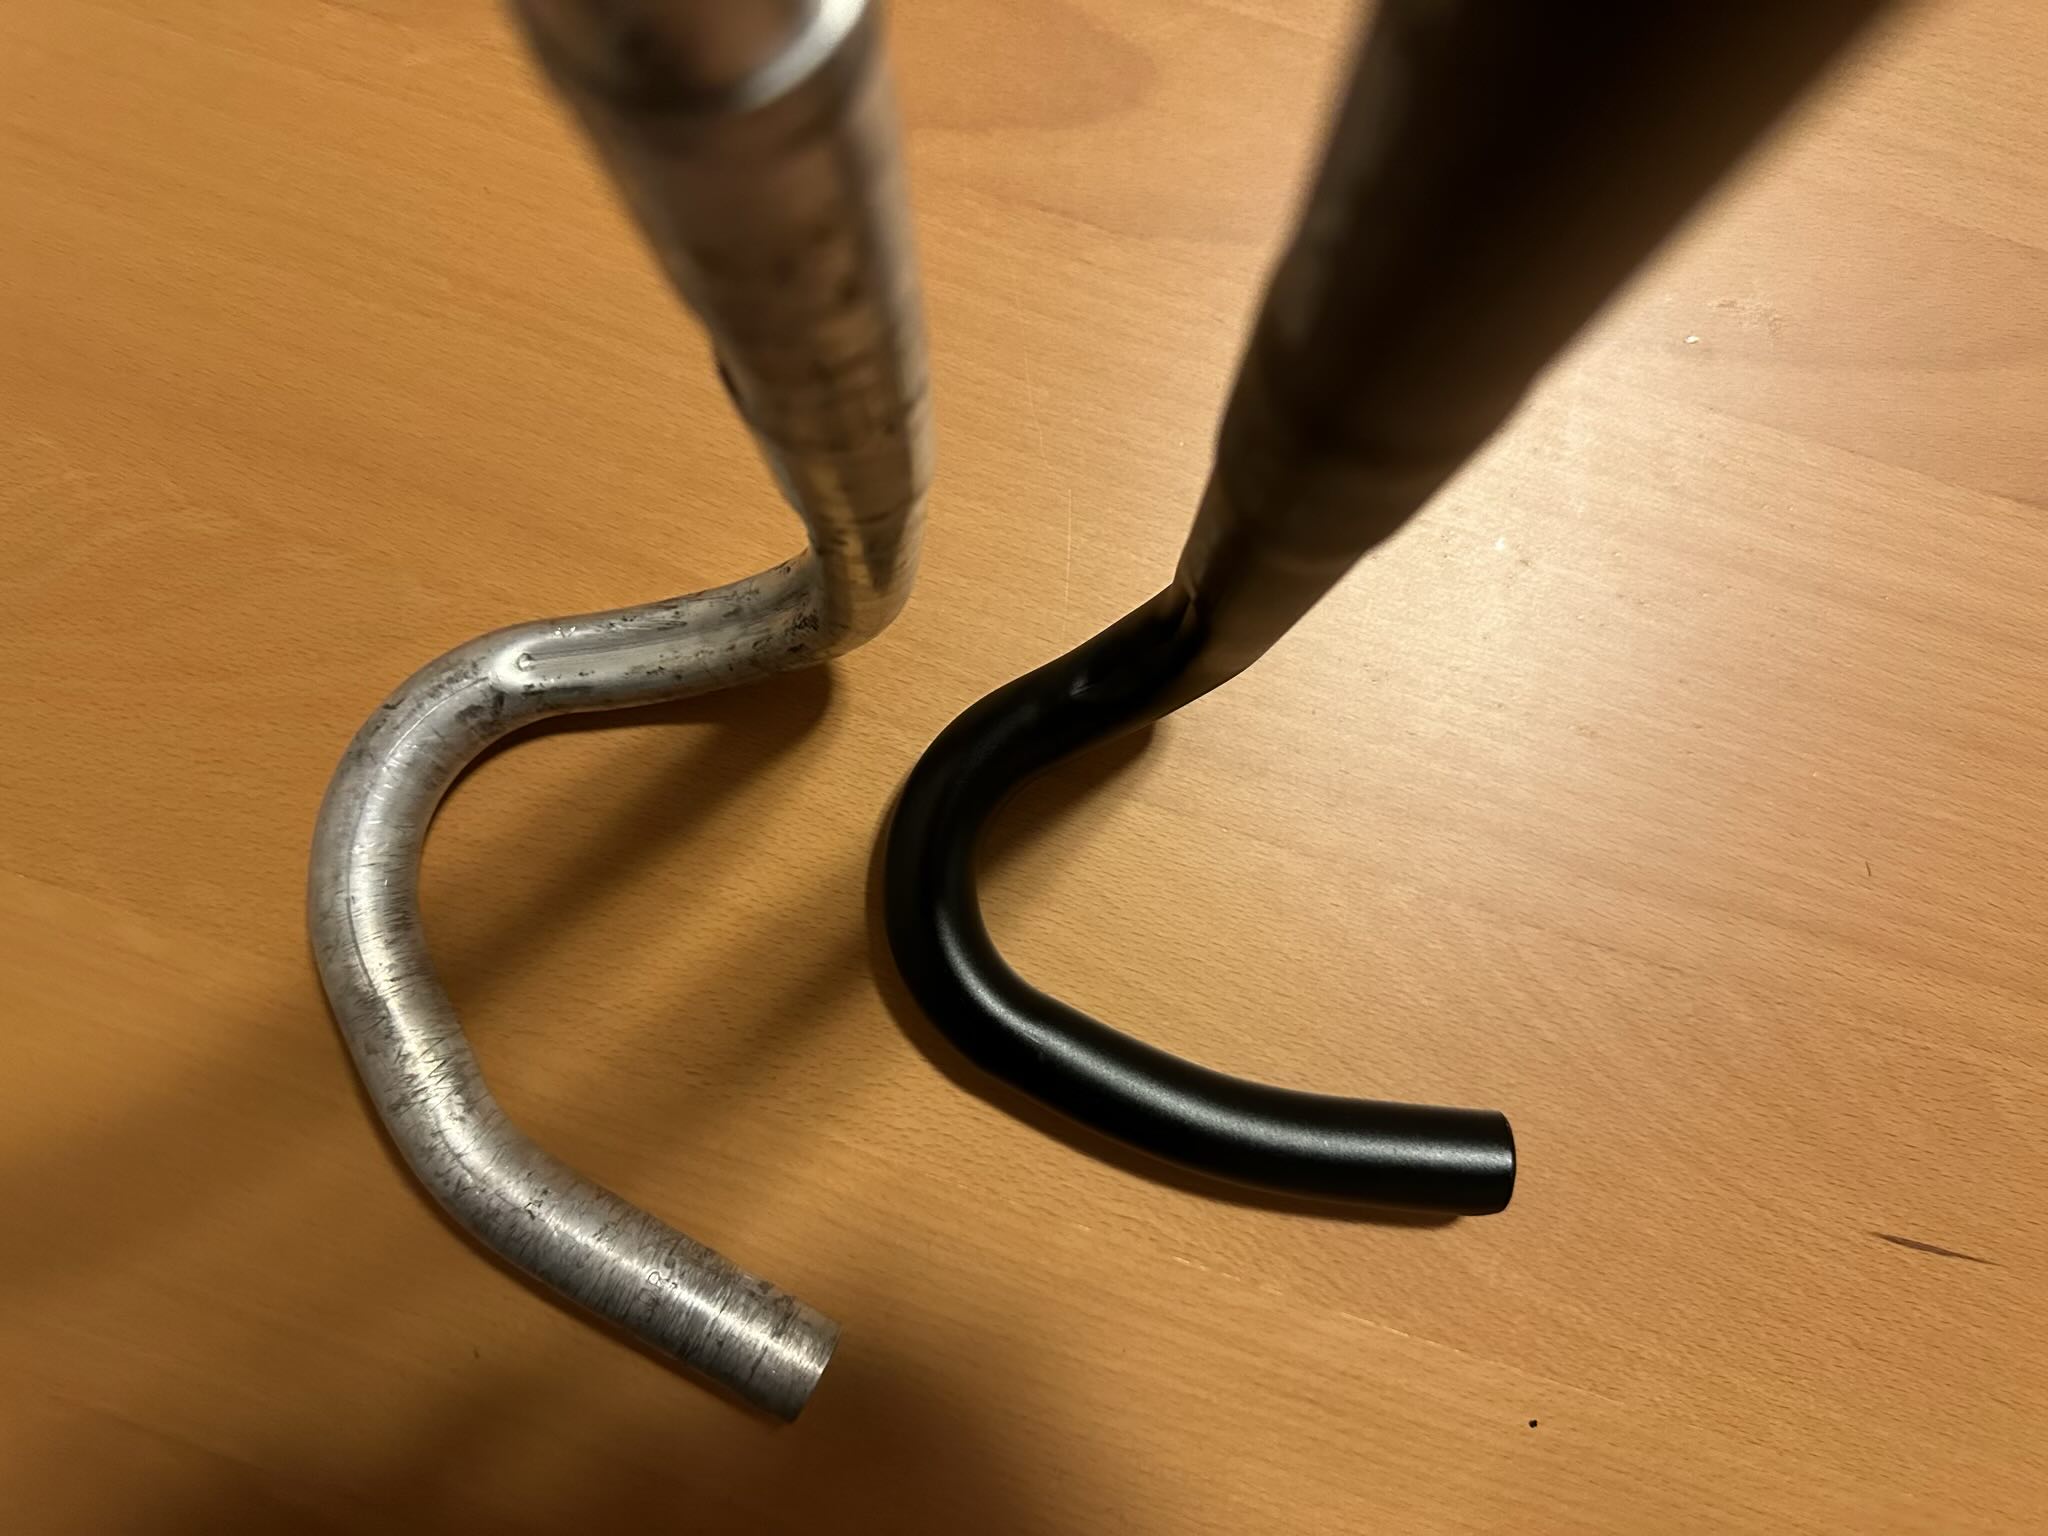
It’s worth discussing handlebar width further. The Cannondale R500 originally came with 38 cm handlebars, which was among the narrowest available. A decade later, Lance Armstrong favored 44 cm handlebars, claiming that they opened up his chest and improved breathing. The cycling world copied him, and to my bewilderment, road bikes started to come with very wide and un-aerodynamic bars during the naughts.
However, the trend has finally shifted back towards narrower bars, with many professional cyclists now using 38 cm bars for reduced air resistance. Cannondale’s choice 30 years ago was ahead of its time.
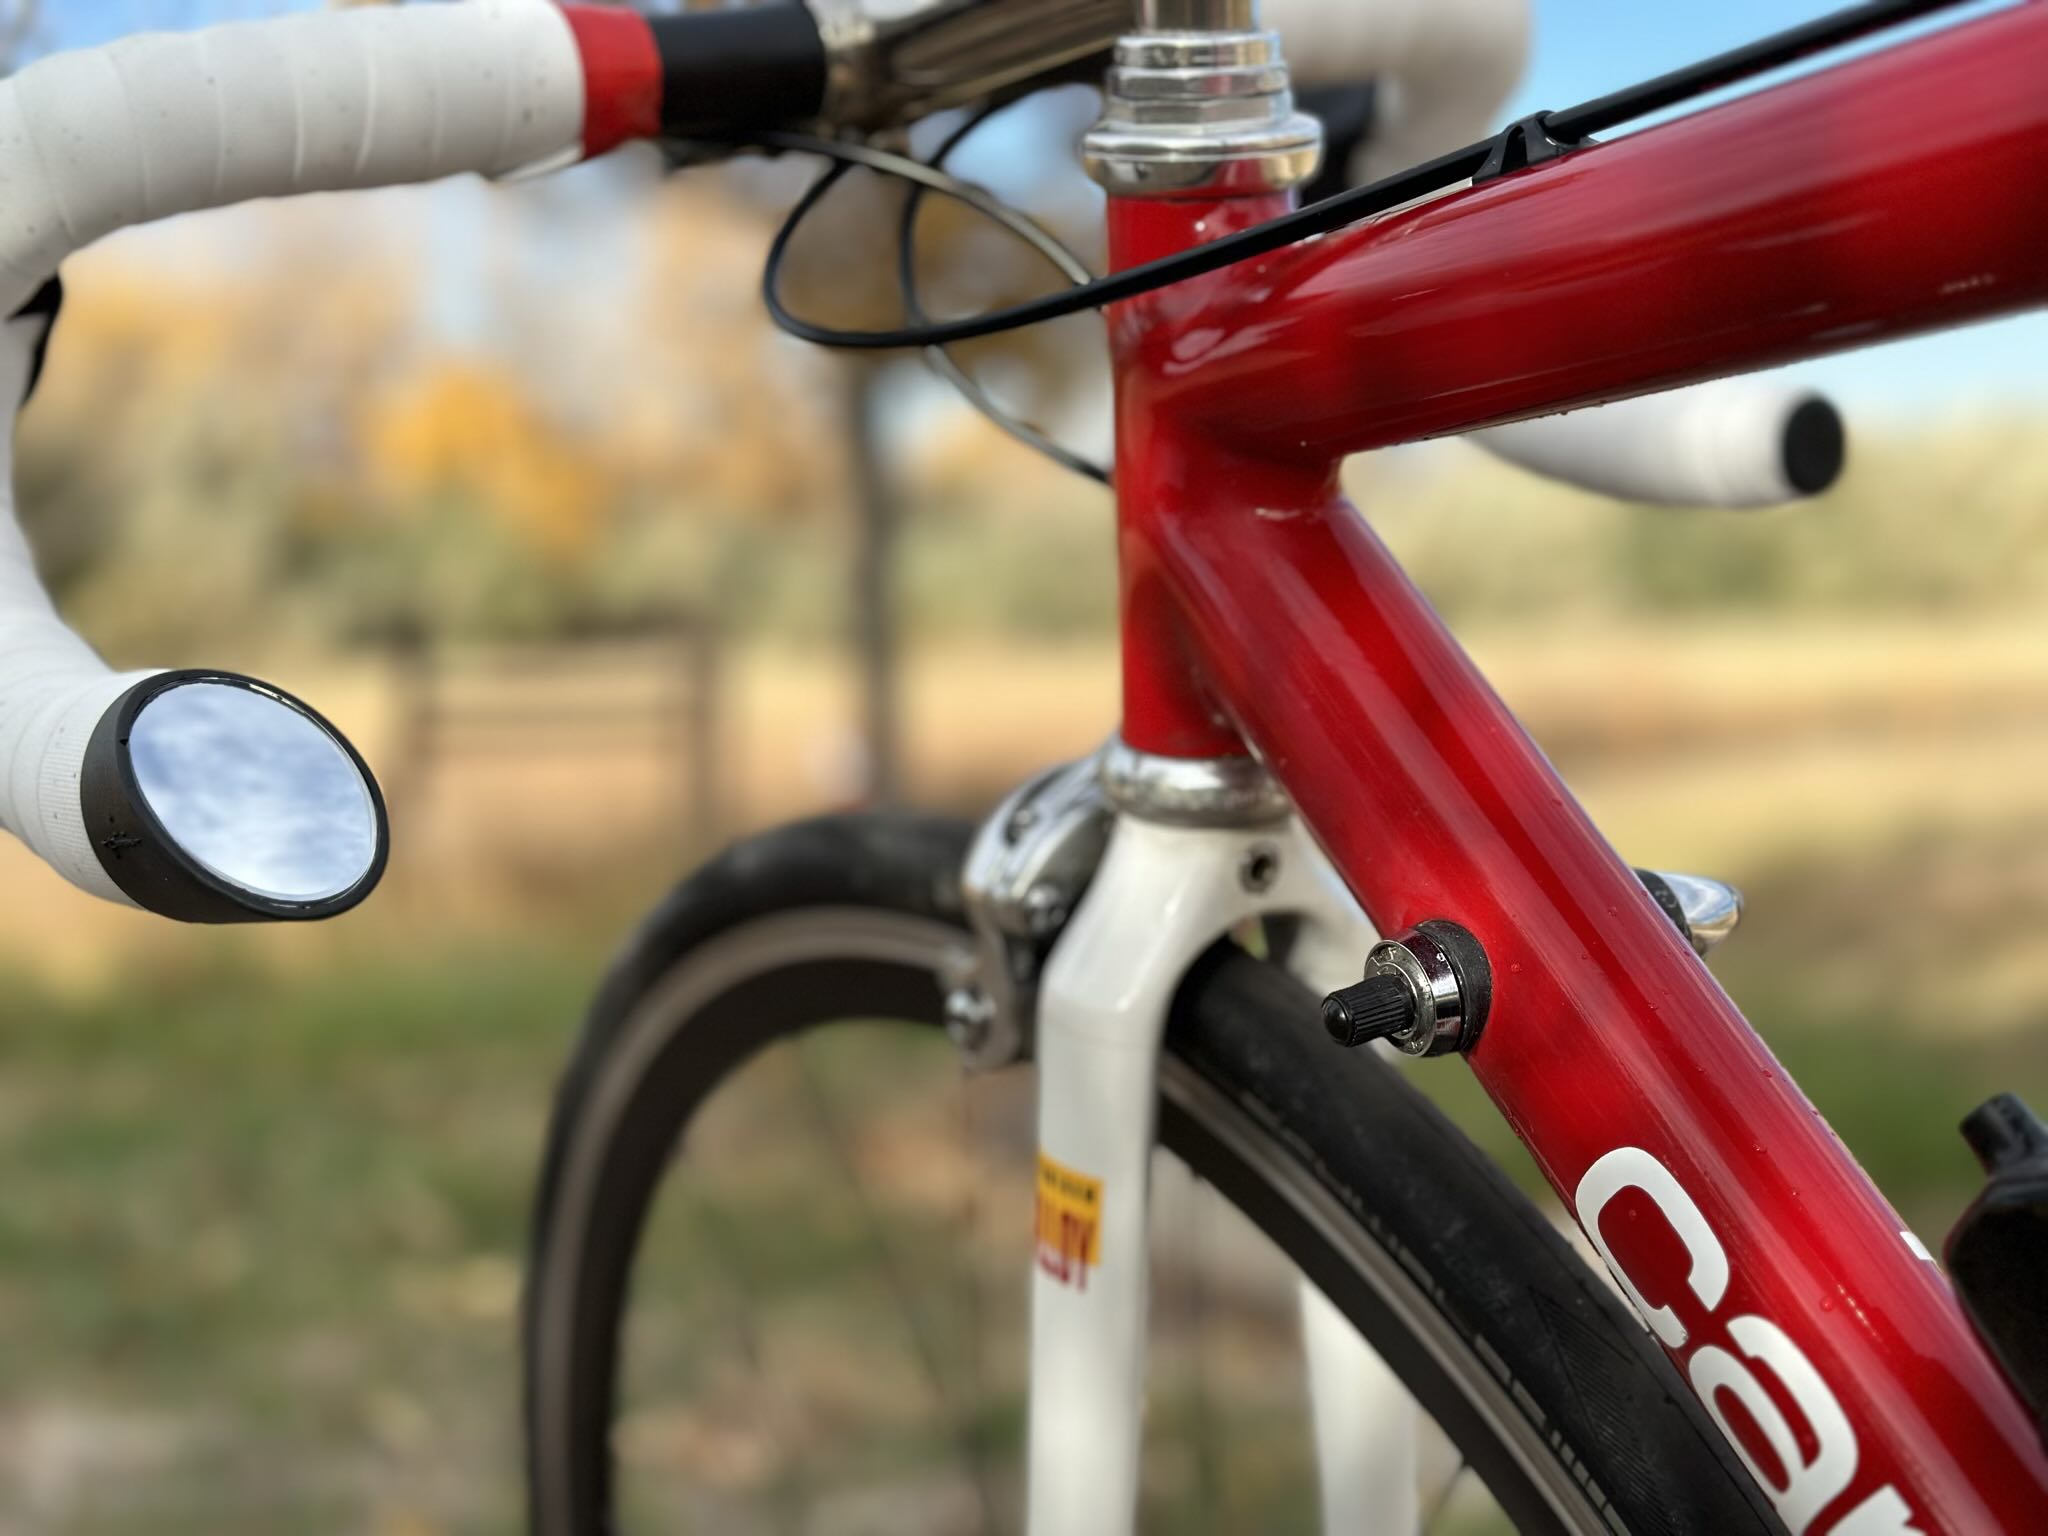
Rotated the brake hoods inward
Inspired by professional cyclists, I adjusted the brake hoods to be narrower. They now have a center-to-center distance of only 34 cm, allowing for a more streamlined arm position.
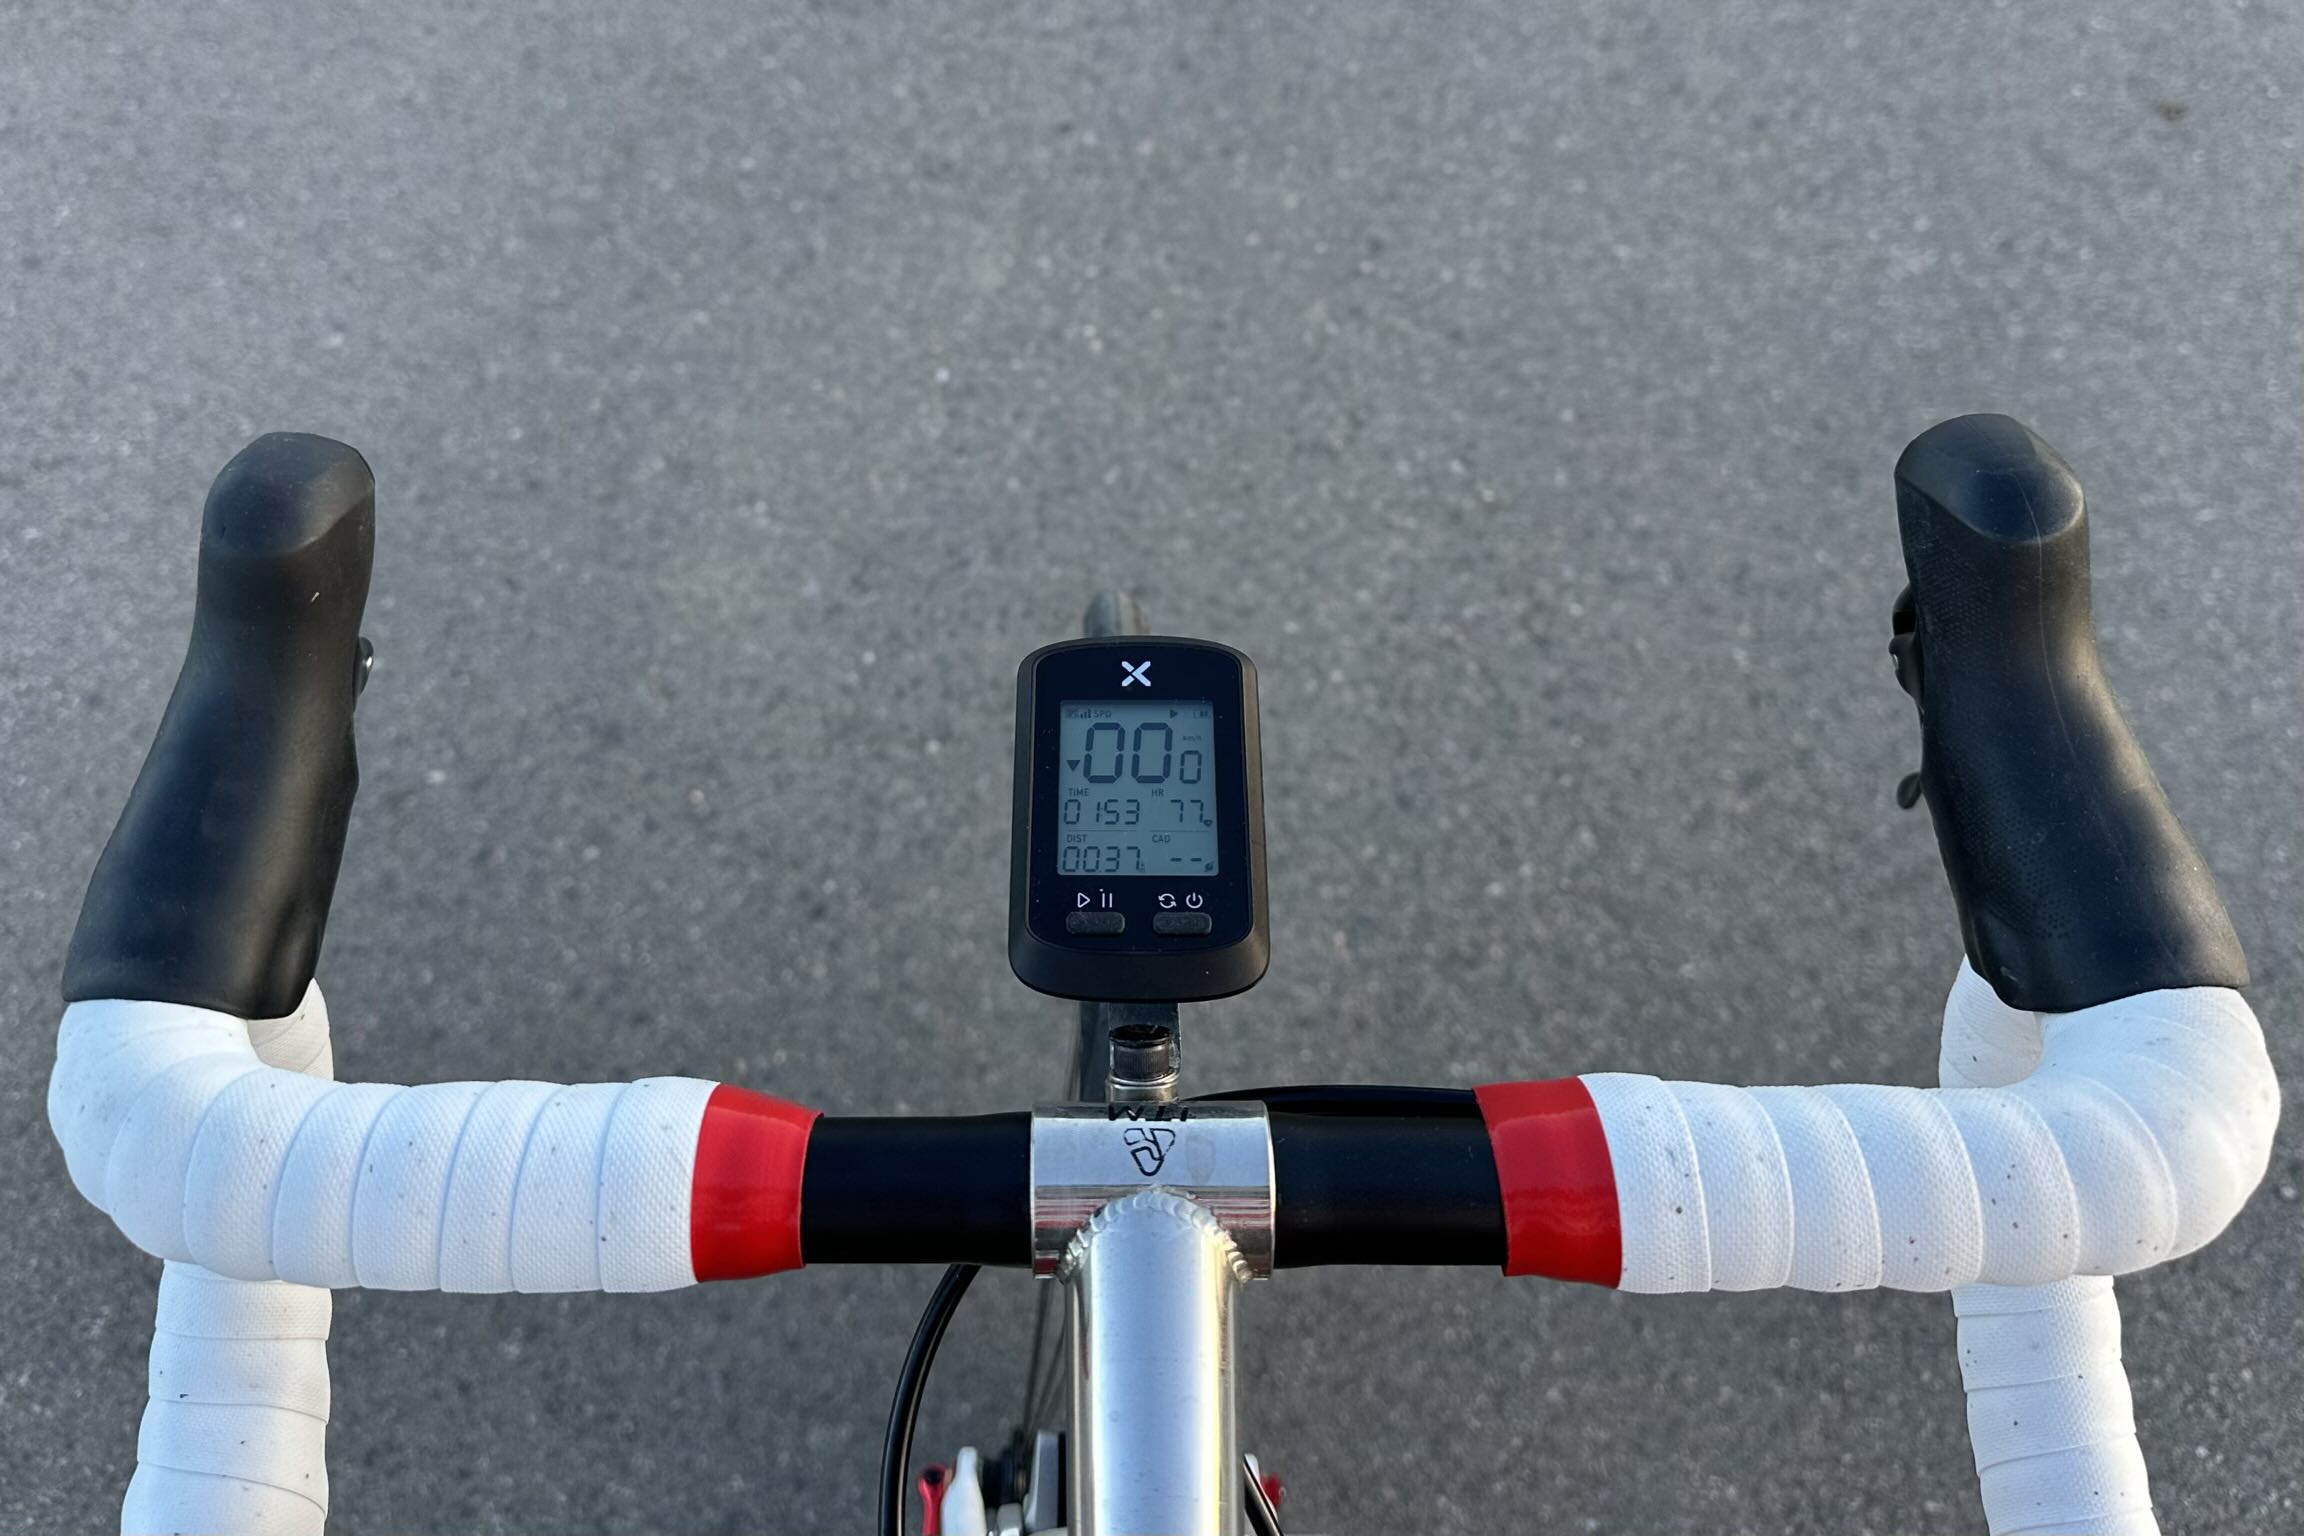
That’s especially important as I intend to be riding in the brake-hood aero position more, with elbows bent 90 degrees and wrists resting on the bar tops. This is discussed more in the following section.
Removed the clip-on aerobars
Aerobars are a common addition to road bikes and are particularly popular among triathletes and time trialists. They allow cyclists to adopt a more aerodynamic position, reducing wind resistance and potentially improving speed. When used correctly, aerobars can significantly enhance a rider’s efficiency, especially during time trials or long, flat stretches of road.
However, there are several reasons why I chose to remove the clip-on aerobars:
- Inconsistent Use: During my rides, I found that I spent most of my time on the handlebar hoods or drops for safety reasons. This meant that I wasn’t consistently utilizing the aerobars to justify their permanent presence on my bike. Given this, I was exposing myself to additional resistance from the aerobars when not in use due to their flip-up armrests and “antlers” jutting out in the wind.
How would removing aerobars actually improve aerodynamics? Well, look at how much they stick out into the wind when they are not being used! - Gear Shifting: Aerobars can make gear shifting less convenient, especially when the shift levers are not mounted on them. It’s another reason I found that I spent most of my time with the hands on the brake hoods.
- Safety Concerns: While the aerodynamic benefits of aerobars are undeniable while you use them, they can compromise handling and control, making them less ideal for crowded or unpredictable riding environments. For safety reasons, I preferred not to rely on them in traffic, through turns, or on poorly paved roads.
- Alternative Aero Positions: The decision to remove the clip-on aerobars prompted me to explore and become more comfortable with alternative aerodynamic positions, such as the brake-hood aero position. Many cyclists and experts consider this position to be nearly as aerodynamic as the traditional aerobar position. With your elbows bent at a right angle and forearms horizontal, it allows for a flat back and reduced wind resistance while maintaining easier access to the brake and shift levers.
In essence, my choice to remove the clip-on aerobars was driven by a combination of practicality, safety, and a desire to simplify (and lighten!) my bike setup. While aerobars certainly have their place in triathlons, time trials, and ultra-distance bikepacking events, their utility may vary depending on the type of riding and personal preferences.
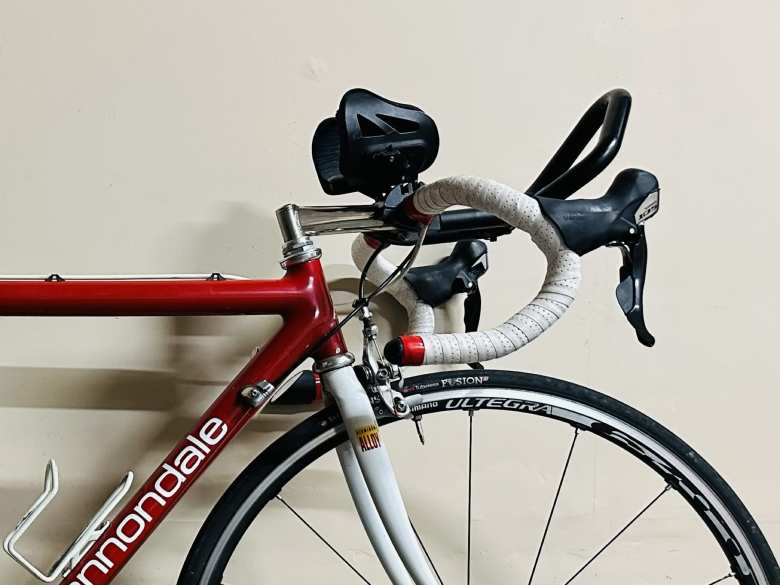
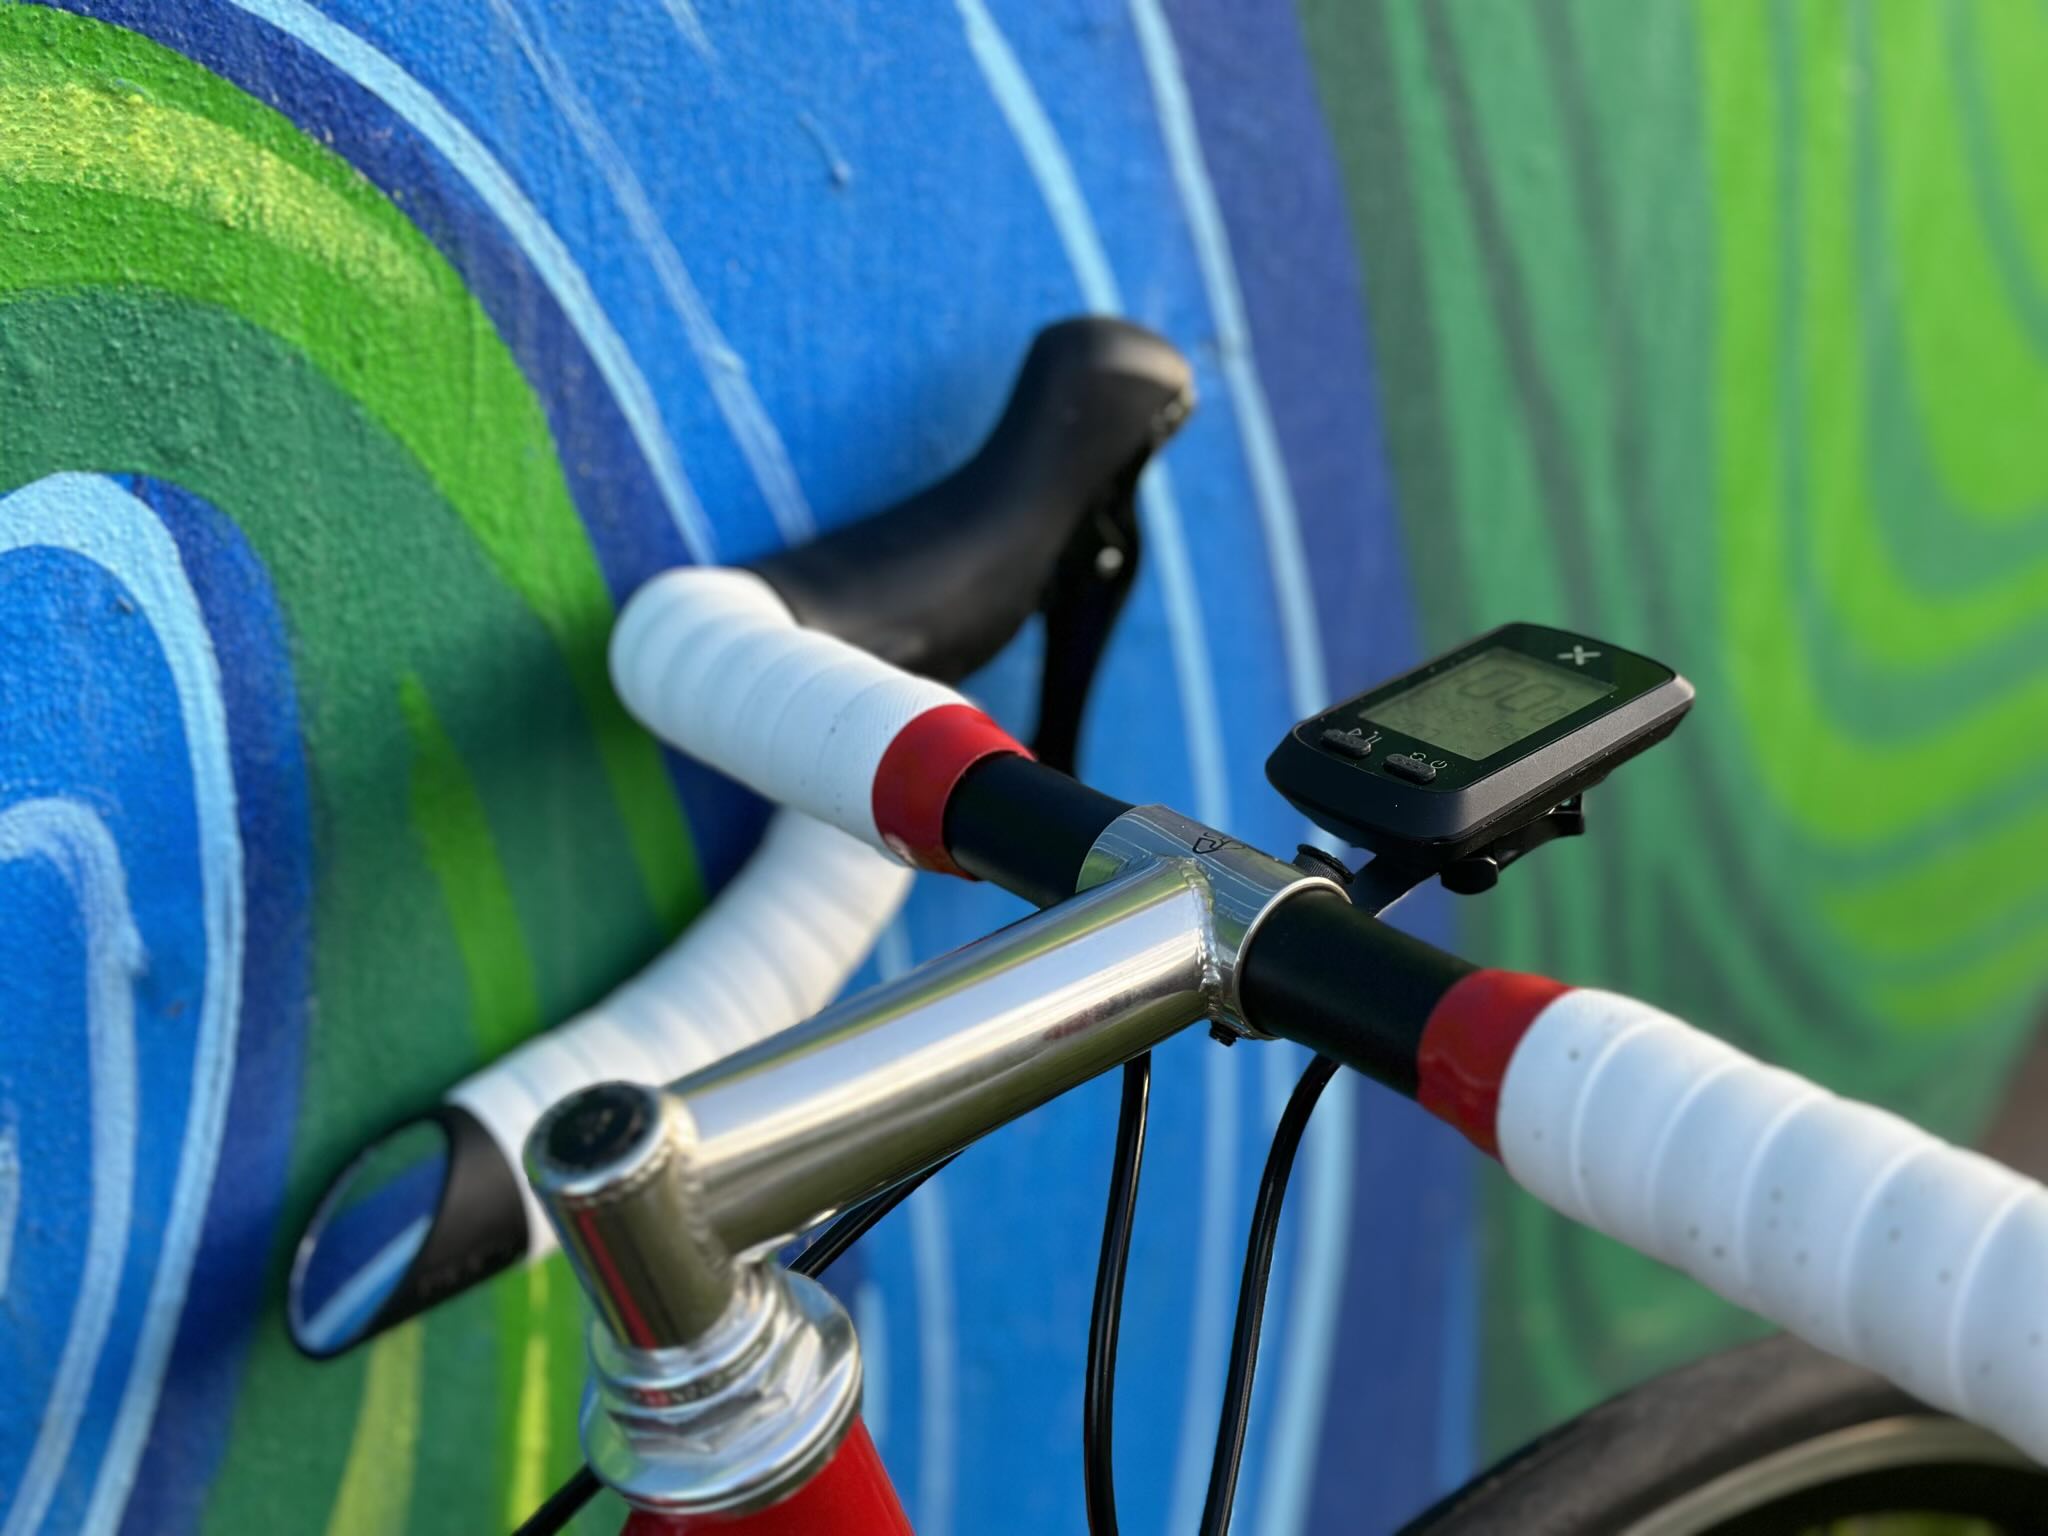
Mount head unit in front of handlebars
Rather than having the cyclometer perched on top of the stem, I fabricated a lightweight steel bracket to position it in front, directly in line with the handlebars. This adjustment slightly reduces the frontal area.
Utilized aero water bottles
The aero water bottles I got have a more streamlined and tapered shape compared to traditional cylindrical bottles. This design minimizes their frontal area, which is a critical factor in reducing aerodynamic drag. Furthermore, they employ an innovative magnetic mounting system, eliminating the requirement for a water bottle cage. This not only reduces weight but also minimizes aerodynamic disruption.
These aero water bottles also feature dimpled surfaces, similar to the indentations on a golf ball. This design element is intended to reduce the separation of airflow around the bottle.
Unfortunately, the quality of the bottles isn’t top-notch, with the valves being particularly prone to leaks. But I love the concept.
Do aero water bottles actually make a measurable reduction in air resistance? I’m unsure, but they sure look fast!
Installed wheels with deeper rims
Speaking of dubious aerodynamic benefits, let’s talk about the Reynolds Solitude wheels I installed. These 30mm-deep wheels were once considered “aero,” but I’ve come to doubt their actual aerodynamic advantage compared to my previous wheels, despite being 7.5 mm deeper. The reason for my skepticism lies in their dimensions—these wheels have an external width of 18.5 mm, which is notably narrower than the 700x25c tires I’m using, measuring 23.5 mm wide on these wheels.
The Rule of 105, a guideline in bicycle wheel aerodynamics coined by Josh Poertner, former technical director at Zipp Wheels, suggests that the rim should be at least 105% of the width of the tire to effectively manage airflow and reduce drag. In this case, the ratio of rim width to tire width is 18.5/23.5, resulting in a percentage of 78.7%.
Furthermore, findings from a YouTube channel have essentially confirmed that deep dish wheels that don’t adhere to the Rule of 105 offer no aerodynamic advantages over shallower wheels. In their testing, ICAN 50 mm carbon wheels were compared to shallower aluminum wheels, revealing no time savings but an increase in instability, particularly in crosswinds.
The Reynolds Solitude wheels have a moderate depth of just 30 mm, which effectively eliminates concerns related to crosswind instability. This depth does impart strength, reducing the requirement for additional spokes. However, it’s unlikely that they deliver significant aerodynamic advantages.
Greater Comfort
During my time at Stanford University from 1993 to 1997, one of my extra-curricular activities was participating in Usenet discussion groups, which were among the earliest online forums. I accessed these groups with Sun Microsystems UNIX computers on the second floor of Sweet Hall, often with my trusty Cannondale bike nearby, resting against a wall. One of the Usenet newsgroups I actively followed was rec.bicycles.tech, a hub for lively discussions on all things related to bicycles.
One of the most passionately debated topics in this newsgroup centered around the stiffness of aluminum frames. Some enthusiasts complained that oversized aluminum frames were overly rigid and harsh. However, there were dissenting voices, particularly from know-it-all engineer types like the infamous Jobst Brandt, who contended that the perceived harshness was greatly exaggerated and more psychological than real. They pointed out that other elements of a bike, including the tires, saddle, and handlebar tape, played a far more significant role in providing comfort and compliance than minuscule frame tube deflections.
I firmly aligned with the camp that emphasized the importance of these other factors, not just because of my engineering background but also due to my personal experience. My bike, based on Cannondale’s 3.0 Series frame known for its stiffness (an advantage for power transfer), had always been comfortable to me. Even during lengthy rides such as centuries, double centuries, and ultra-distance cycling events, I never felt excessively fatigued or “beat up” by my bike.
Over the years, I observed an improvement in ride quality with each change of bicycle tires. I transitioned through various models, including the Michelin Hi-Lite Supercomp HD, the Michelin Pro Race, and eventually Hutchinson tubeless tires, which were particularly transformative for me when I adopted them in 2014. Notably, tubeless tires not only reduced rolling resistance and eliminated flat tires by allowing the use of sealant, but also allowed me to run lower pressures without the risk of pinch flats.
Recent years have witnessed a shift in the professional peloton towards fully embracing tubeless tires. These tires offer reduced rolling resistance and the flexibility to run lower pressures without concerns about flats caused by the pinching of a tube.
However, the most substantial trend has been the adoption of wider tires. Back when I initially acquired my bike, high-end Cannondale race models favored 700x20C tires inflated to 110 psi. The prevailing belief was that narrower tires were faster due to their improved aerodynamics, and higher pressures resulted in lower rolling resistance. However, this mindset began to change around the time of the introduction of tubeless road tires. It became evident that wider, lower-pressure tires often surpassed their narrower, high-pressure predecessors in terms of rolling resistance, as they could smoothly roll over imperfect road surfaces, rather than bouncing off them.
Wider tires, along with lower pressures, significantly enhanced ride quality, a concept that resonates with the wisdom of individuals like Jobst Brandt from three decades ago.
In line with these evolving trends, and even though I never considered my bike uncomfortable, I made the following adjustments to enhance its comfort.
Wider Tires
After three decades of using 700x23C tires, I decided to switch to wider rubber to stay in step with industry trends. I selected Schwalbe Pro One 700x25C tubeless tires known for their low rolling resistance, supple ride, and ease of mounting. While they measured only 23.6 mm wide on my narrow Reynolds Solitude wheels, this was still a bit broader than the 22.5 mm width of the 700x23C Hutchinsons I had previously used. Presumably, their air volume was greater as well.
Unfortunately, 700x25C is about the widest that can be fitted to a Cannondale 3.0 Series frame, at least in the rear. (I believe there is enough clearance to use 700x28C at the front.) One Cannondale owner wrote,
I have a 90s Cannondale which really should have a max of 25 mm tyres. I have a 28 mm in the rear, but refitting it after a puncture means a three-handed dance between the quick release, the rear brake lever, and pushing on the rim at the chainstay to get it all centered. Otherwise the bike will subtly rub and erode my wheel and left chainstay over time.
Criggie on Bicycles Stack Exchange
Tire Pressure Experimentation
The Silca tire pressure calculator recommended approximately 97 psi for 25 mm 700C tubeless tires. Starting from there, I experimented with decreasing the pressure, and nowadays don’t run more than 78 psi.
A YouTube video, in particular, left a deep impression on me. It concluded that running 50 psi in 700x28C tubeless tires didn’t compromise speed compared to 100 psi but markedly enhanced the ride comfort.
While I lacked a power meter for precise measurements, I likewise found that 78 psi seemed equally efficient as 97 psi but offered a smoother ride. Tubeless tires allowed me to run lower pressures without the risk of pinch flats. I may experiment with even lower pressures in the future.
Skinnier Rims
You might be wondering how narrower rims could possibly enhance the comfort of my bike, especially when the prevailing industry trend leans toward wider rims. Here are a couple of key considerations:
Firstly, it’s a misconception that wider rims are necessary to accommodate wider tires. People have been fitting super-wide knobby tires onto narrow rims for ages. Wider rims become crucial when you’re aiming for better aerodynamics, a topic discussed in the “More aerodynamic” section.
Secondly, according to an industry veteran, wider tires on narrow rims offer an improved ride quality, with better shock absorption characteristics. This is attributed to the “light-bulb effect,” which causes the tires to assume an O-shaped profile similar to tubular tires. Tubular tires had been the standard in professional cycling for more than a century until recent years when tubeless tires gained popularity. Tubulars’ suppleness, handling, and ride quality were many of the reasons they were favored, and tires on rims much narrower than them effectively mimic this quality.
New Handlebar Tape
I replaced my handlebar tape with Cannondale KnurlCork tape, lauded for its silicone strip instead of a messier double-sided adhesive backing. It is easy to clean and notably cushy, providing a more comfortable grip than my previous Fizik Microtex tape. The tape came with bar plugs branded with the Cannondale logo, a nice touch for my bike.

Switch to SPD Pedals
An experience earlier in the year in Colorado, where mud rendered my Speedplay cleats inoperative, prompted me to switch to SPD pedals for added comfort during both cycling and walking. I chose Venzo VZ-SCPD-02 double-sided pedals because of their reasonable weight and cost.
Additionally, I opted for Shimano SH-M065L shoes that accommodated recessed SPD cleats. These shoes—the same model I use in Spain—had proven to be more comfortable than the Performance Scattante shoes I used with Speedplay pedals in Colorado, as they didn’t cause hot spots on my feet. Moreover, they allow for recessed cleats, enhancing walkability.
The switch to SPD pedals didn’t necessarily make the bike more comfortable to ride per se (although the Shimano shoes did), but they significantly improved the comfort of walking in cycling shoes when off the bike. The fear of being unable to clip in due to mud in the cleats was completely eliminated, and this transition added an extra layer of comfort to my cycling experience.
Reduced friction
In this upgrade, I didn’t retrofit items like ceramic bearings. But I made several notable improvements to reduce friction in various areas:
- No Front Derailleur: The absence of a front derailleur means no chain rub to sap watts and contributes to a quieter riding experience.
- Better Chainline: The wider gear range of the 11-34T cassette ensures that, for most of my riding, the chain is on the outer two-thirds of the cassette. This, combined with the single chainring on the outer position of the crankset, results in a smaller chain angle, reducing friction.
- Waxed Chain: I’ve been immersing bicycle chains in melted paraffin wax since 2006, primarily for cleanliness and longevity. Independent lab tests have since confirmed that wax reduces friction compared to drip lubes. For this upgrade, I removed the factory grease from the new Shimano 105 11-speed chain using degreaser and an ultrasonic cleaner before applying the wax, ensuring maximum efficiency and longevity.
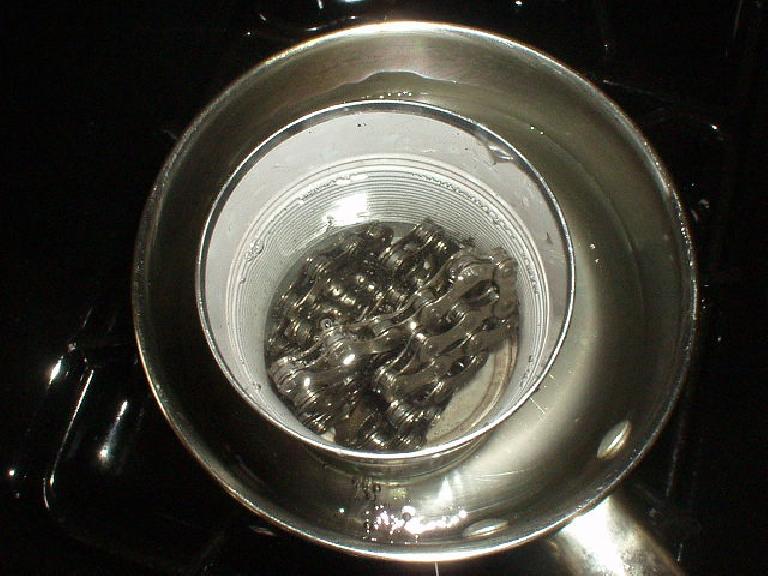
Melted wax and a bicycle chain inside a tin can inside a pot of boiling water. - Wider Tires: The switch to wider tires brings lower rolling resistance, provided all other factors like casing thickness, tire pressure, and tread remain the same. World Tour cycling teams transitioned from 23mm to 25mm tires around 2015, citing this reason. This is another thing that the late Jobst Brandt had pointed out back in the 1990s, but I only made the switch recently.
- Serviced Headset: Canny’s Campagnolo Athena headset, installed in 1997, wasn’t as smooth as it could be. While not noticeable during rides, it became apparent when turning the handlebars while stationary. I disassembled it, cleaned it in an ultrasonic cleaner, and repacked it with fresh Lucas lithium grease, restoring it to like-new condition. Impressive longevity for a 26-year-old part.

It’s worth mentioning that the new Ultegra rear derailleur may introduce some friction due to the clutch, according to Jason Smith, CTO of CeramicSpeed and founder of Friction Facts. The clutch in Shimano rear derailleurs might lead to increased drivetrain friction briefly after downshifts, but this typically dissipates after a short time.
Despite this, I haven’t noticed any additional drivetrain resistance. Shimano’s derailleur includes an “off” switch for the clutch to make wheel removal easier; you could also switch it off for time trials where minimizing drag is critical. For now, I keep the clutch “on” for enhanced chain security and the complete elimination of chain slap against the right chainstay.
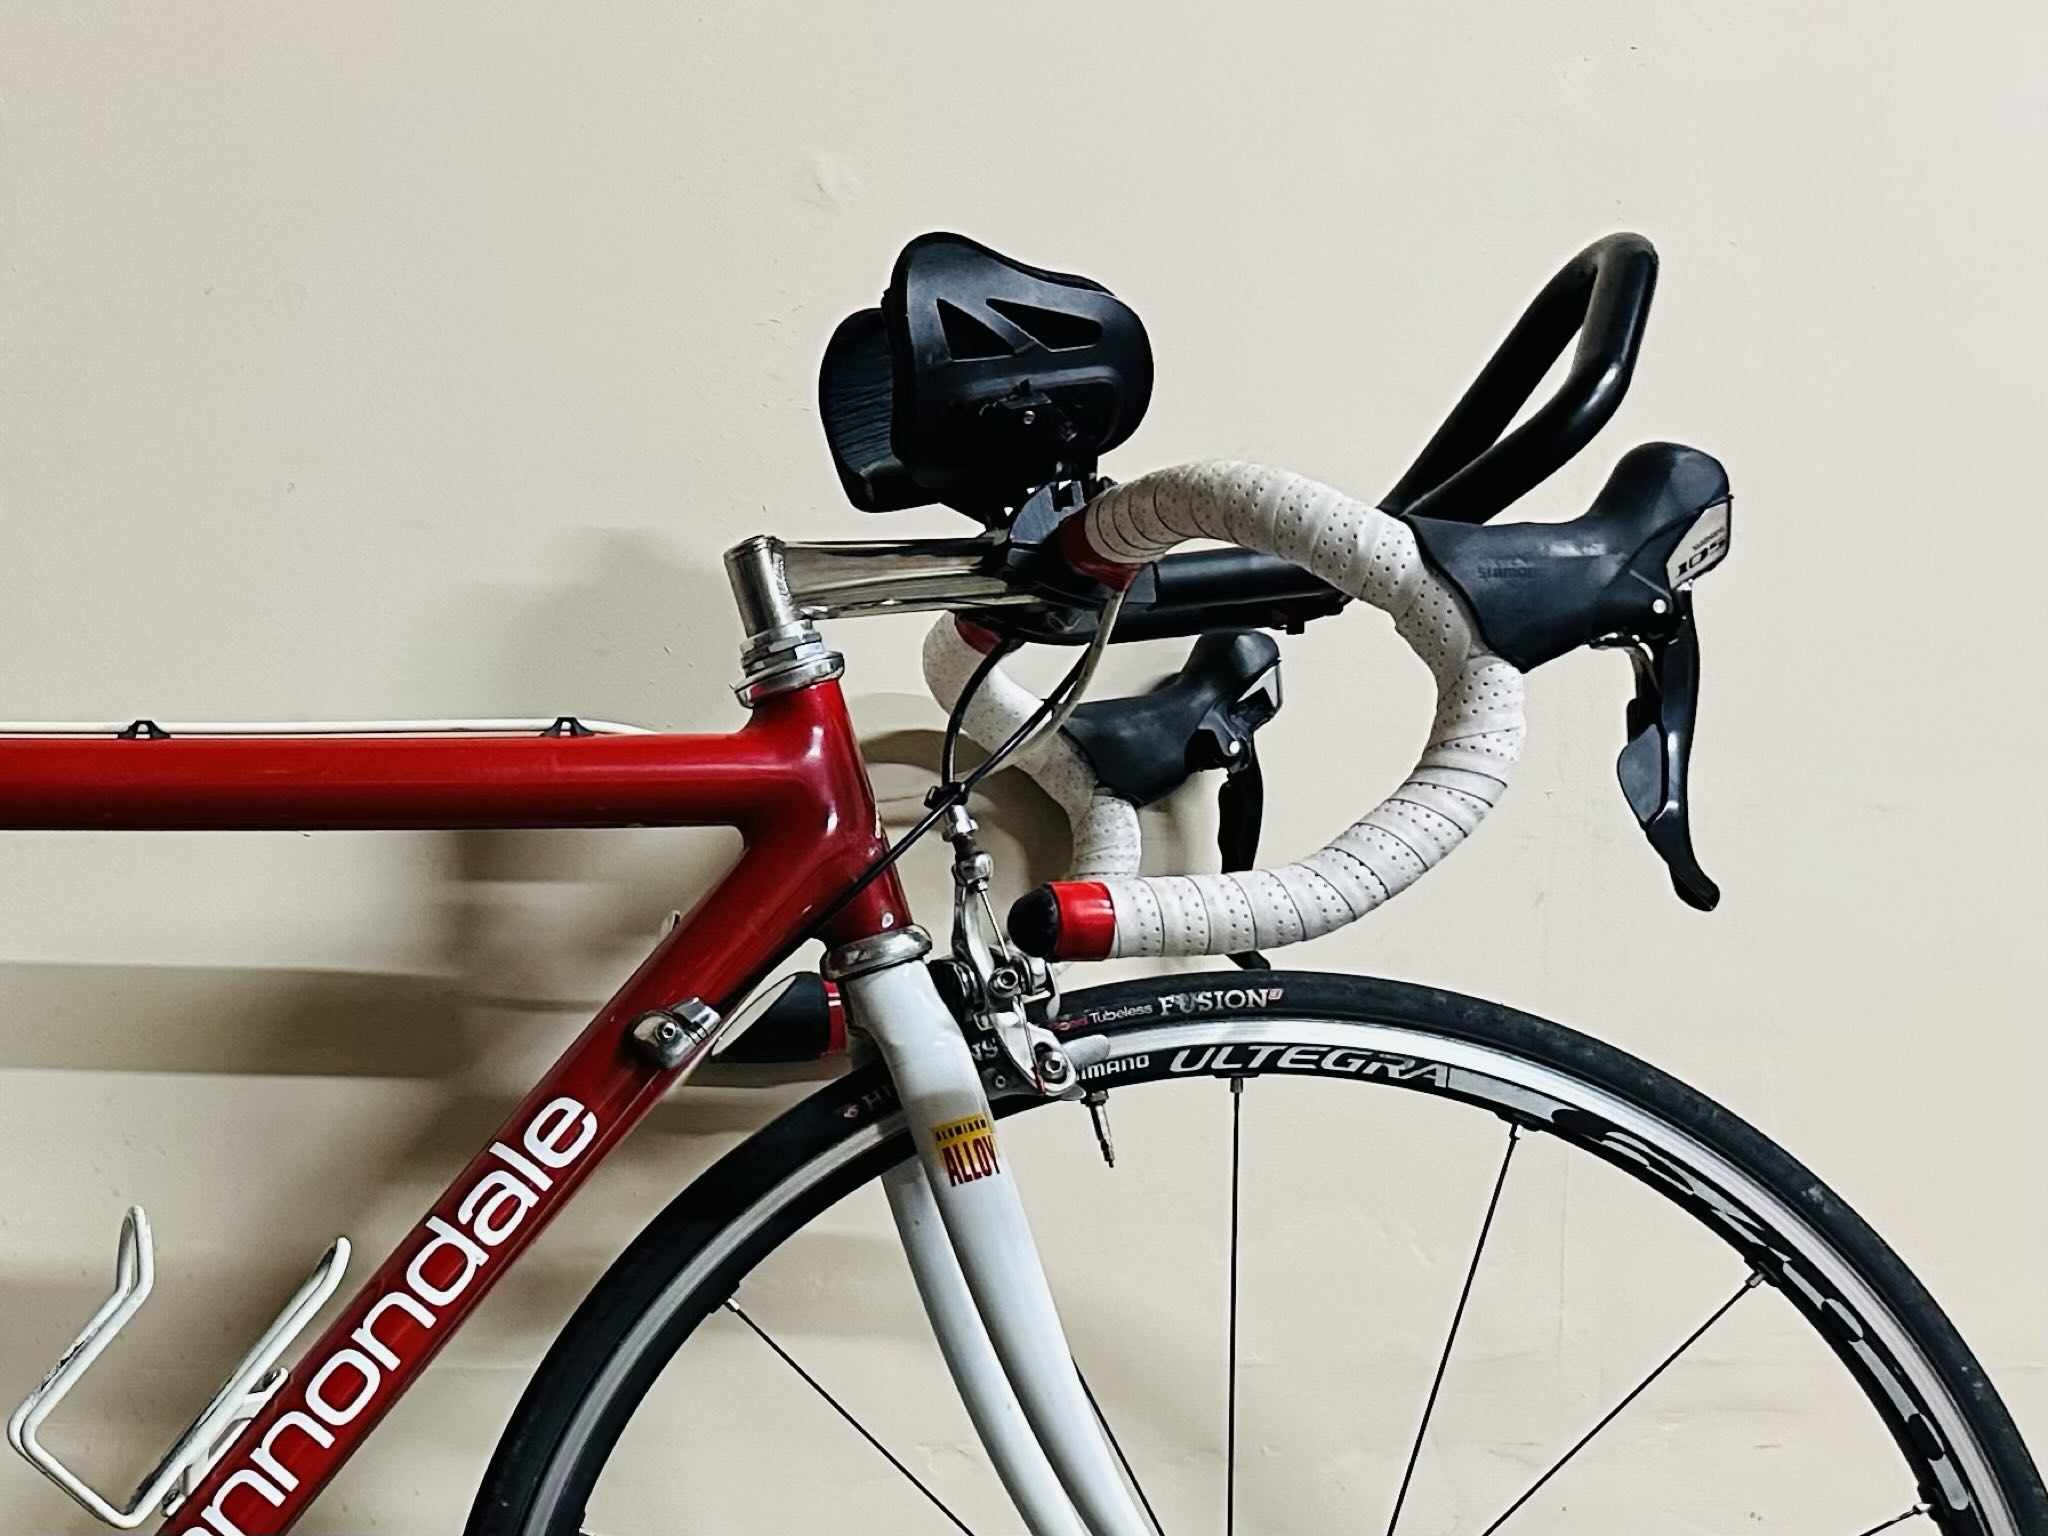
Better Looking
There weren’t many aesthetic enhancements to consider. I’ve always found the Cannondale R500 to be an attractive bike, characterized by meticulously hand-sanded welds, a glossy finish, tasteful decals, and timeless geometry.
Nonetheless, the passage of time had taken its toll, prompting a few measures:
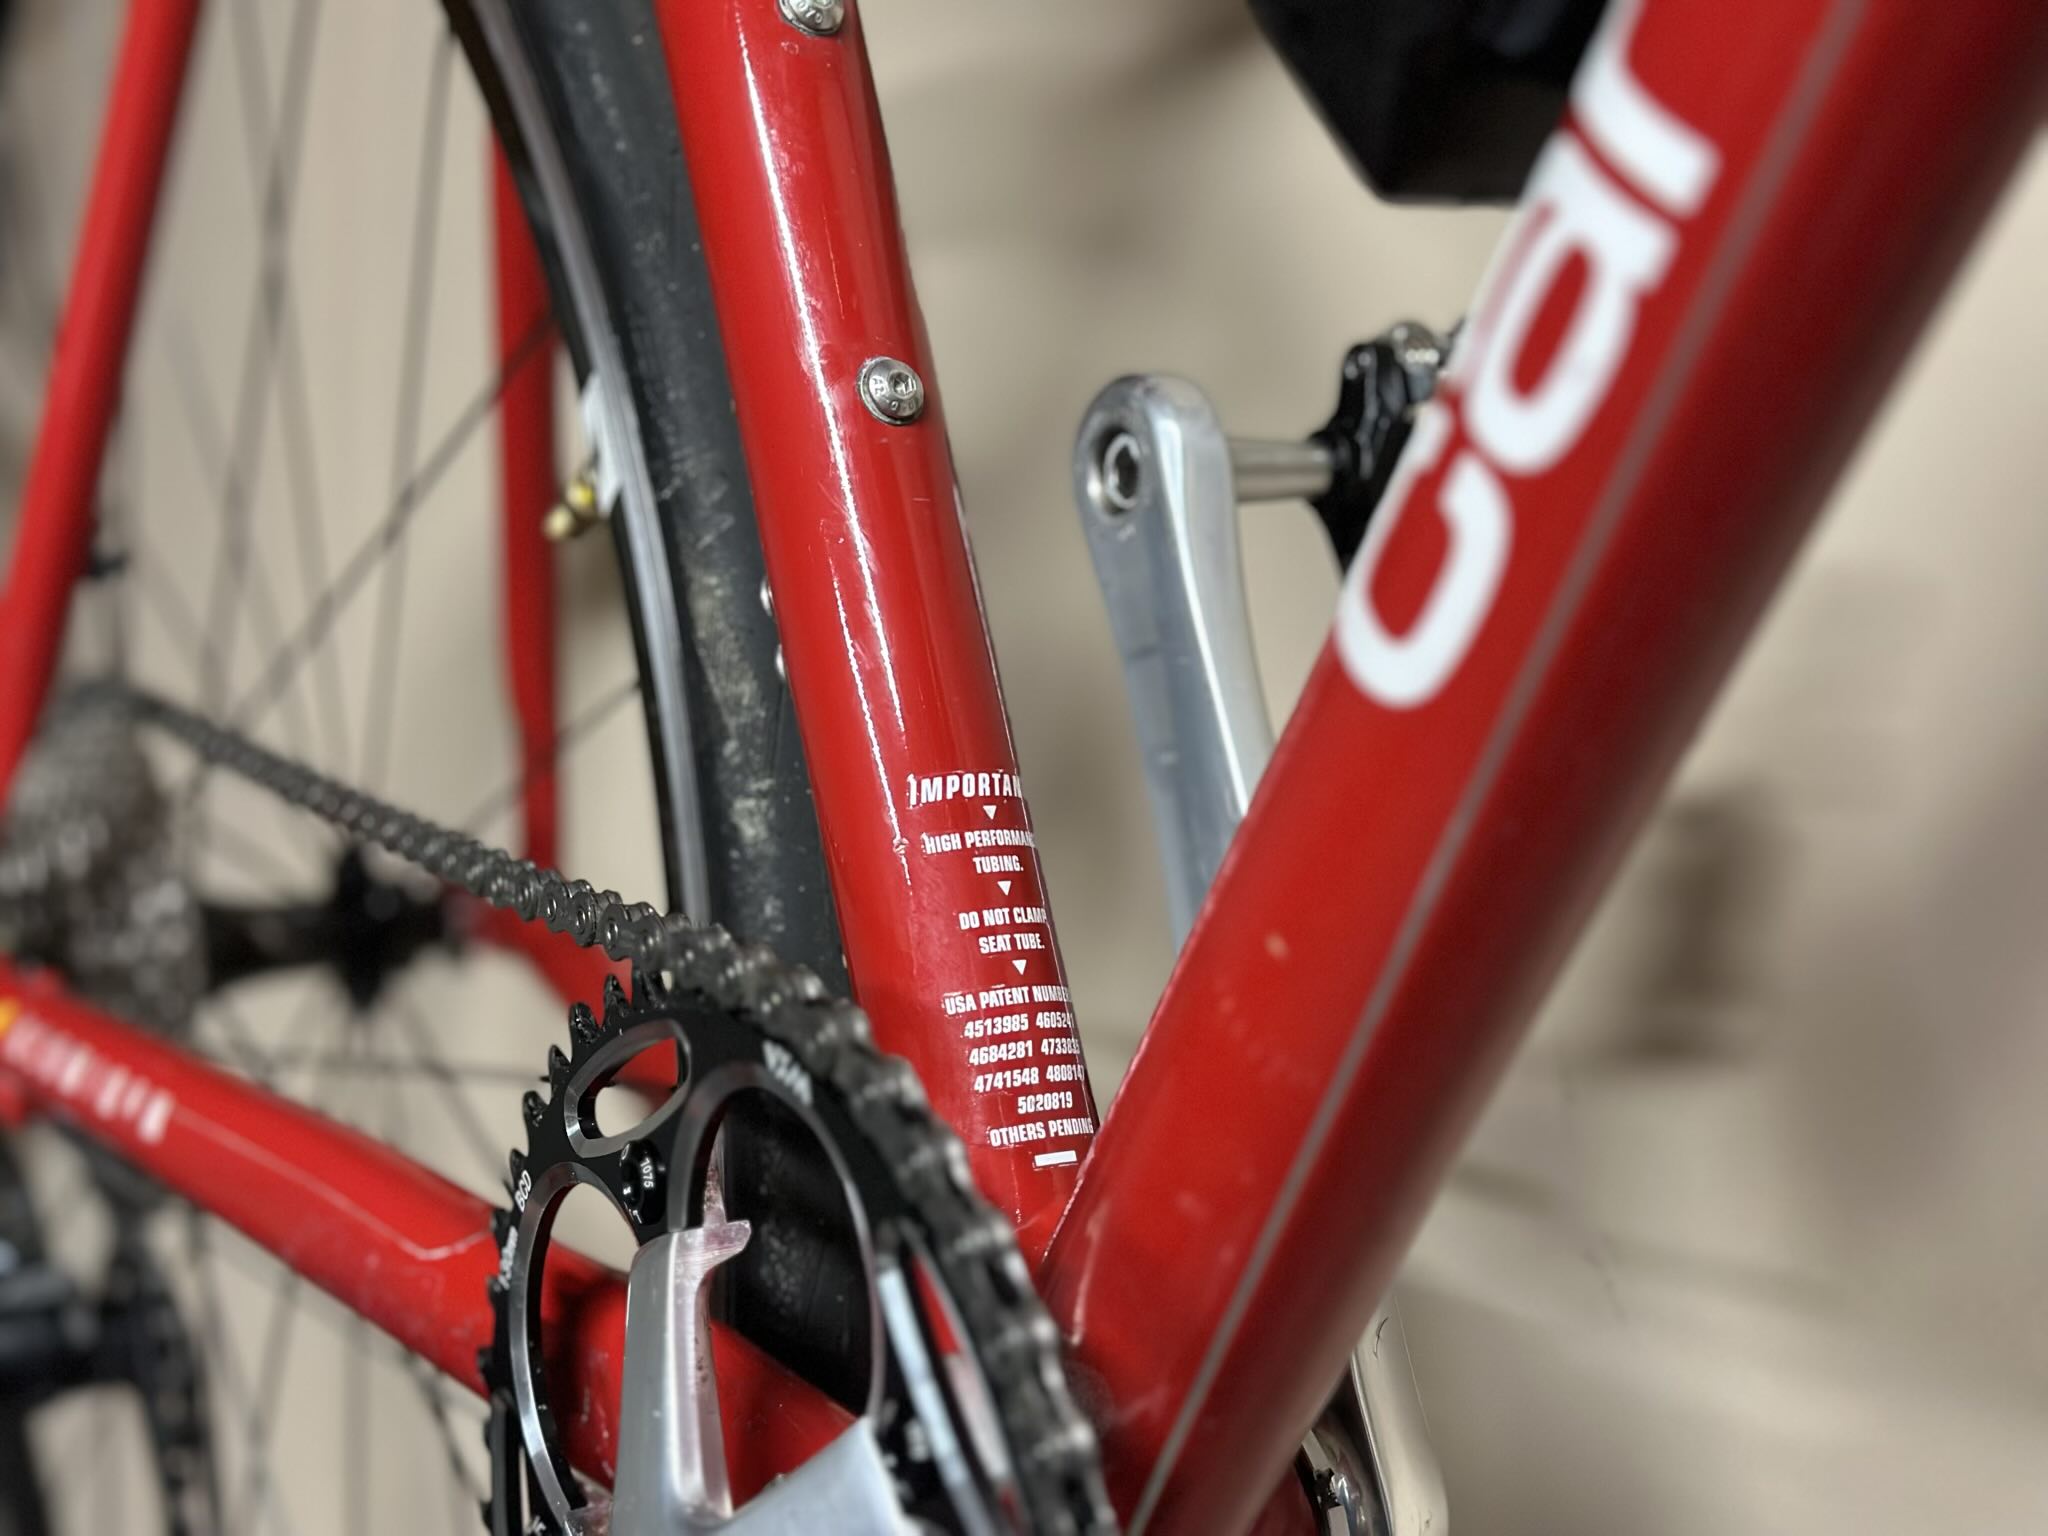
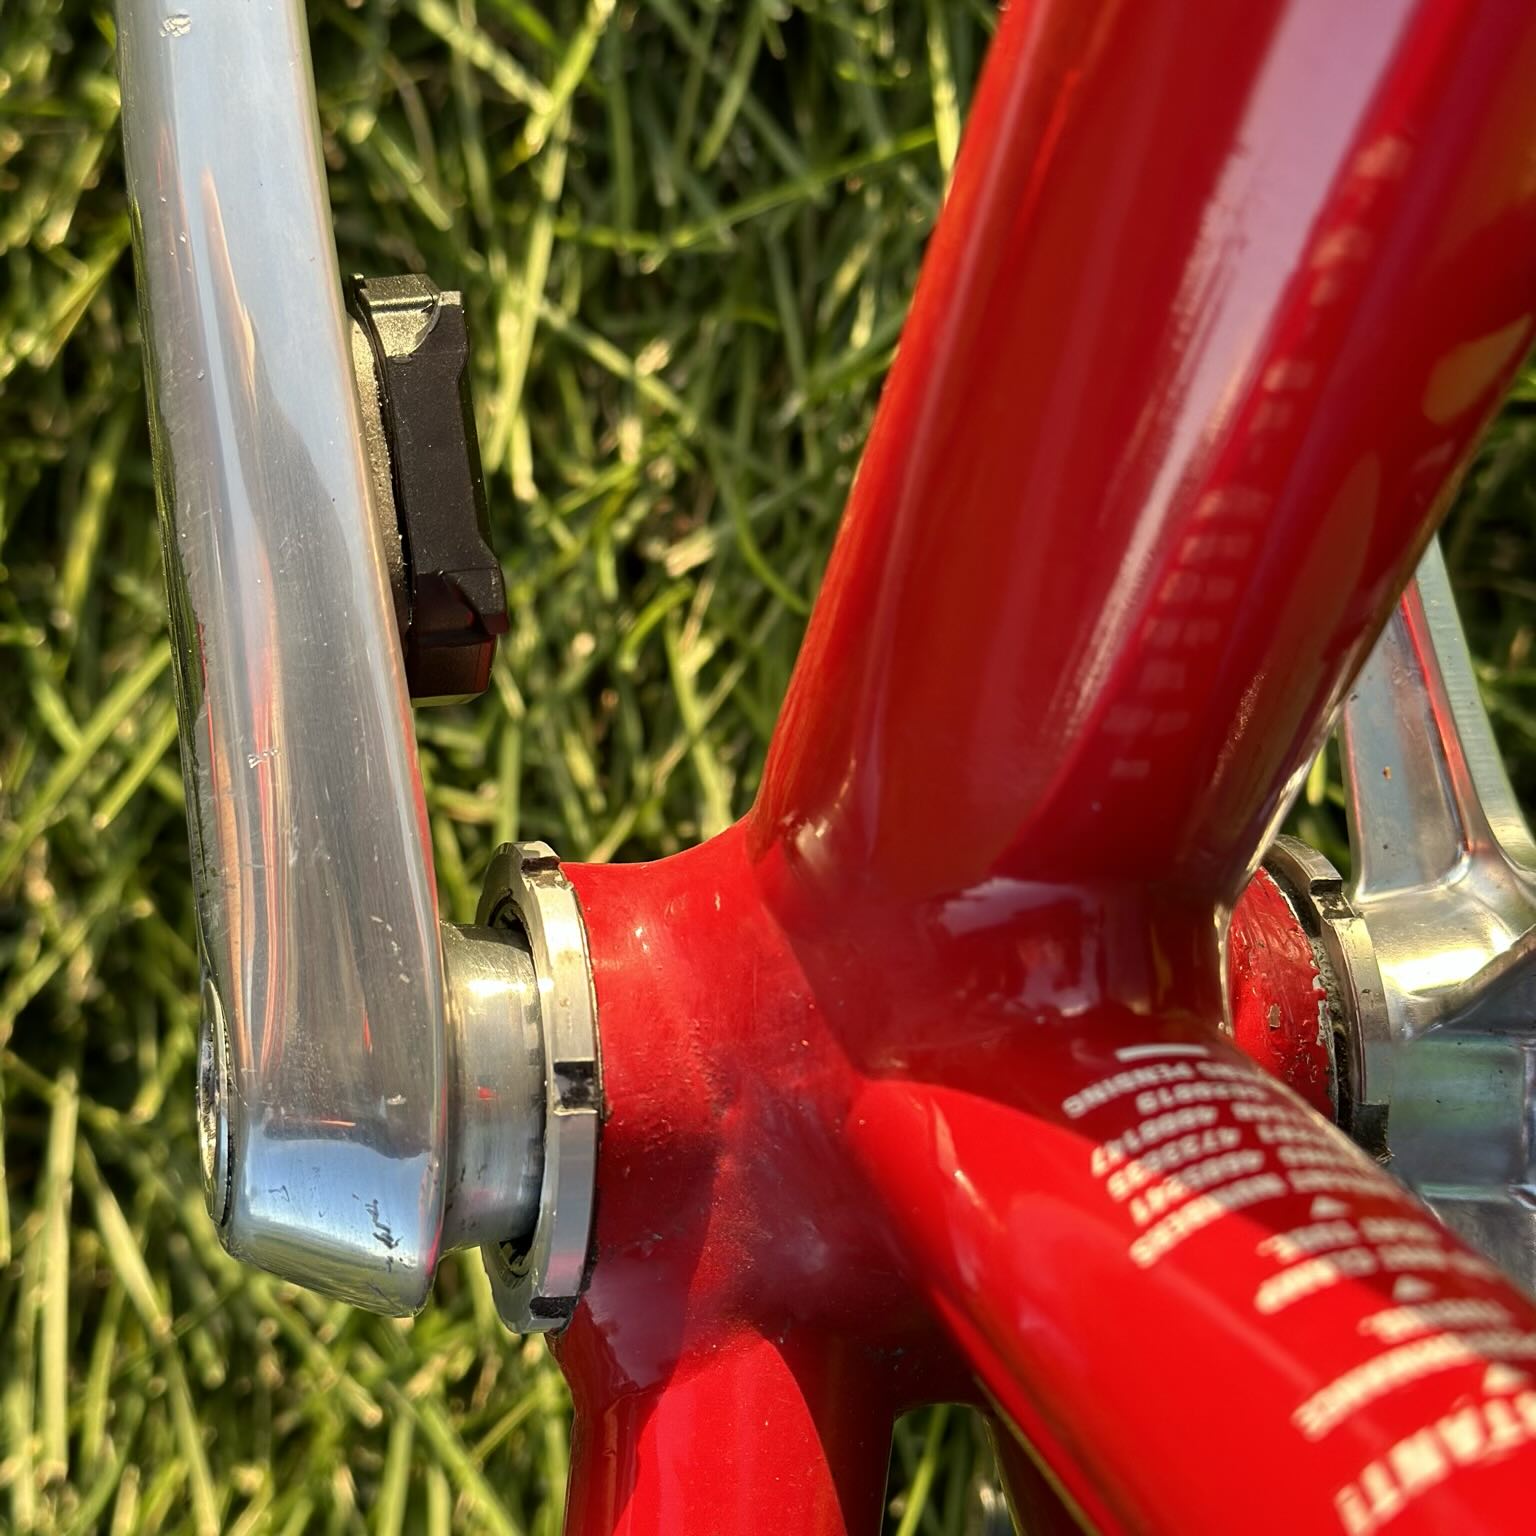
- Paint Chip Touch-Up: Over three decades of riding inevitably resulted in some paint chips. The majority of these blemishes were on the right chainstay from chain slap and around the bottom bracket due to chain drops. I first applied primer with a small brush.
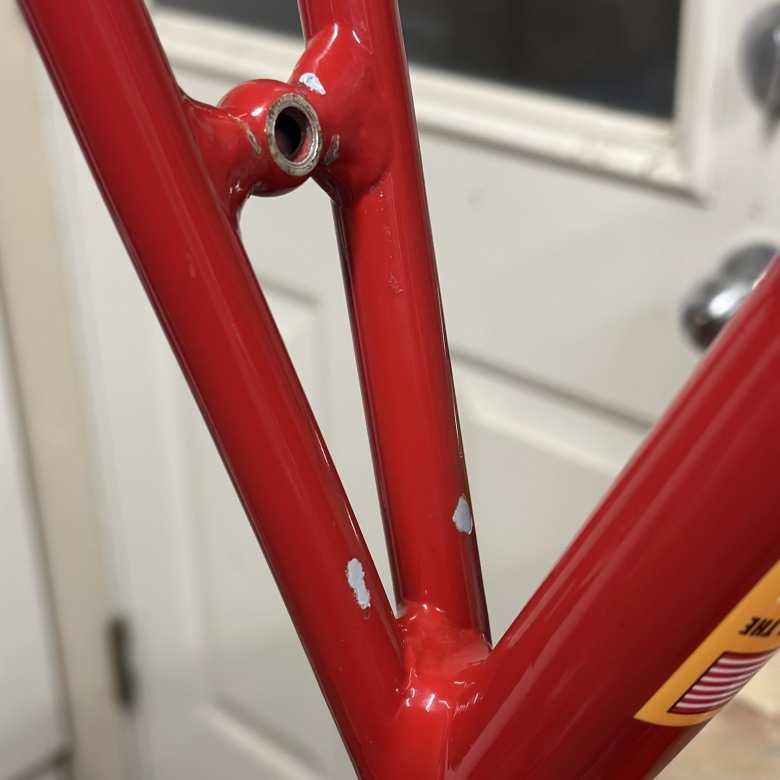
I first filled the paint chips with primer.
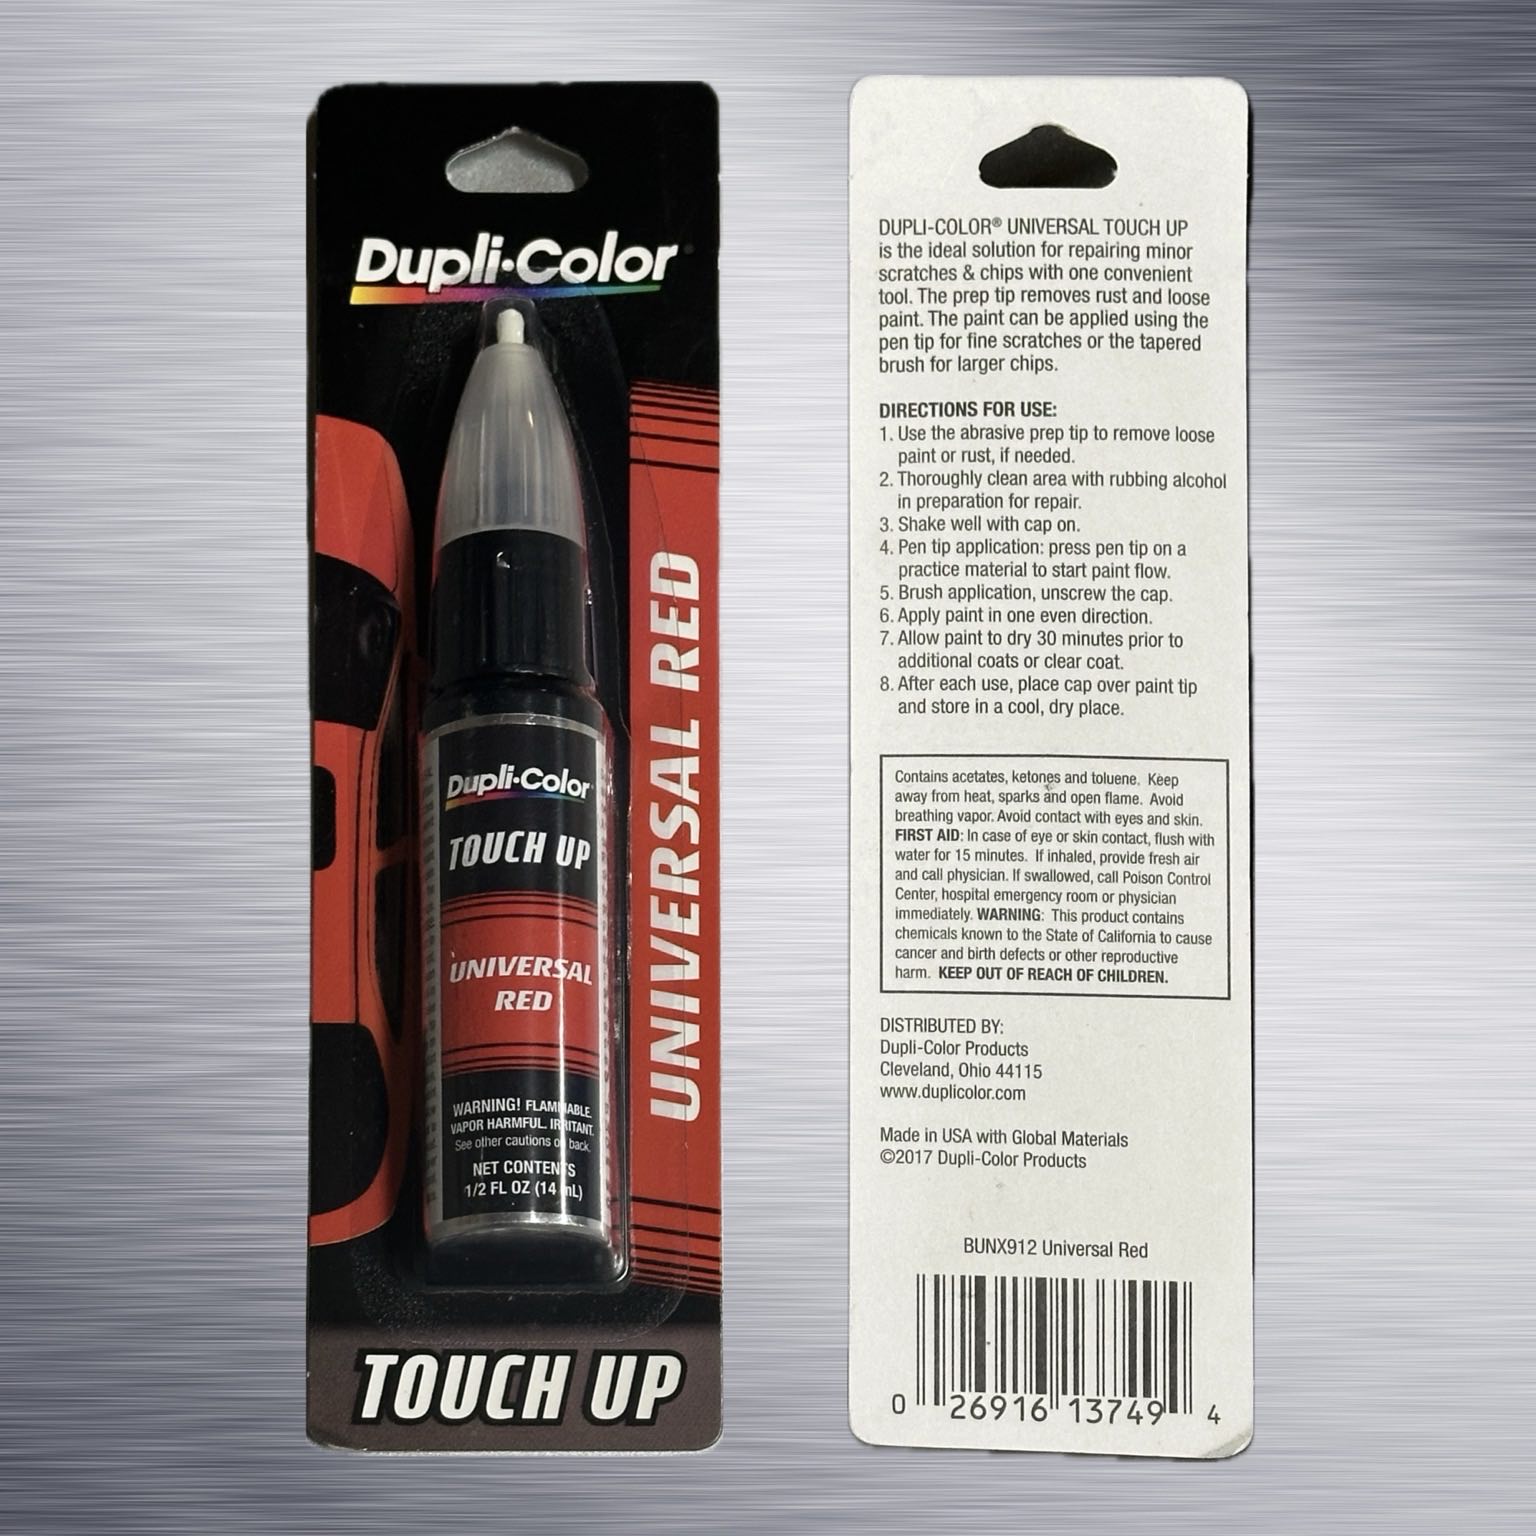
Then I applied Dupli-color Universal Red using its ball-point applicator. Happily, it proved to be a 100% match with Canny’s Formula Red paint.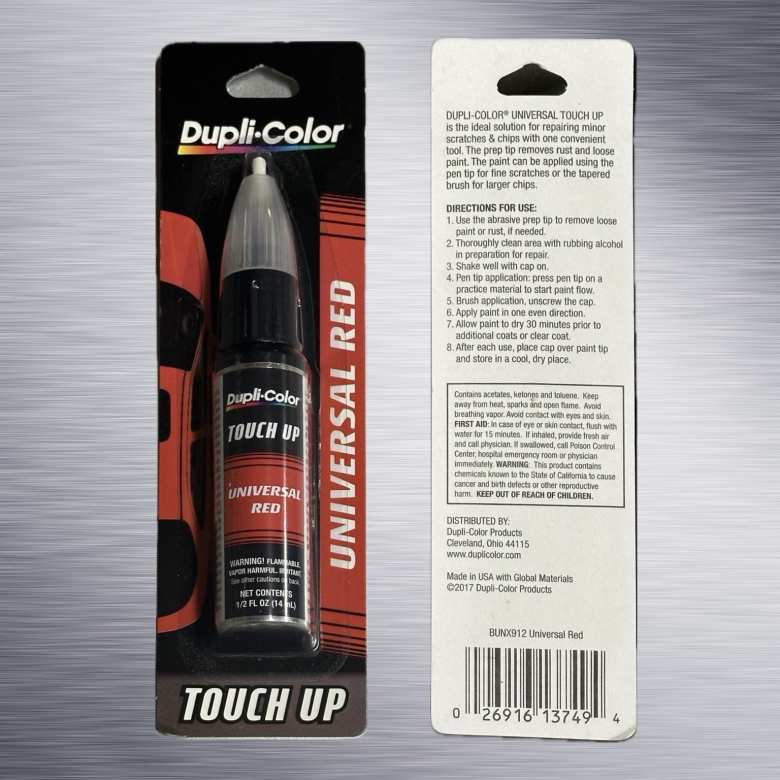
Dupli-color Universal Red touchup paint was a perfect match for the Formula Red paint of my Cannondale R500. It came with a ball-point and brush applicator.
Going forward, the improved chain security delivered by the single narrow-wide chainring and clutched rear derailleur should significantly reduce the occurrence of paint chips on the chainstay and bottom bracket. - Frame Polishing and Waxing: I utilized Turtle Wax car polish and CarGuys Liquid Wax to restore the frame’s shine.
- Decal Removal from the New Wheelset: The Reynolds Solitude wheelset I acquired came with large, flashy decals. It took me a couple of hours to remove them using a hair dryer and rubbing alcohol. The result is wheels that look cleaner and less akin to a NASCAR vehicle.
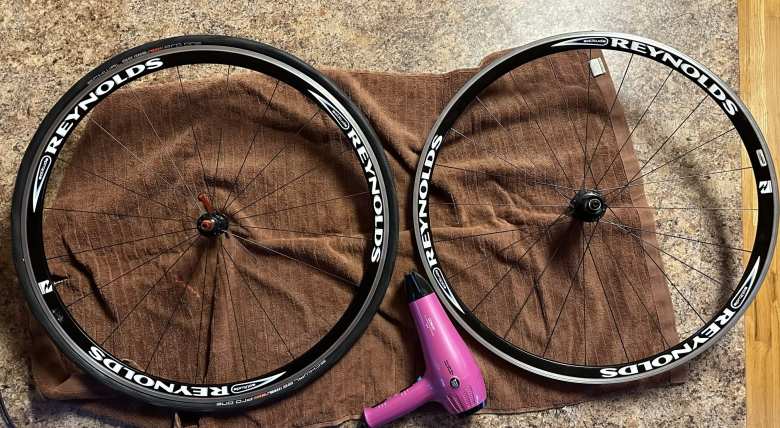
The Reynolds Solitude wheels came with NASCAR-like logos. I removed them with the aid of a hairdryer. - New Handlebar Tape: Instead of attempting to clean the old handlebar tape I had used for the past two decades, I opted for new white KnurlCork tape by Cannondale, adding a noticeable touch of freshness.
- Transitioned to 1X: Having a single chainring and no front derailleur provides a cleaner and more streamlined appearance.
- Use of 3M VHB Tape: While cleaning and touching up the frame, I encountered an interesting relic from the past—30-year-old remnants of silicone glue on the downtube. To attach the wired cadence and speed sensors of a Vetta C-20 cyclometer, I used silicone to avoid unsightly zip ties that would interrupt the bike’s sleek lines.
Today, sensors are wireless but they still need to be securely affixed to the bike. In this project, I opted for 3M VHB (Very High Bond) tape which I knew from various engineering projects was stronger than rivets in many cases. Not only is it exceptionally robust, but it’s also far easier to remove compared to silicone glue if the need arises—just use dental floss.
I used 3M VHB (Very High Bond) tape to attach the cadence sensor and cyclometer mount on flat surfaces. - Application of Red Electrical Tape: I affixed strips of red electrical tape in locations susceptible to cable rub to safeguard the paint in those specific areas.

More Secure
I had already installed the Italian Road Bike Mirror and a rear taillight, seamlessly integrated to maintain an inconspicuous appearance while allowing for better traffic monitoring and visibility.

The safety-related actions in this upgrade were relatively understated. They included:
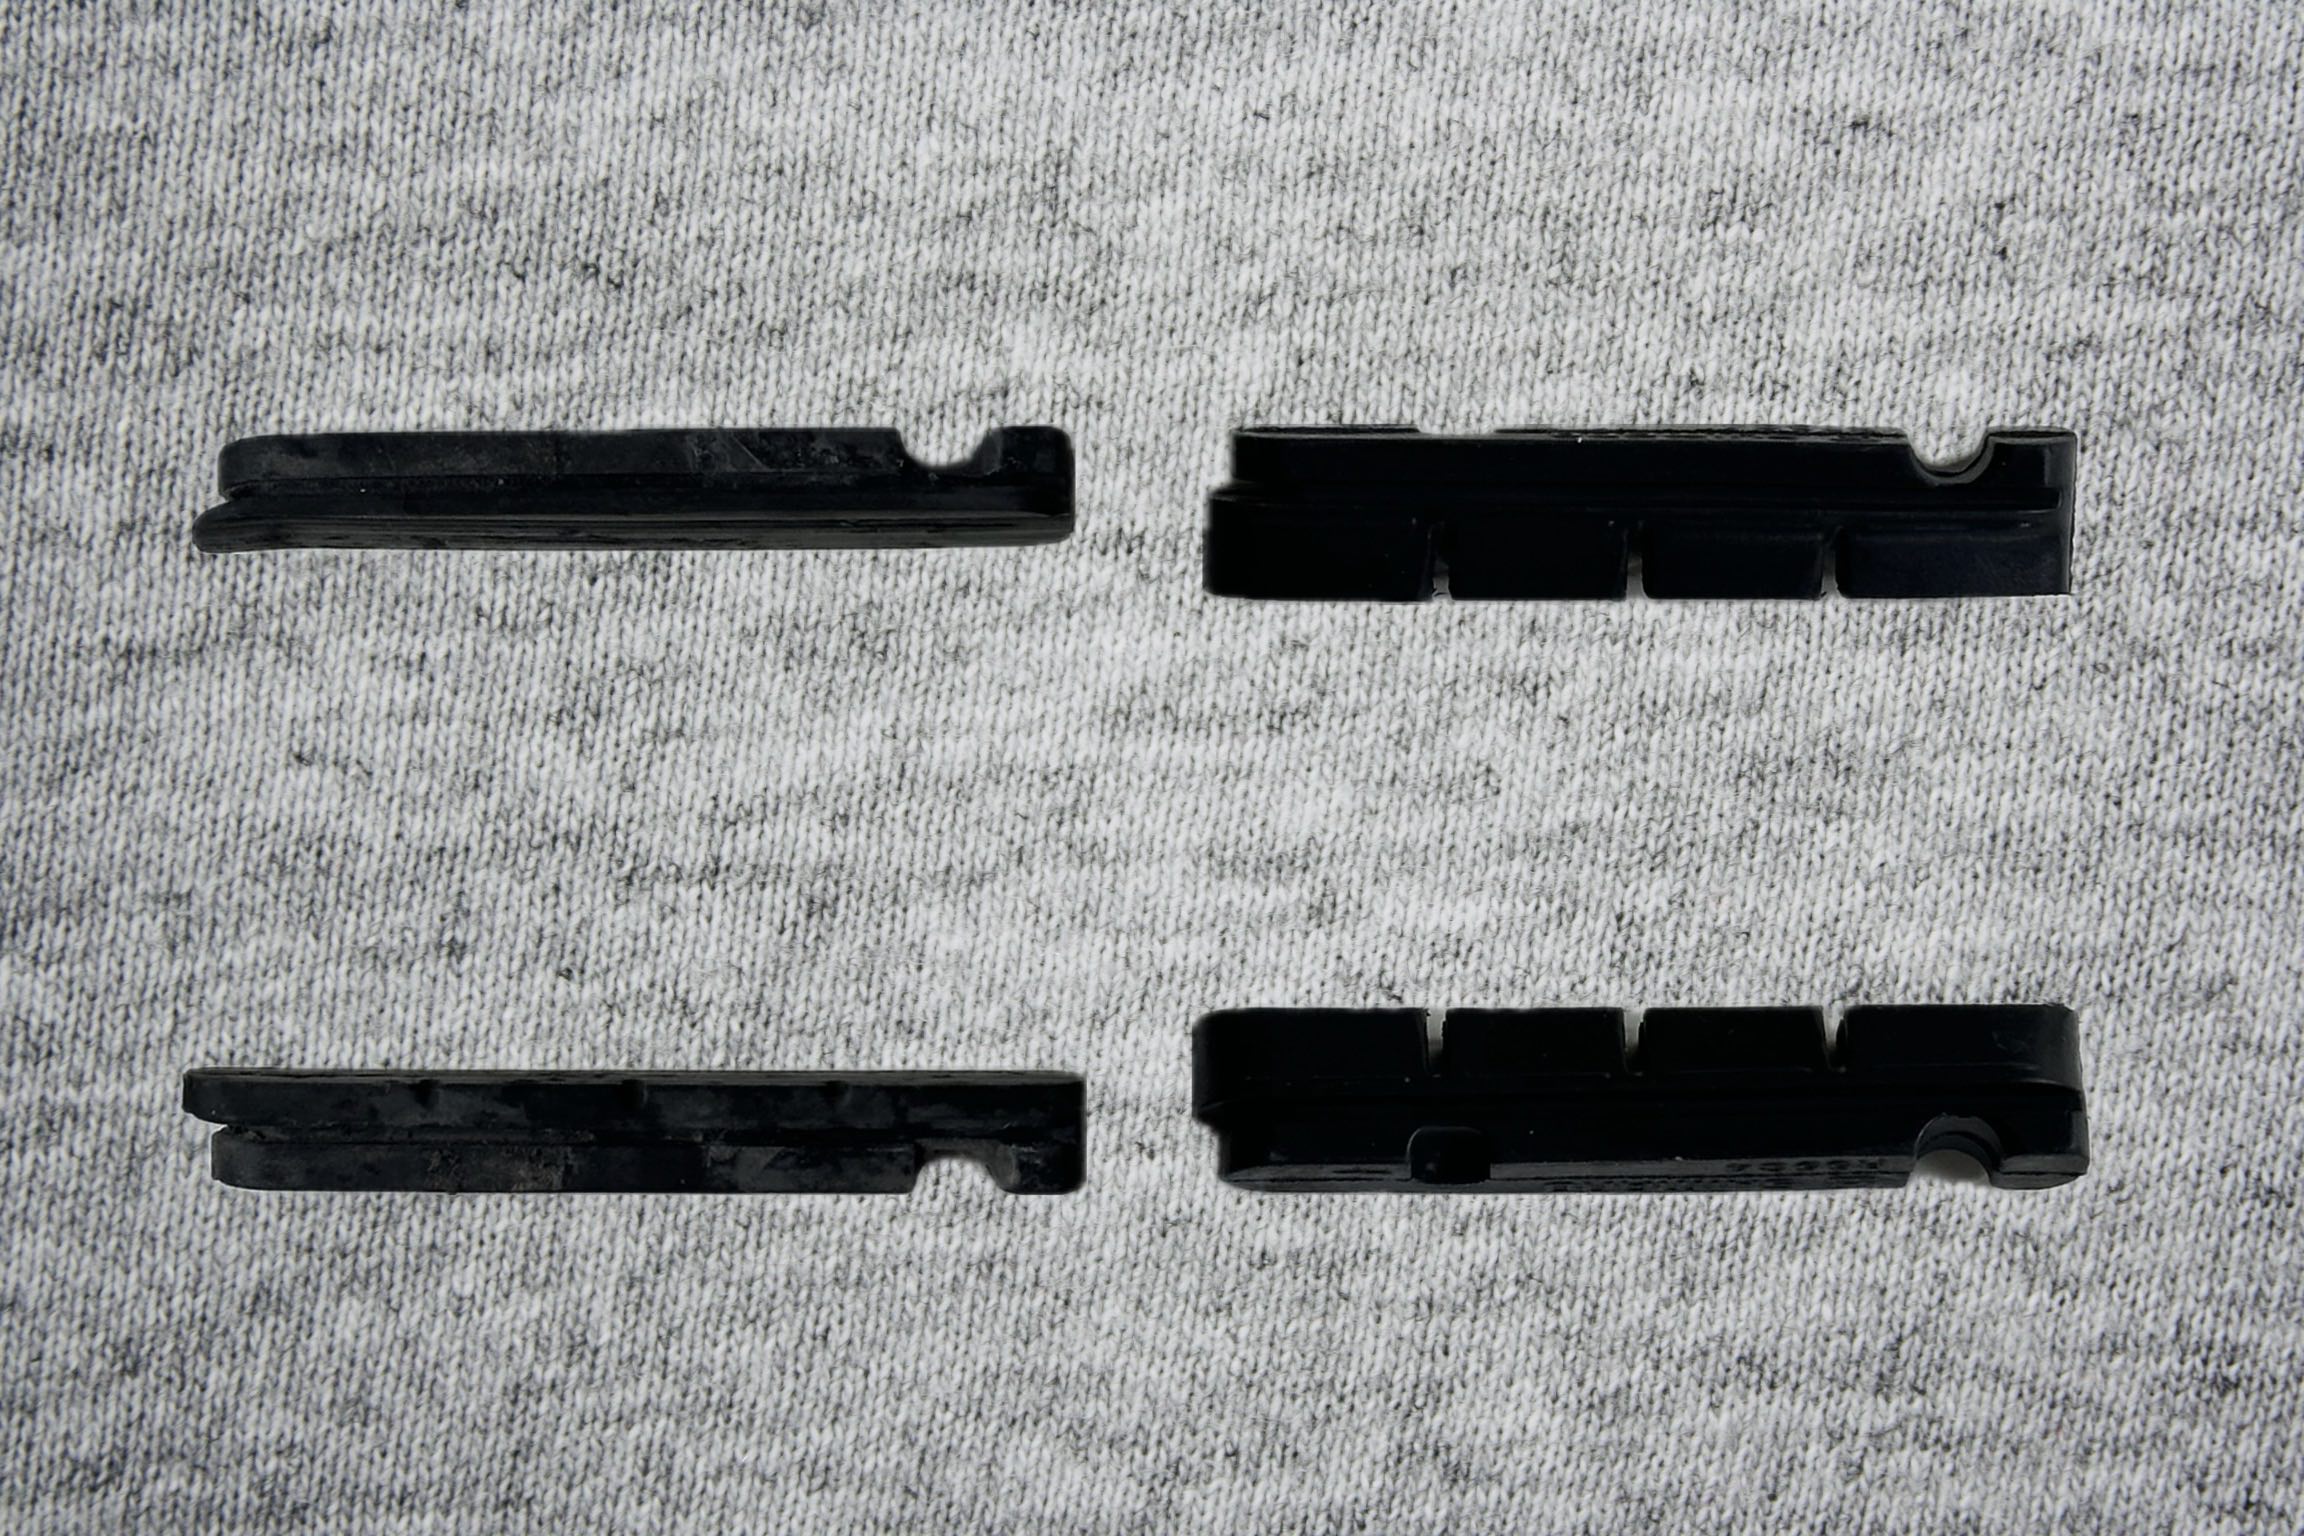
- Brake Shoe Replacement: I swapped the worn-out OEM brake pads for new ones from Shimano that were otherwise identical. While this change didn’t significantly enhance modularity or braking performance, it ensured that the brakes were in top condition.
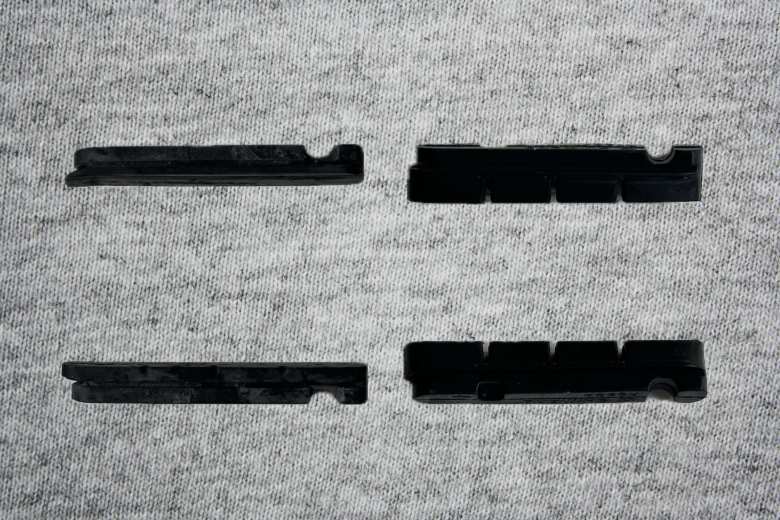
You can see how worn down my old Shimano brake pads (left) were compared to new ones (right). - Handlebars Replacement: The front handlebars showed extensive wear and scratches from multiple instances of shift and brake lever replacements. Given that scratches are stress risers that can result in sudden failure, it was a prudent decision to replace these 30-year-old aluminum handlebars.
- Threadlocker and Torque Wrench Application: To secure every component correctly, I used a torque wrench to adhere to recommended torque specifications. Additionally, I applied blue threadlocker to all thread surfaces to prevent them from loosening over time. During both cross-country bikepacking races I have done, screws vibrated loose and fell out, which is not exactly the safest thing to happen.
These enhancements were made to maintain the integrity and reliability of the bike.
Conclusion
Retromodding my classic road bike required many weeks of research and work, but was a multi-day labor of love, a project that encapsulated nostalgia, innovation, and practicality. It was also an entertaining engineering challenge that showcased that there’s no need to part with a trusty companion that has a rich history for a new one, particularly when it can be revitalized to harness the benefits of contemporary technologies.
In addition to the sentimental journey, this transformation proved to be a significantly more budget-friendly alternative compared to the astronomical price tags of modern bicycles. Achieving 95% of the performance at a fraction of the cost underscores the value of breathing new life into a cherished classic. The end result was a bike that retained its vintage, elegant, and distinctive appearance while taking advantage of new technologies and philosophies in cycling.
The popular GCN YouTube channel did a similar project. Its video entitled “Can An Upgraded $250 Bike Win An Elite Bike Race?” showcased the transformation of an older Giant aluminum race bike that was not only about preserving tradition but also about pushing limits. Just as in my endeavor, the presenter managed to trim his bike’s weight to below 8 kg despite having a budget of just £1,000 (about $1,250). He also incorporated an aero water bottle! Although he didn’t seize victory in the race, he finished right behind a rider on a £10,000 bike, proving that upgraded older bicycles can hold their own against the latest and greatest super bikes.
On top of the sentiment and performance gains, this project also served as a test bed for contemplated upgrades to my 2011-era “Super Bike,” currently residing in Spain. That bike, based on a Litespeed Archon C2 carbon-fiber aero frame, features 2×10 SRAM components with dreaded DoubleTap. Canny served as a good prototype for proving the viability of Shimano 1X, and I’m seriously considering converting the Litespeed as well in 2024.
Looking towards the future, I wonder what upgrade possibilities would be available then for my steed. Perhaps 13-speed drivetrains with hydraulic rim brakes? Surely there will be evolved versions of electronic doodads to consider like radar, “dashcams,” and power meters.
The cycling industry, much like Canny, continues to move forward, offering endless opportunities for exploration and evolution as we celebrate the enduring charm of classic bicycles. Canny’s 40th, 50th, and 60th anniversaries should be interesting.
There are 2 comments.
Amazing write-up! So detailed. I recently bought a used-steel Giodarna bike from a co-worker, with 10-speed Campy Veloce (drivetrain) and Shimano 105 (brakes) components. The bike feels so much smoother than my 28-year old Trek 5200. I'm still looking to restore the Trek one day, but I'm not rushing things. Congrats again on the upgrade. Canny looks great!
Congrats on the Giodarna, Adam! That's a good-looking bike! Is this your first time on steel and Campy? How do you like Ergopower?
In the naughts, I was running a hodgepodge of Campagnolo Chorus (Ergopower shifters), Athena (headset), Mirage (bottom bracket and front derailleur), Racing T (triple crankset), and Veloce (rear derailleur). I think I had something from every Campagnolo line except Record. On top of that, I was using Shimano RX100 brakes and a Shimano 9-speed cassette. Somehow, everything worked.
My next project will be restoring the classic Gitane I failed to sell in the last couple of years. It is steel like your Giodarna. I will use it on a Wahoo Kickr smart trainer that I bought a couple of months ago but have only used with the recumbent so far. A good thing about indoor cycling is it doesn't matter how heavy or un-aerodynamic the bike is. It will perform nearly the same as a modern super bike as long as it has adequate gearing.