Crafting a Custom Bicycle Carrier for My Audi TT Roadster

In my lifetime, I’ve owned seven cars, five of which were two-seat roadsters. For many years, I only had a single convertible sports car as my only four-wheeled vehicle while simultaneously being a bicycle enthusiast. However, I refused to let the diminutive size of these fun, sporty vehicles prevent me from carrying my bicycles around or use it as an excuse to buy, say, a truck.
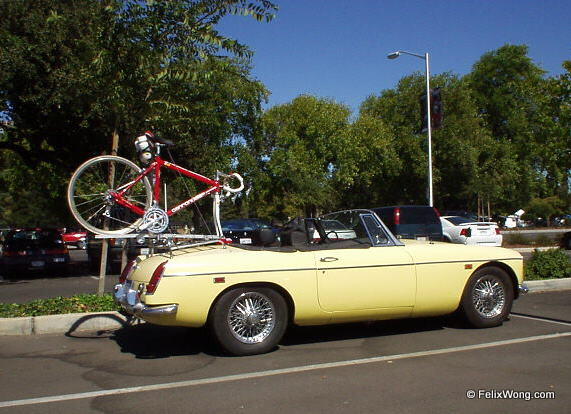
For instance, in college, I created a custom bike rack for my 1969 MGB roadster as a ME103 mechanical engineering project. Its unique, folding/sliding/clamping design is still something I have never seen elsewhere.
For my BMW Z3 and Alfa Romeo Spider, I used a Rhode Gear Shuttle bicycle carrier that attached with nylon straps to the rear trunk. My friend Melissa Mann generously gave me that.
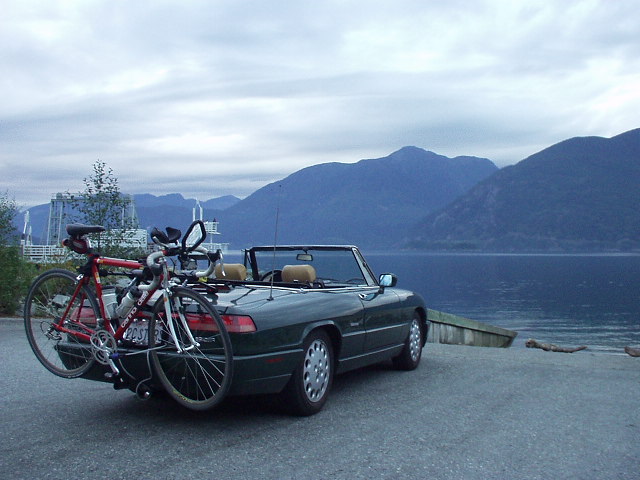
While it was a universal solution that could be used for almost any car, it did have the drawback of resting on the car bodywork, albeit on thick foam pads. These pads could slide a bit, abrading the car’s paint. Since the bicycle rested on the “arms” of this bicycle carrier (again on foam pads), the bicycle paint was abraded as well.
For the first 15 years of owning the Audi TT Roadster, I didn’t use it to carry a bicycle. Instead, on the rare occasion I needed to bring the bicycle somewhere, I rented a car. Or during the four years I also owned a Chrysler PT Cruiser, I used that instead. Now that I live in Spain and come back to the U.S. only occasionally and briefly, I wanted a more convenient solution.
I looked into off-the-shelf solutions. There were the aforementioned trunk-mounted-with-straps bicycle carriers that are super inexpensive. But I wasn’t a fan due to potential damage to both the car and bike. A better solution would have been getting a hitch installed and then purchasing a hitch-mounted bicycle rack. The hitches aren’t pretty, but at least they are relatively inconspicuous. However, they are expensive—about $500 just for the part and not including labor for installation. More problematic is that they seem to be no longer available for a first-generation Audi TT. Folks who insist on going this route would be advised to give U-Haul a call. There is also the additional expense of the hitch-mounted bicycle carrier ($150-$350), and they obscure the license plate and vehicle taillights.
So, I came up with my own solution. The idea was to attach the bicycle fork to a fork mount between the roll bars of the car, with the rear wheel resting on a suction-cup-mounted base on the trunk.
Creating the Fork Mount Base
Materials
- A piece of wood from Home Depot ($2)
- MBP fork mount ($17)
- Matte black spray paint ($7)
- 3X M6 screws (20-22 mm long), nuts and washers
- 6X black zip ties ($1 for a pack of 20 from Dollar Tree)
Steps
- Created a template out of paper to check the fit.
- Drilled the necessary holes.
- Spray painted the fork mount base matte black.
- Attached the fork mount to the base with screws and the base to the roll bar with six zip ties (3 on each end overlapping each other).
See photos at the bottom of this post for more detail.
Manufacturing the Rear Wheel Base
Materials
- 2-inch PVC pipe coupling from Home Depot ($2)
- SeaSucker Vacuum Mount suction cup ($68)
- Velcro ankle strap
- Screw (M6?)
Steps
- Cut the PVC pipe coupling in half. I only used one of the halves.
- Drilled a hole to attach the PVC pipe to the suction cup with a screw.
- Drilled slots for the velcro ankle strap to slide through to attach to the bicycle’s rear wheel.
Note: I used a 2″ pipe coupling in case I were to transport my mountain bike one day. The PVC base I created could accommodate tires up to two inches wide.
You can see the final product in the photos below.
Overall Assessment
The bike rack has proven to be very robust. I have already used it for two bike rides—the Poudre Canyon 300km Brevet and a 70-mile bike ride with my friends Becca and Kate—for more than 100 miles of driving, including most of those miles at highway speeds. The bicycle carrier I made was not too difficult to make and cost less than $100 total. It carries the bike in style.
Overall, I am very pleased with my creation, particularly because it looks good, sets up super quickly, does no damage to the bike or car, and was relatively inexpensive. But there are a couple of drawbacks to my bike carrier design.
The primary one is that I have to have the top down when transporting the bike. This is not as much of a negative as you might think, at least for short trips. If the weather is good enough to be biking outside, then usually it is plenty comfortable to be driving with the top down in a car with a heater, heated seats, and pretty good wind buffeting with the side windows and rear wind deflector up.
A secondary drawback is that I have to remember to stash the front wheel of the bicycle in the rear trunk (and anything else I want in the trunk) before mounting the bicycle to the car. This is because I cannot open the trunk when the bicycle is mounted. So far, this has not proven to be a major inconvenience.
I thought a third drawback might be reduced fuel economy due to increased aerodynamic drag. But I have noticed no reduction in fuel economy while driving with the top down and carrying the bicycle, versus driving with the top up and no bicycle, even at 80 MPH.
While the bike carrier I made will only fit a first-generation Audi TT, its design can be adapted to other roadsters with roll bars or some sort of rear attachment point for the fork mount. These cars could include the BMW Z4, FIAT 124 Spider, Mazda Miata, Porsche Boxster, among others.
Video Demonstration
Here is a very short video of my bike carrier in action.
Who needs a truck?


