Solved: Microsoft Band 2 and Strava Syncing Issues
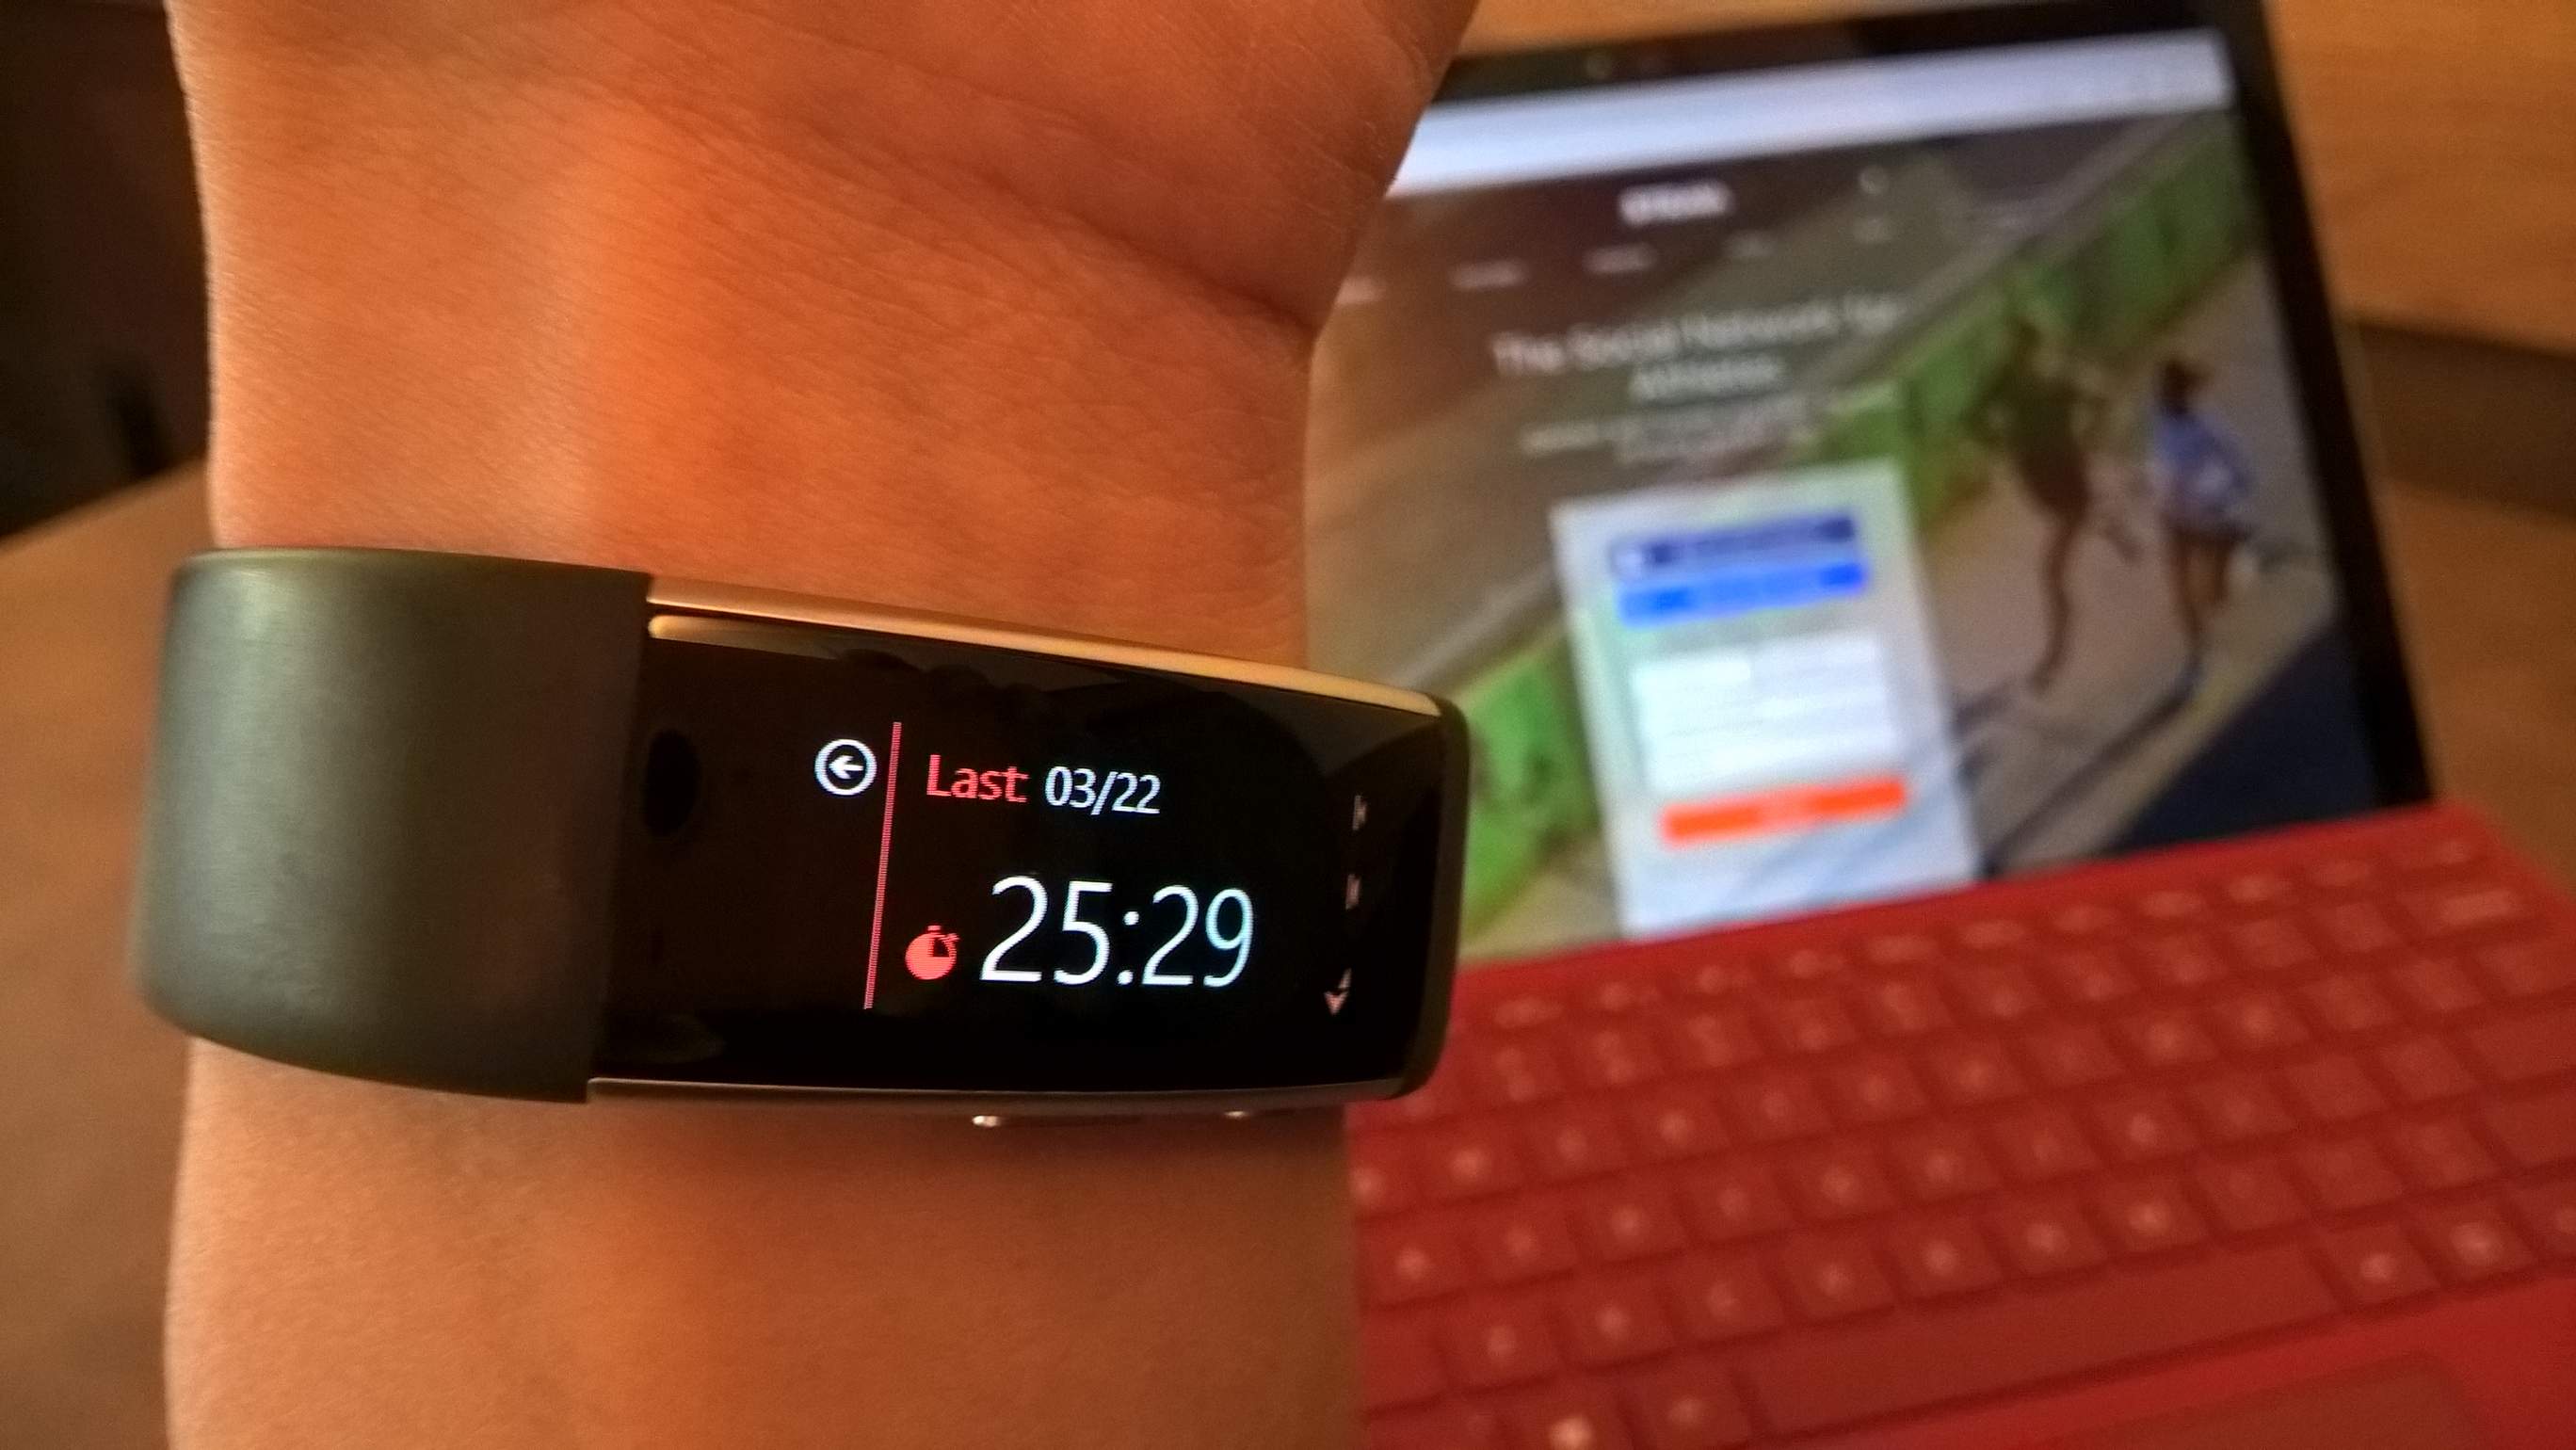
I’ve been using the Microsoft Band 2 for five months now and continue to be very fond of this device. It has been a great “smart band”—or hybrid between a fitness band and a full-blown smart watch—one that looks great, is easy to use, and has decent battery life. I love the text and call notifications, the sports and built-in GPS tracking, that I can keep it fully charged by simply putting it on the charger for 20-40 minutes each morning (usually during a shower and breakfast) and that it is comfortable enough to wear full time. I especially love how it synchronizes with Microsoft Health, MyFitnessPal, and Strava (and more fitness apps) automatically with no effort on my part.
Every couple months, however, the Microsoft Band 2 does not successfully synchronize with Strava. I also experienced this with the original Band and am not sure why it happens, but upon researching the issue have discovered that I am far from the only one to experience this issue. Some users say that once in a while it takes up to 24 hours after the Band has synchronized with Microsoft Health for the data to show up in Strava. (This happened to me once.) A couple times the data did not show up at all in Strava even though it did in Microsoft Health.
Below is what you can do if your Microsoft Band does not sync with Strava.
Solution
- If the activity is not that important, you can do nothing and just wait for a day or two and see if the data eventually shows up in Strava. However, if you are reading this webpage you probably don’t want to wait that long.
- Open up the Microsoft Health app on your smartphone. At least on Windows phone, after doing so the app syncs with the Microsoft Band. There will be a synchronizing progress bar at the very top of the app. Make sure it completes.
- Make sure that your data is now showing in Microsoft Health. In my experience, there are never any problems with the Microsoft Health app on the phone syncing with the Band as long as the Bluetooth connection is good. (If Microsoft Health cannot sync with the Band, try restarting your phone and repeating Step 2 above.) Note: if your data is not showing up in Microsoft Health, that’s a problem you need to resolve before the data can show up in Strava. Strava actually syncs with Microsoft Health and not directly from the Band.
- Check again to see if your data shows up in Strava. Most of the time, it shows up in Strava immediately after Microsoft Health has successfully sync’d with the Microsoft Band.
- If data is still not in Strava after waiting a reasonable amount of time (e.g., 5-10 minutes), reset (disconnect and re-connect) the connection between Microsoft Health and Strava. You can do this by logging into your your Microsoft Health Dashboard online and clicking on Connected Apps in the left sidebar, or using the Microsoft Health app on your smartphone and clicking on Apps. Then go to the section for Strava, and then press Disconnect and Connect (you may have to enter credentials for the latter). This should solve syncing problems for your next activities (e.g., run or bike ride), but won’t solve it for previous activities. To get previous activities into Strava, you will need to export GPS data from Microsoft Health and import it into Strava.
How to Export GPS data from Microsoft Health
Revised June 1, 2016
With a May 2016 update, Microsoft now allows you to export GPS data from the Microsoft Health web site. (Previously it could only be done with an app like the third-party XportBand app.) Procedure:
- Visit the Microsoft Health website.
- Click on Sign in to Your Dashboard and sign in with your Microsoft account credentials if necessary.
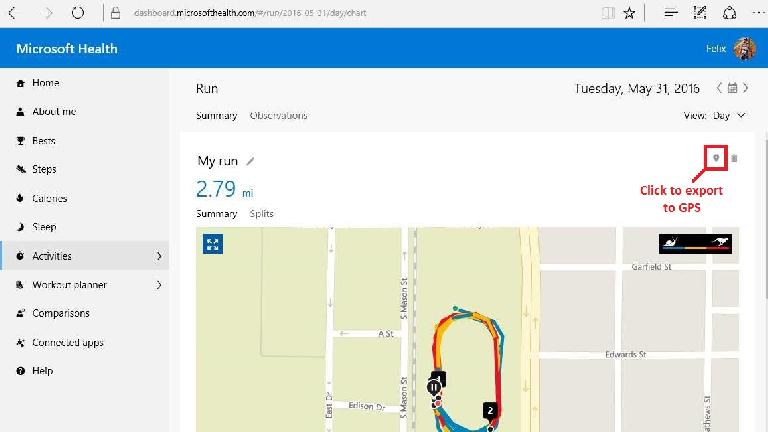
- Find and click on the activity you want to export data from. Once on that page, in the upper right hand corner click on the location icon to export GPX data.

Export to GPS icon on Microsoft Health activity screen - You are given the option for exporting to GPX or TCX format. I suggest TCX format for Strava.
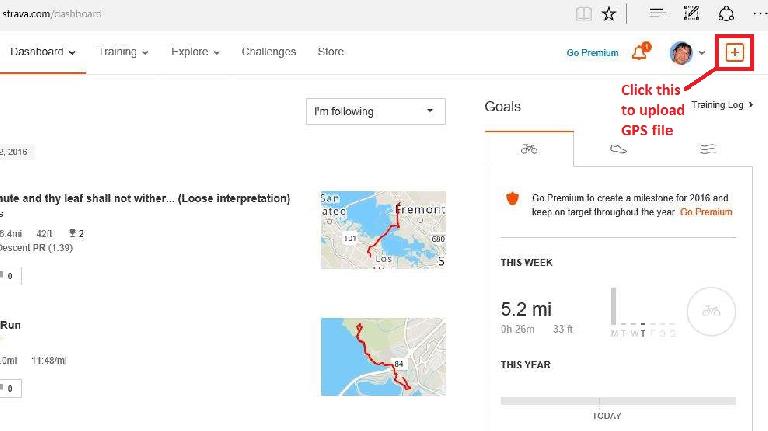
- Import the exported file into Strava by visiting strava.com in your web browser, logging in, and then clicking the + sign on the upper right hand corner. Select Upload activity in the dropdown menu, File on the next page, and then select your exported file.

How to upload GPS files to Strava: click the + sign in the upper right hand corner in the dashboard of the strava.com website.
