How to Write in Chinese in Microsoft Windows
My dad asked me how to write Chinese in Windows 10 and to my chagrin as a Microsoft fanboy, I did not know. I searched the web and YouTube, and while I eventually figured out what to do I surprisingly did not encounter one short and simple tutorial on doing so. Hence, this quick article and video.
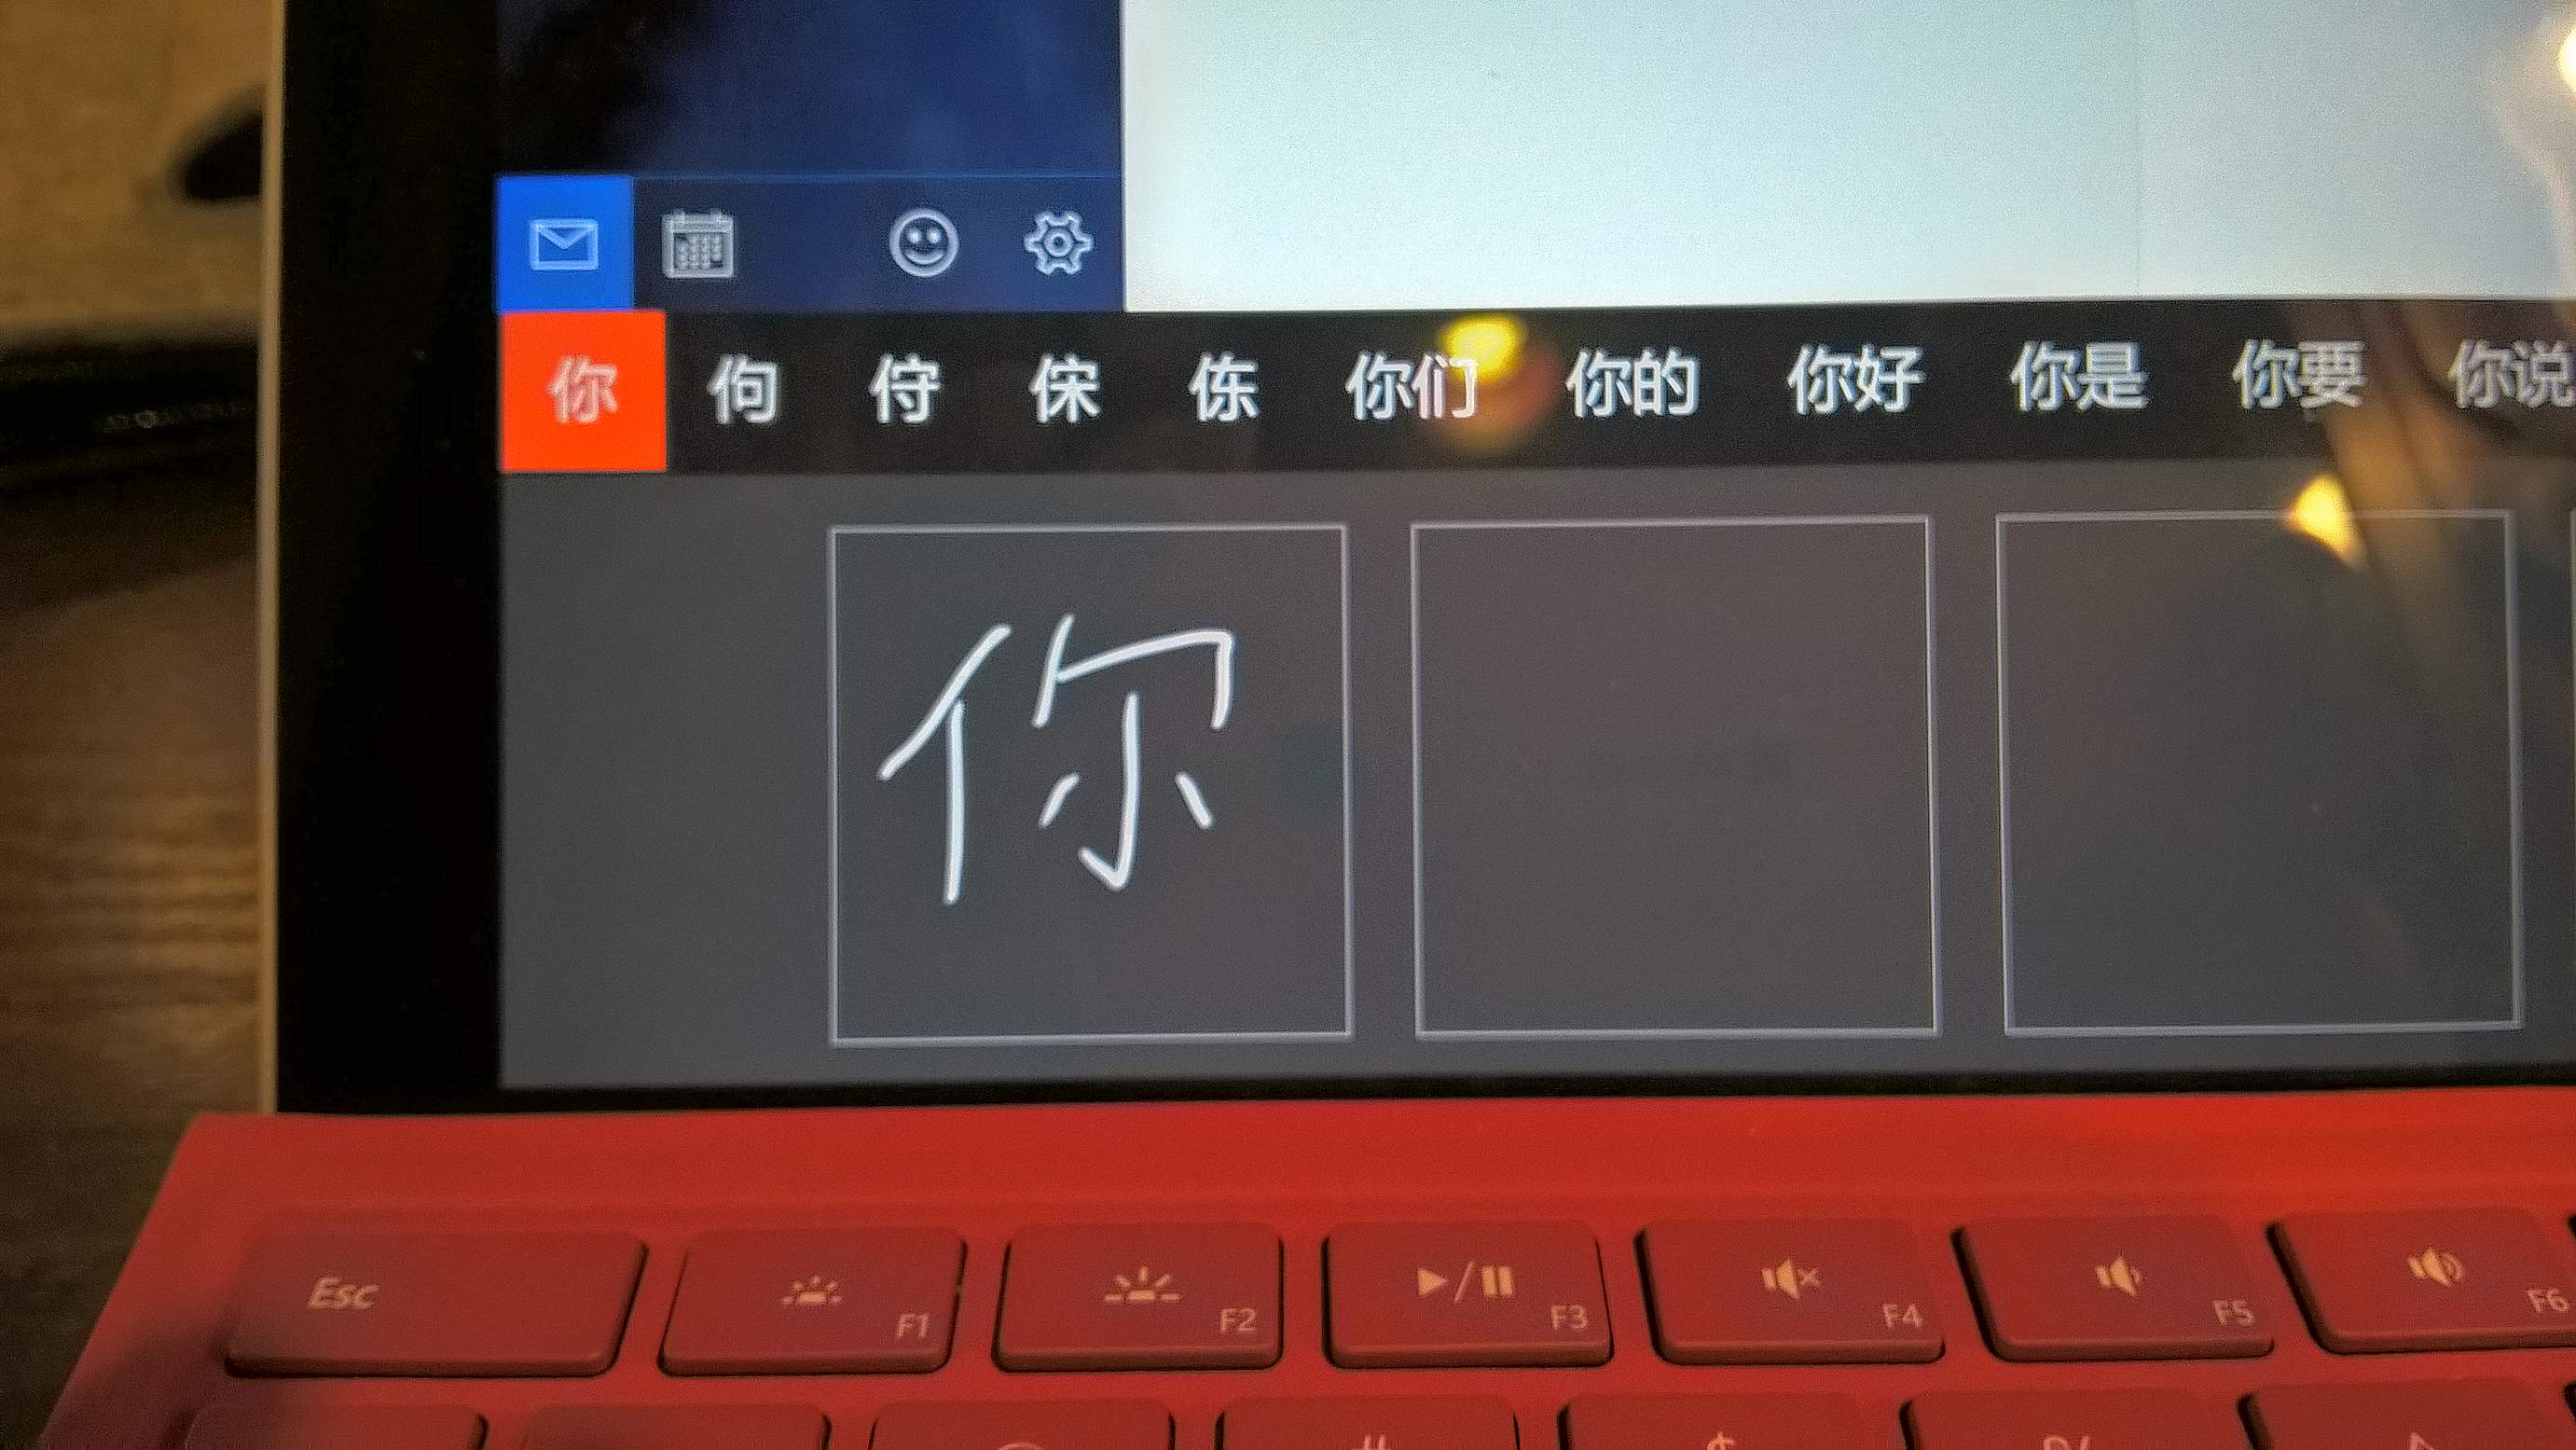
As it turns out, writing Chinese in Windows 10 is exceedingly easy! Ignore the articles that say you need to download third-party software or buy some sort of specialized writing pad, or talk about IME (“Input Method Editor”)—whatever that is. If you have a Windows tablet or 2-in-1 like the Microsoft Surface, you can easily write Chinese using a stylus or finger and Windows will automatically convert your handwriting to typeface. Or, if you don’t have a touch screen, you can type in Pinyin instead.
Overview of the Procedure
- Add Chinese language to your device
- Either (a) click on the virtual keyboard in the taskbar, select Chinese and select the handwriting icon, then start writing Chinese with a stylus, or (b) select Chinese in the taskbar, start typing in Pinyin, and select from a list of Chinese character that could correspond to that Pinyin.
Here is a video of the above.
I actually prefer Option 2b (typing in Pinyin) above since I know how to write very few Chinese words, but know how to say some and can sort of recognize the most basic ones.
Some older, native Chinese people probably prefer writing with a stylus or finger. But the younger generation most often use the Pinyin input method because it is much quicker!

There are 9 comments.
Thanks Felix for the video, my dad asked me the same question. Gifted him a surface and he gave it back to me unable to understand how to use. Want to transition him and your video will go along way!!
Hi Karin. That's funny; I had originally created the video for my dad too! Hope it helps your dad.
Thanks for stopping by my blog and for your comment!
You rock!
if i dnt know PinYing, and don't have Windows tablet or 2-in-1 like the Microsoft Surface, I only have a rugular laptop, no touch screen. can i still use Wrting Pad build in laptop?
Do i need to download the Appl or change key broad to do Chinese Hand Writing?
Thanks for stopping by my blog and for your comment!
Regarding your question, without a touchscreen, it still is possible to use the drawing method that I showed in the video. But you would have to draw the character with your mouse or built-in touchpad instead of using your finger or stylus. As you can imagine, that would be a lot more awkward.
That would probably work fine if you were infrequently entering Chinese characters.
Another method I have used that is imperfect is to type English into Google Translate, find the Chinese characters I want, and copy and paste. Depending on what you are trying to do, that might be adequate also.
If you do a lot of writing of Chinese, however, I would highly recommend getting a laptop with a touchscreen and a stylus. Most Windows laptops have a touchscreen nowadays.
Q: The problems are new and centered on its mistaking the initial radical as a word before an handwritten input is even completed.
I've experienced the same problem you had, with Windows mistaking the initial radical as a separate word. I could avoid it by writing the radicals closer together. Also, writing quicker seemed to help too.
But there are not many Chinese words I can write freehand. I rely entirely on the Pinyin input method!
Since I upgraded to Win 10 Pro, none of my Widows devises allow Traditional characters using pinyin. Been stuck with simplified characters.
Even worse, my separate pen pad, I was using with my desktop to learn to write, no longer worked
On my wife's new Win11 laptop being older, unless a tab or fold over laptop, will cause ergonomic shoulder damage. That's why I discouraged her from buying a touch screen laptop. Using Apple & Google tablets & phones, she puts them flat on table writing entire character.
For a Win 11 laptop, would make sense to use stylus on built in laptop mouse area, using wireless mouse
What would be great for a desktop, is a cheap Android tablet, being a wireless pen pad Mouse
Win 11 supporting Android, allows use of the best possible bilingual program HAN IZ, by Embere
Thanks for your comment and your tips!
I agree that touchscreen laptops are not ergonomic to write on unless it is a convertible 2-in-one.
I have since moved on to an iPad Pro for all my "computer" needs.